
How-to use autofill columns in Microsoft Syntex

Today, I want to talk to you about a feature that’s going to save you tons of time and hassle: Autofill Columns in Microsoft Syntex.
To be honest, I’m pretty excited about this one. Why? Because it’s like having a super-smart assistant that reads your documents and fills out metadata for you. Cool, right?
What Are Autofill Columns?
Autofill columns are this nice feature in Syntex that uses AI to automatically extract, summarize, or generate content from files you upload to your SharePoint document library.
Here’s how it works: you ask a question (prompt) about a document in plain English (or any other supported language like German), and the system saves the answer directly to a specific column in your library. You can even set up multiple questions for each file, with each answer going to its own column.
Setting Up Syntex pay-as-you-go in your Microsoft 365 Admin Center
If you’re an admin and want to set this up across your organization:
-
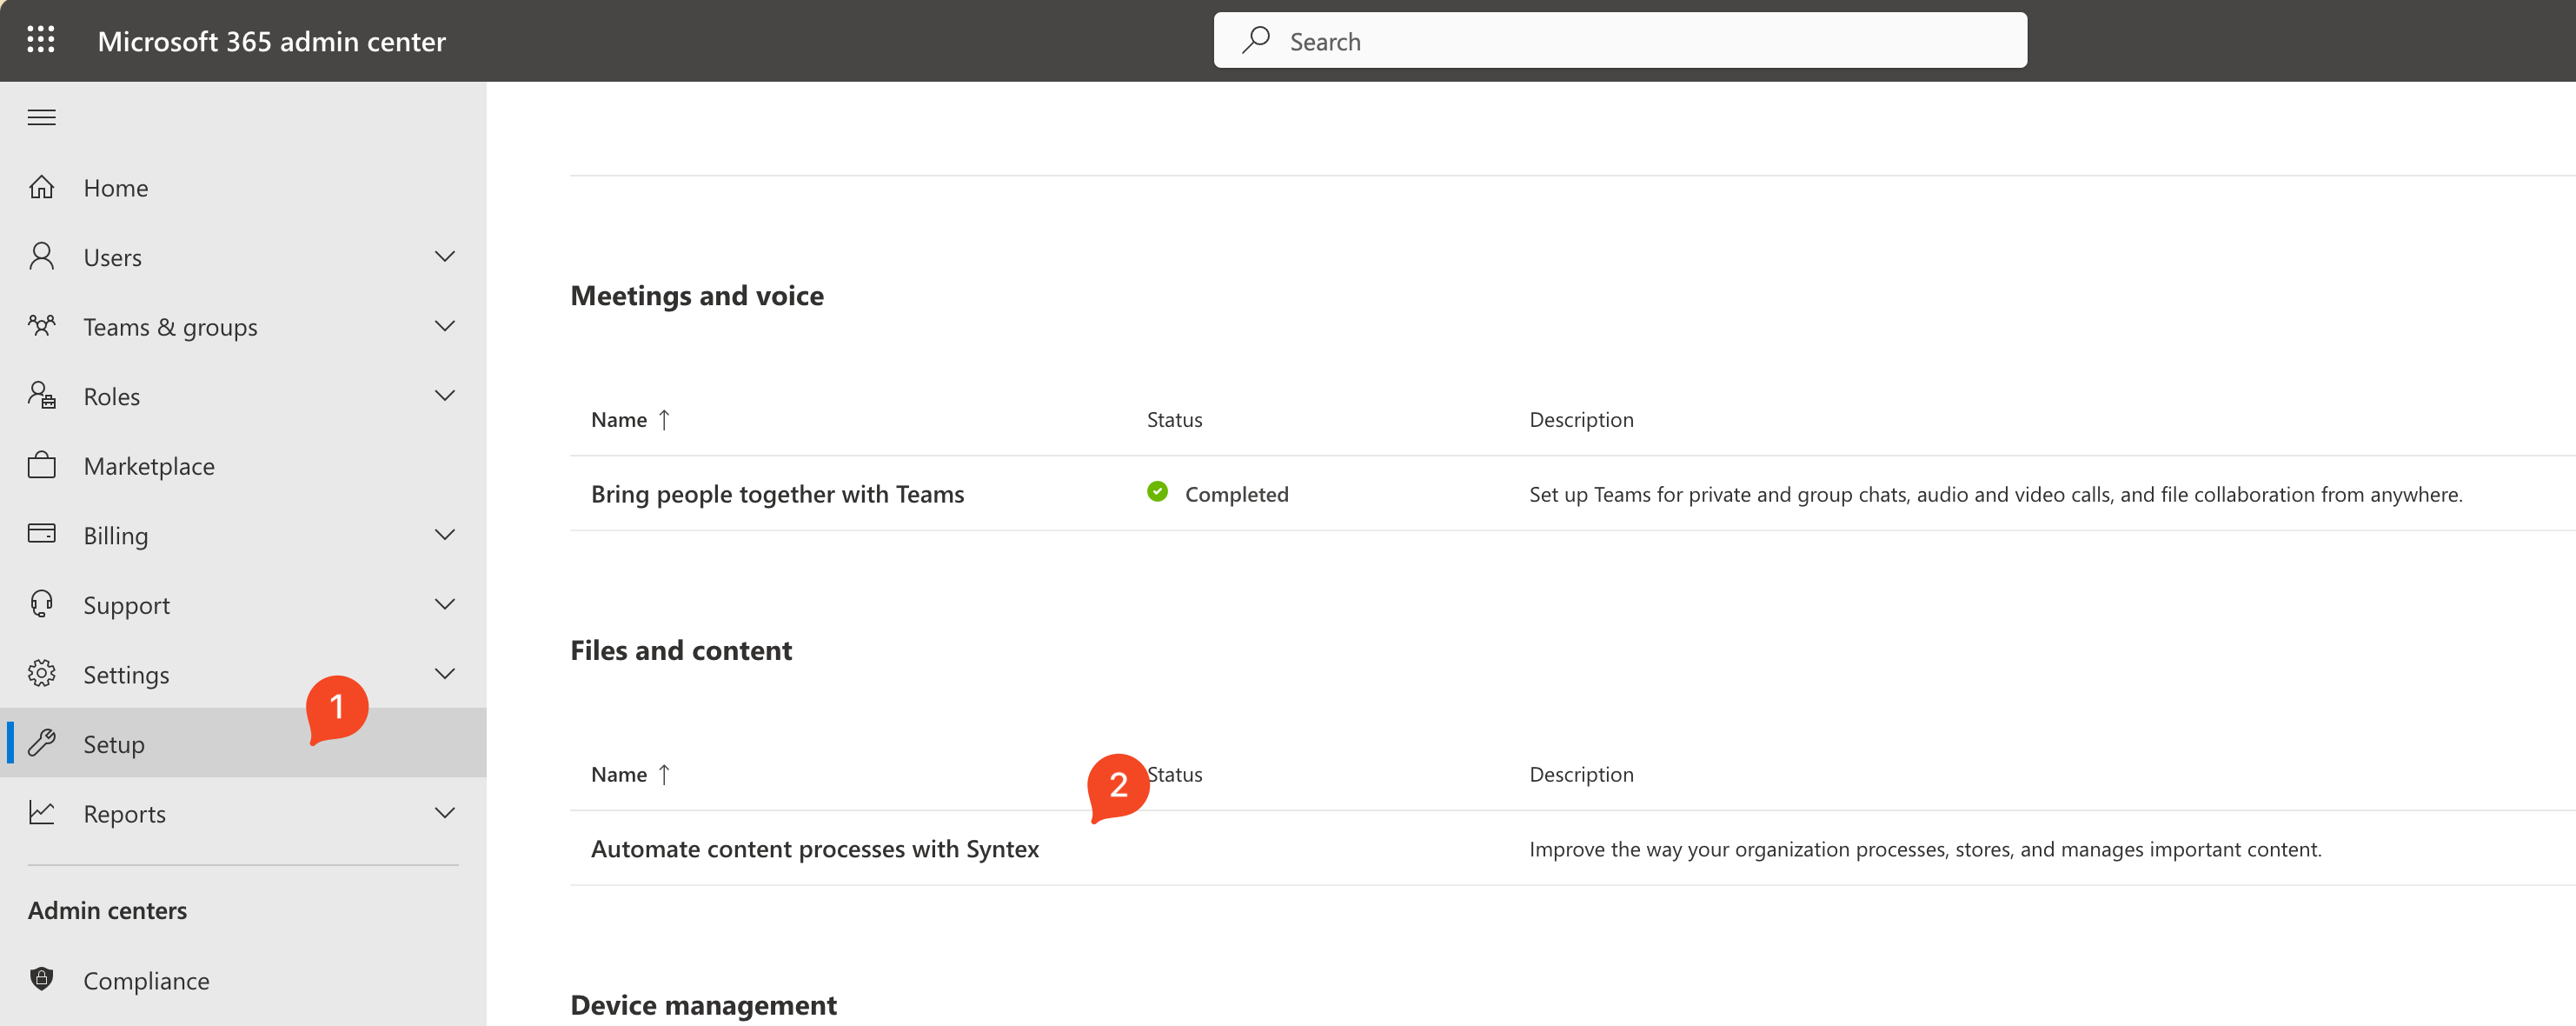
Access the Admin Center: Log into the Microsoft 365 admin center and navigate to Setup > Files and content > Automate content processes with Syntex.
-
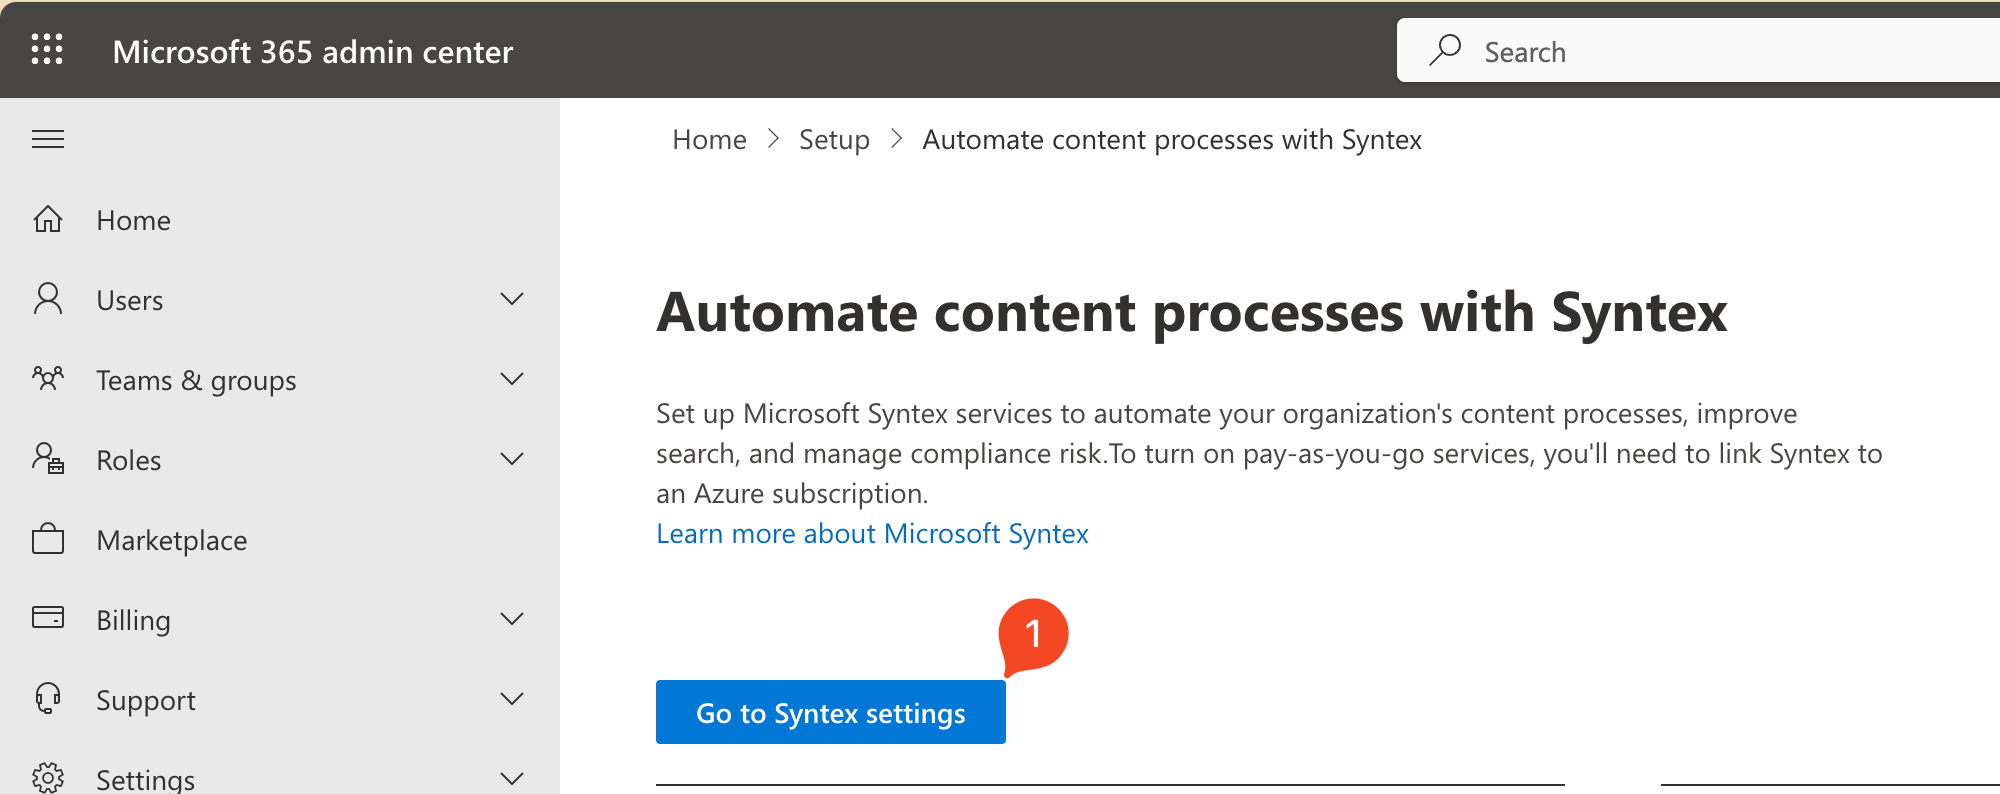
Manage Microsoft Syntex: Look for the Go to Syntex settings option and click on it.
-
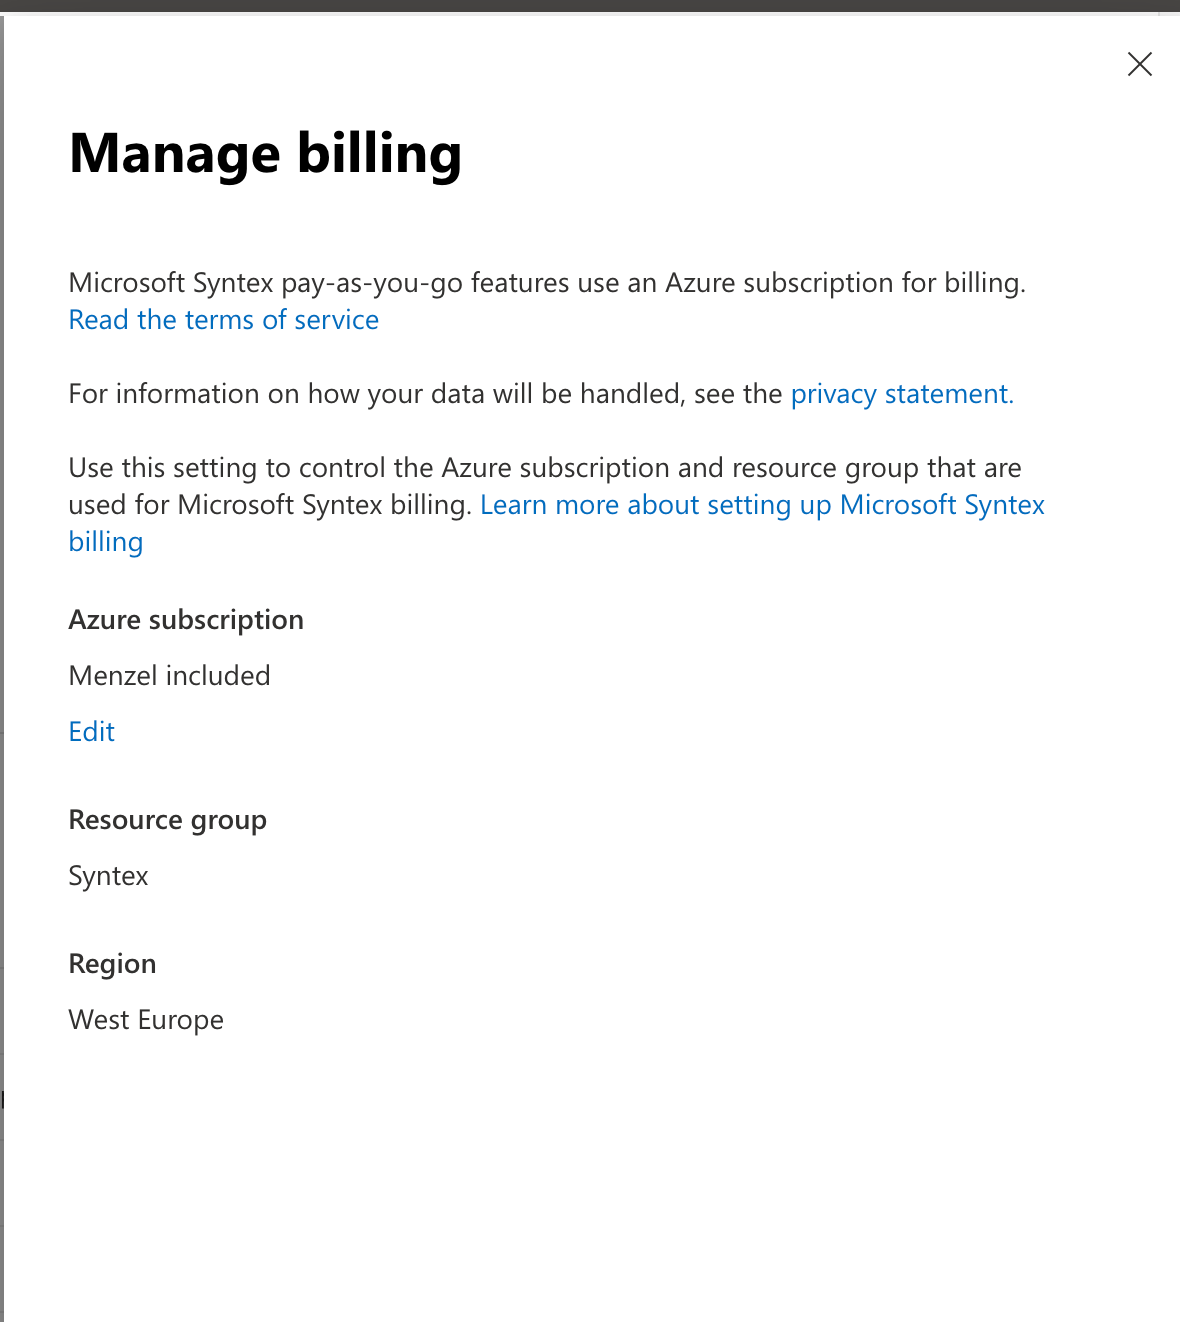
Set Up Azure billing: You’ll need to set up Azure billing to use Syntex. If you haven’t already done this, follow Manage pay-as-you-go billing. There you have to fill in an azure subscription, a resource group, and a region. This is where the costs for the AI processing will be billed.
-
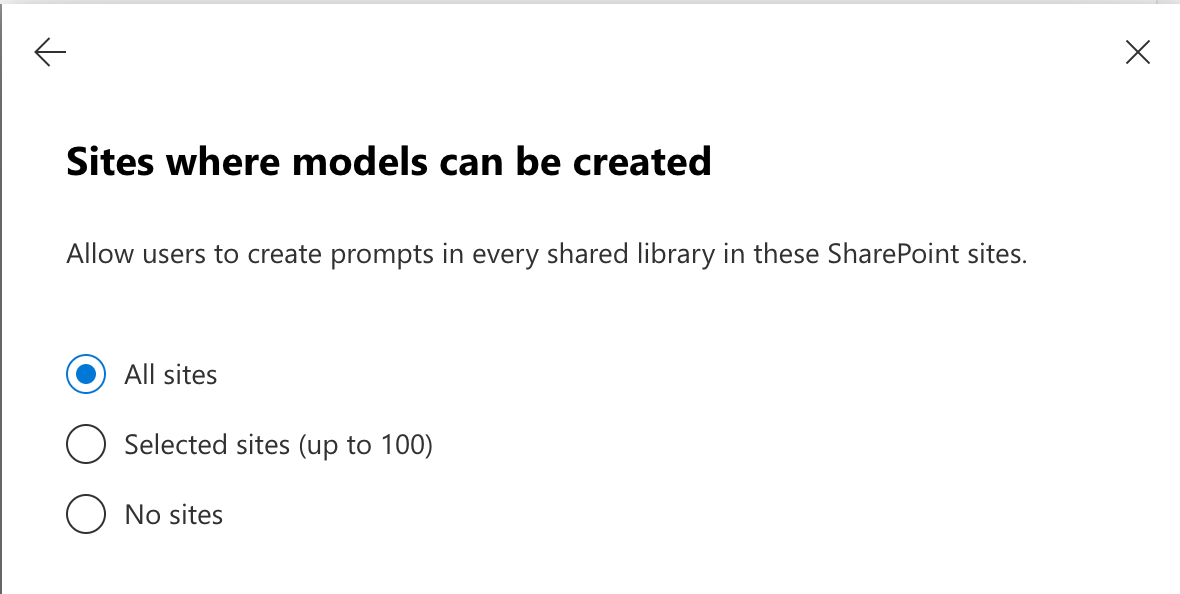
Enable Autofill Columns: Choose Autofill columns from the Documents & images Tab in the list of Syntex services and configure your options.
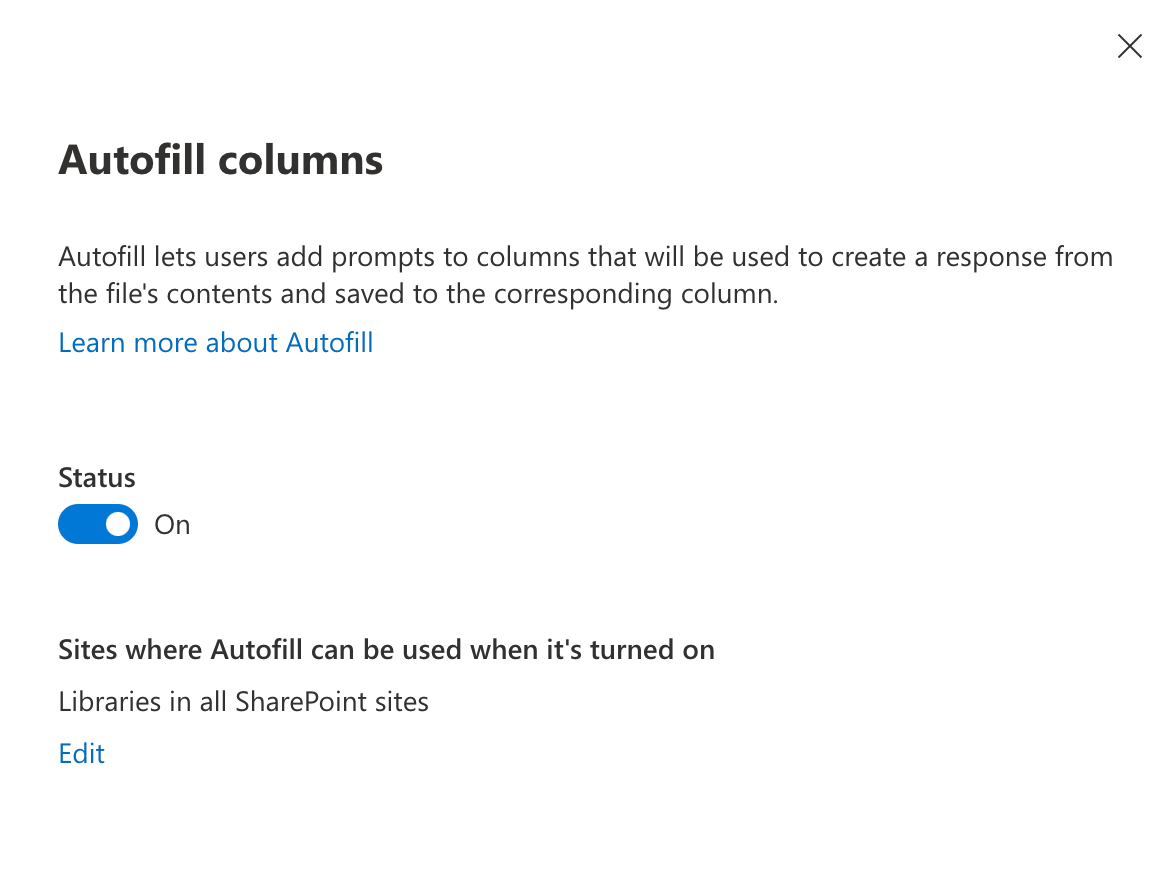
To decide for which SharePoint SiteCollections the Autofill Columns should be enabled, you have to select them in the menu. You can either enable it for all SiteCollections or only for specific ones (up to 100)
-
Save Your Settings: Once you’re happy with your choices, hit save.
The Nitty-Gritty of Billing
Now, let’s talk money. Microsoft Syntex offers flexible billing options:
-
Pay-As-You-Go: You’re billed based on the number of pages processed. Each page counts as one transaction, and it’ll cost you $0.05 per transaction. As stated above, you only pay once per document, even if you have multiple autofill columns.
-
Per-User Licensing: This gives you a more predictable monthly cost per user.
For most of us, the pay-as-you-go option is probably the way to go, especially if your usage varies month to month.
Setting Up Autofill Columns
Now, let’s get into the nitty-gritty of how you can set up autofill columns in Microsoft Syntex:
-
Navigate to Your SharePoint Library: Open up the library where you want to add the autofill column.
-
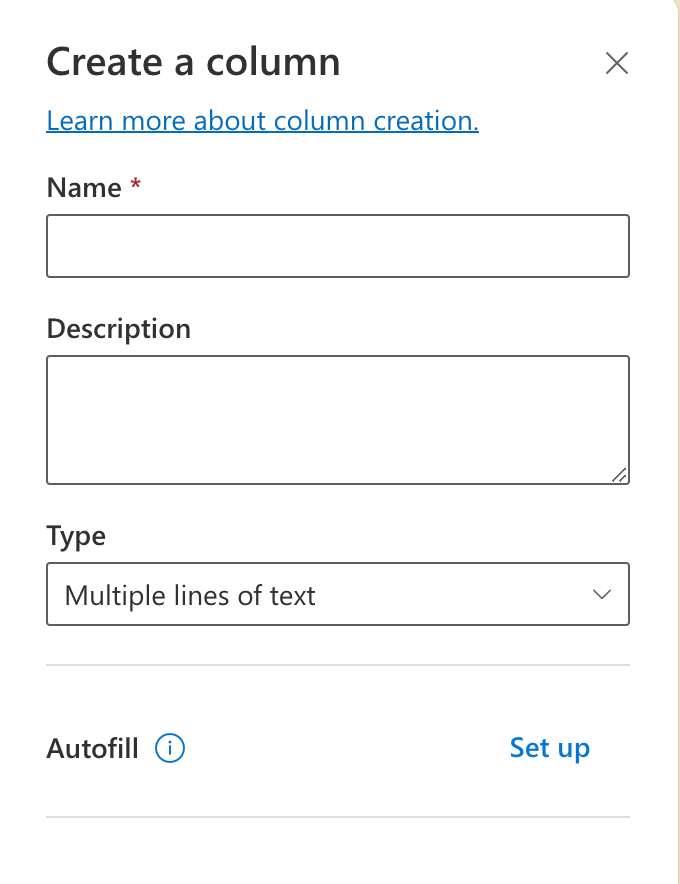
Add a New Column: Click on that +Add Column button and choose the type of column you want.
-
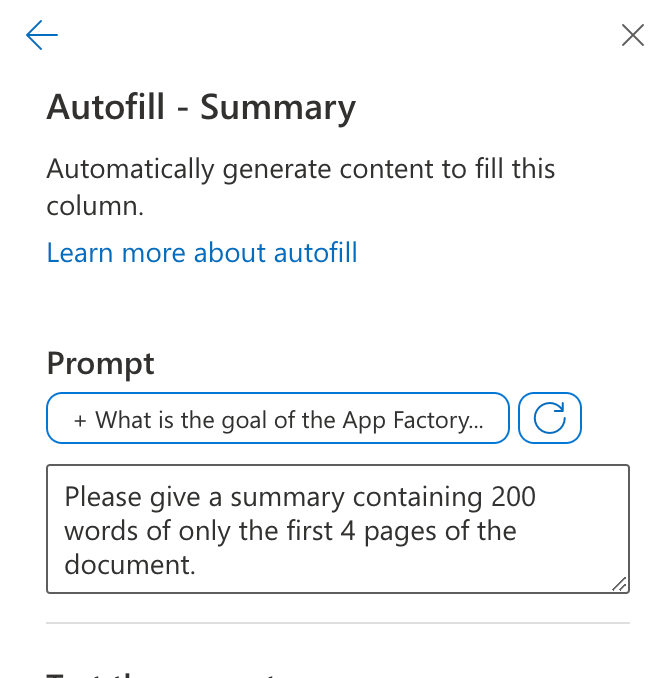
Configure the Autofill Settings: Once you’ve added the column, go to the column settings and click the Autofill link. This is where you’ll define your prompt - the question you want the AI to answer about each document.
-
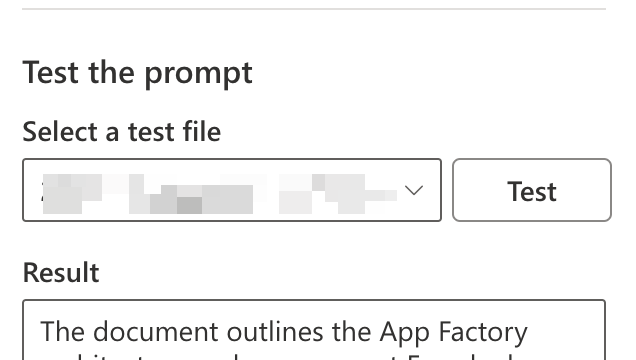
Test Your Prompt: Before you save, you can test your prompt to see if it’s working as expected. Just upload a sample document and see if the AI fills in the column correctly. Testing is not adding any costs to your bill.
-
Save Your Settings: After you’ve set up your prompt, hit save. From now on, this column will automatically populate based on what the AI finds in your documents.
Real-World Examples
Let’s look at a couple of ways you might use this in the real world:
Example 1: Invoice Processing
Imagine you’ve got a SharePoint library full of invoices. You could set up autofill columns to automatically extract:
- Invoice number
- Total amount
- Due date
Now, every time you upload a new invoice, these fields will automatically populate. No more manual data entry!
Example 2: Contract Summarization
If you’re dealing with a lot of contracts, you could set up an autofill column to generate a summary of key terms. Upload a contract, and boom - you’ve got an AI-generated summary ready to go.
Wrapping Up
Autofill columns in Microsoft Syntex are a powerful tool for automating document management. By setting these up, you can:
- Streamline your document processes
- Reduce manual data entry (and the errors that come with it)
- Improve the searchability and organization of your SharePoint libraries
Plus, with the flexible billing options, you can choose what works best for your organization’s needs and / or budget.
So, why not give autofill columns a try in your SharePoint libraries? I bet you’ll be amazed at how much time and effort you can save.
Until next time, happy automating!
Further Reading
Published on:
Learn moreWe can help you with How-to use autofill columns in Microsoft Syntex
If you want help implementing, troubleshooting, or improving this product, contact us and we’ll point you in the right direction.

Related posts
Creating Copilot Studio Agents Without an M365 Copilot Premium License
A common assumption when getting started with Copilot Studio is that you need a full Microsoft 365 Copilot Premium license. That assumption is...
Power Automate: Get events (V4) shared mailbox fix
When your flow reads a shared mailbox calendar using the Office 365 Outlook → Get events (V4) connector, it can fail in a way that looks like...
Using Managed Identity with Azure Automation & PnP.PowerShell
How to Set Up a Managed Identity for Azure Automation Runbooks and Use It in PowerShell Scripts with PnP.PowerShell This guide walks you throu...
UPDATED - Set Up Pay-as-you-go M365 Chat & SharePoint Agents
Introduction to Pay-as-You-Go Agents in Microsoft 365 Microsoft has introduced a flexible way for organizations to leverage AI capabilities wi...
How to Use Flexible Sections in SharePoint Pages and News
If you’ve been using SharePoint Online to build pages or share news, you know how important it is to have a layout that works for your c...
What's New in SharePoint Pages
1. New Carousel Layout in the Hero Web Part The Hero Web Part has always been a fundamental element of SharePoint pages. The new Carousel Layo...
Power Platform Solutions Made Simple
Introduction to Power Platform Solutions Power Platform Solutions offer many benefits, especially when moving from standalone flows and apps t...
Use your Bluesky post for comments on your Hugo Blog
Since Bluesky is getting really popular by people I interact with, I decided to switch my blog comments to Bluesky posts. In this blog post, I...
Exploring SharePoint Online's SiteAssets Library
The SiteAssets library in SharePoint Online often seems like a mystery to a lot of users I talk to, but it’s important to understand it ...
Step-by-Step Guide to Copy Pages between SharePoint Online
Unfortunately you can’t copy pages in SharePoint through the UI. But sometimes you may need to copy pages and their associated SiteAsset...