
Use your Bluesky post for comments on your Hugo Blog

Since Bluesky is getting really popular by people I interact with, I decided to switch my blog comments to Bluesky posts.
In this blog post, I will explain how I set up my blog comments using Bluesky posts and how you can do the same.
This involves several steps, including setting up the necessary HTML file(s), integrating everything, and styling the comments.
Fornuately I didn’t had to start from scratch, as I had previouusly used the solution from Carl Schwan. Please check out his solution if you prefer to do your comments with Mastodon Adding comments to your static blog with Mastodon
Step 1: Creating the HTML File
First, you need to create a partial template that will be included in your article layout.
Create a new file named comments.html in the components directory:
|
|
Here’s how it works, step by step:
-
Initial Setup
When the web page loads, the script immediately starts preparing to fetch comments after checking if the id in the comments section in Front Matter is set.
It shows a “Loading comments…” message while it’s working behind the scenes. -
Fetching Comments
The script makes a request to Bluesky’s public API to retrieve comments for a specific post. This is done using a fetch request to a special Bluesky URL that includes: -
The Bluesky account identifier
The specific post’s unique ID
A request to retrieve up to 10 levels of comment threads (replies to replies) -
Processing Comments
Once the comments are retrieved, the script does several smart things: Sorts the comments by their creation date (oldest to newest) Clears the initial “loading” text Prepares to render each comment with its details -
Comment Rendering
For each comment, the script creates a structured view that includes:- The author’s avatar (profile picture)
- Author’s display name (clickable to show the profil) and handle (username)
- The actual text of the comment
- The timestamp when the comment was created
- Meta information like the number of replies, reposts, and likes
Link Handling & Rich Text Processing
Instead of just treating comment text as plain words, the script understands the “meaning” behind parts of the text:
- Links Become Clickable: If someone pastes a web address, it automatically becomes a link you can click
- User Mentions Get Special Treatment: When someone mentions another user (like @username), that becomes a link to their profile
Complex Text Parsing: The script carefully goes through the text, replacing specific parts with enriched, interactive versions
Here’s a simple example of how it works:
|
|
Step 2: Including the Comment Section in Articles
Next, include the comments.html partial in your article layout. Open the article.html file in the _default directory and add the following line where you want the comments to appear:
|
|
Step 3: Styling the Comment Section
To style the comment section, add the necessary CSS to your custom stylesheet. You can include the styles directly in the custom.html file or in a separate CSS file.
Here is an example of the CSS for the comment section:
|
|
Step 4: Configuring Hugo Parameters
Ensure that your config.toml file includes the necessary parameters for comments. For example:
|
|
This makes it easy to customize the Bluesky account used for comments across your site if you decide to change your username in the future.
Step 5: Setting the Comment ID
For each article where you want to enable comments, you need to set a unique ID for the comments. This ID is used to fetch the correct comments from Bluesky. You can get the post ID from the Bluesky post like this.
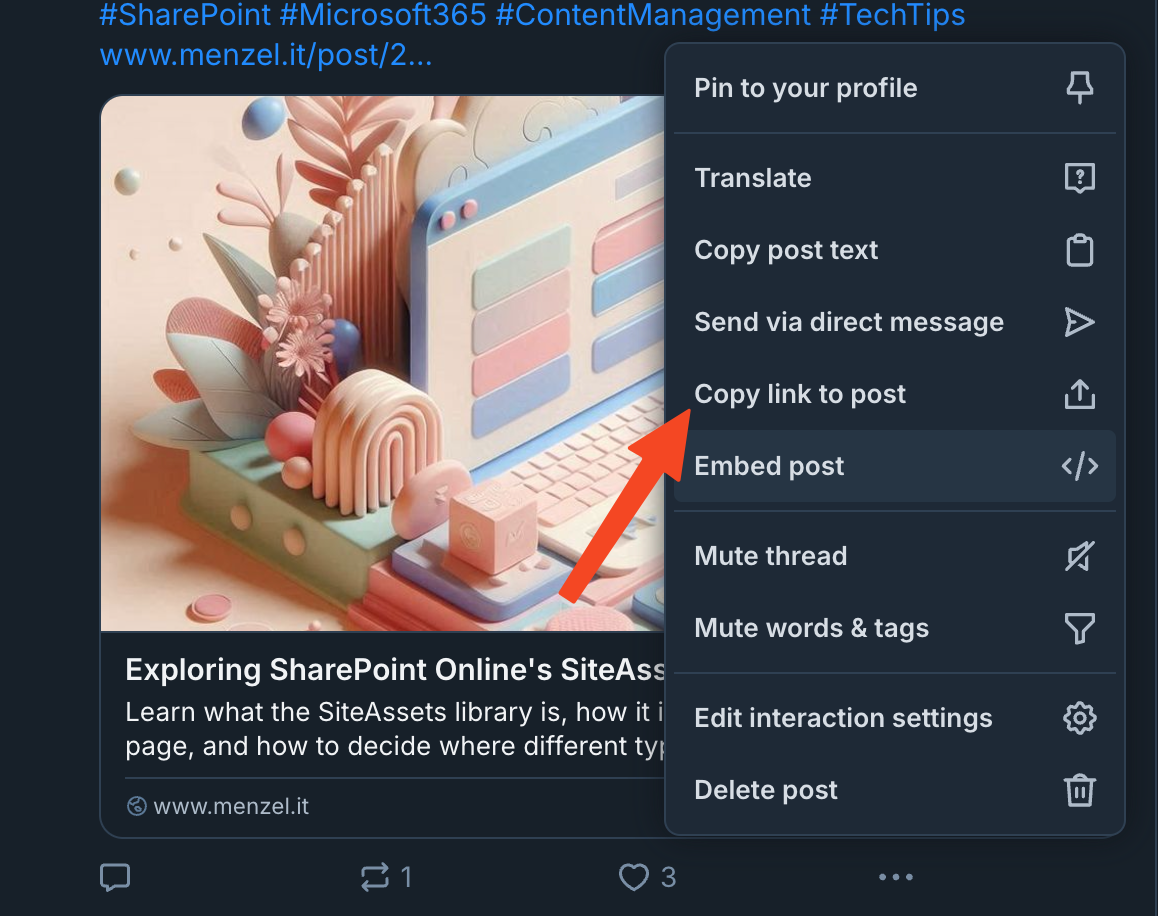
Click on Copy link to post to get the post ID
There you need to copy the post ID and paste it into the Front Matter section of your article.
https://bsky.app/profile/ollim365.menzel.it/post/3laoyekihlo2j
This is how it looks in the Front Matter section of your article:
|
|
Okay, that’s it! You’ve hopefully set up your blog comments using Bluesky posts. Now you can enjoy a more interactive and engaging experience with your readers. If you have any questions or need further assistance, feel free to reach out to me. I’m always happy to help!
Published on:
Learn moreWe can help you with Use your Bluesky post for comments on your Hugo Blog
If you want help implementing, troubleshooting, or improving this product, contact us and we’ll point you in the right direction.

Related posts
Creating Copilot Studio Agents Without an M365 Copilot Premium License
A common assumption when getting started with Copilot Studio is that you need a full Microsoft 365 Copilot Premium license. That assumption is...
Power Automate: Get events (V4) shared mailbox fix
When your flow reads a shared mailbox calendar using the Office 365 Outlook → Get events (V4) connector, it can fail in a way that looks like...
Using Managed Identity with Azure Automation & PnP.PowerShell
How to Set Up a Managed Identity for Azure Automation Runbooks and Use It in PowerShell Scripts with PnP.PowerShell This guide walks you throu...
UPDATED - Set Up Pay-as-you-go M365 Chat & SharePoint Agents
Introduction to Pay-as-You-Go Agents in Microsoft 365 Microsoft has introduced a flexible way for organizations to leverage AI capabilities wi...
How to Use Flexible Sections in SharePoint Pages and News
If you’ve been using SharePoint Online to build pages or share news, you know how important it is to have a layout that works for your c...
What's New in SharePoint Pages
1. New Carousel Layout in the Hero Web Part The Hero Web Part has always been a fundamental element of SharePoint pages. The new Carousel Layo...
Power Platform Solutions Made Simple
Introduction to Power Platform Solutions Power Platform Solutions offer many benefits, especially when moving from standalone flows and apps t...
Exploring SharePoint Online's SiteAssets Library
The SiteAssets library in SharePoint Online often seems like a mystery to a lot of users I talk to, but it’s important to understand it ...
Step-by-Step Guide to Copy Pages between SharePoint Online
Unfortunately you can’t copy pages in SharePoint through the UI. But sometimes you may need to copy pages and their associated SiteAsset...
Re-creating Multilanguage Links: A Step-by-Step Guide
Maybe you’ve also stumbled upon the issue of missing multilanguage links in your SitePages library in SharePoint Online. This can happen...