
Using Managed Identity with Azure Automation & PnP.PowerShell

How to Set Up a Managed Identity for Azure Automation Runbooks and Use It in PowerShell Scripts with PnP.PowerShell
This guide walks you through setting up a managed identity in Azure Automation Runbooks and using it in PowerShell scripts with PnP.PowerShell. It also covers local testing using Visual Studio Code. By the end, you’ll have a secure, maintainable, and efficient automation workflow.
1. Introduction
Azure Automation is a powerful tool for automating tasks across Azure resources. By using managed identities, you can securely access resources without storing credentials in your scripts. This approach reduces security risks and simplifies authentication. When combined with PowerShell 7.2 and PnP.PowerShell, you can automate tasks for SharePoint Online, Microsoft Graph, and other Azure services seamlessly.
In this guide, you’ll learn how to:
- Enable and configure a managed identity in Azure Automation Runbooks.
- Assign permissions to the managed identity.
- Write and test PowerShell scripts that use the managed identity with PnP.PowerShell.
- Debug and test scripts locally using Visual Studio Code.
2. What Are Managed Identities?
Managed identities are Azure’s way of securely handling authentication for services. They come in two types:
- System-assigned: Tied to a specific resource (e.g., an Automation Account) and automatically managed.
- User-assigned: Created independently and can be shared across multiple resources.
For Azure Automation, system-assigned identities are the easiest to use. They are created and deleted with the Automation Account, ensuring no orphaned credentials remain.
Why Use Managed Identities?
- No need to store credentials in scripts, variables, or Azure Key Vault.
- Secure access to Azure resources like SharePoint Online, Microsoft Graph, and Key Vault.
- Simplified lifecycle management.
3. Setting Up a Managed Identity in Azure Automation
Step 1: Create or Enable a Managed Identity
-
Create a New Automation Account:
- Go to the Azure Portal.
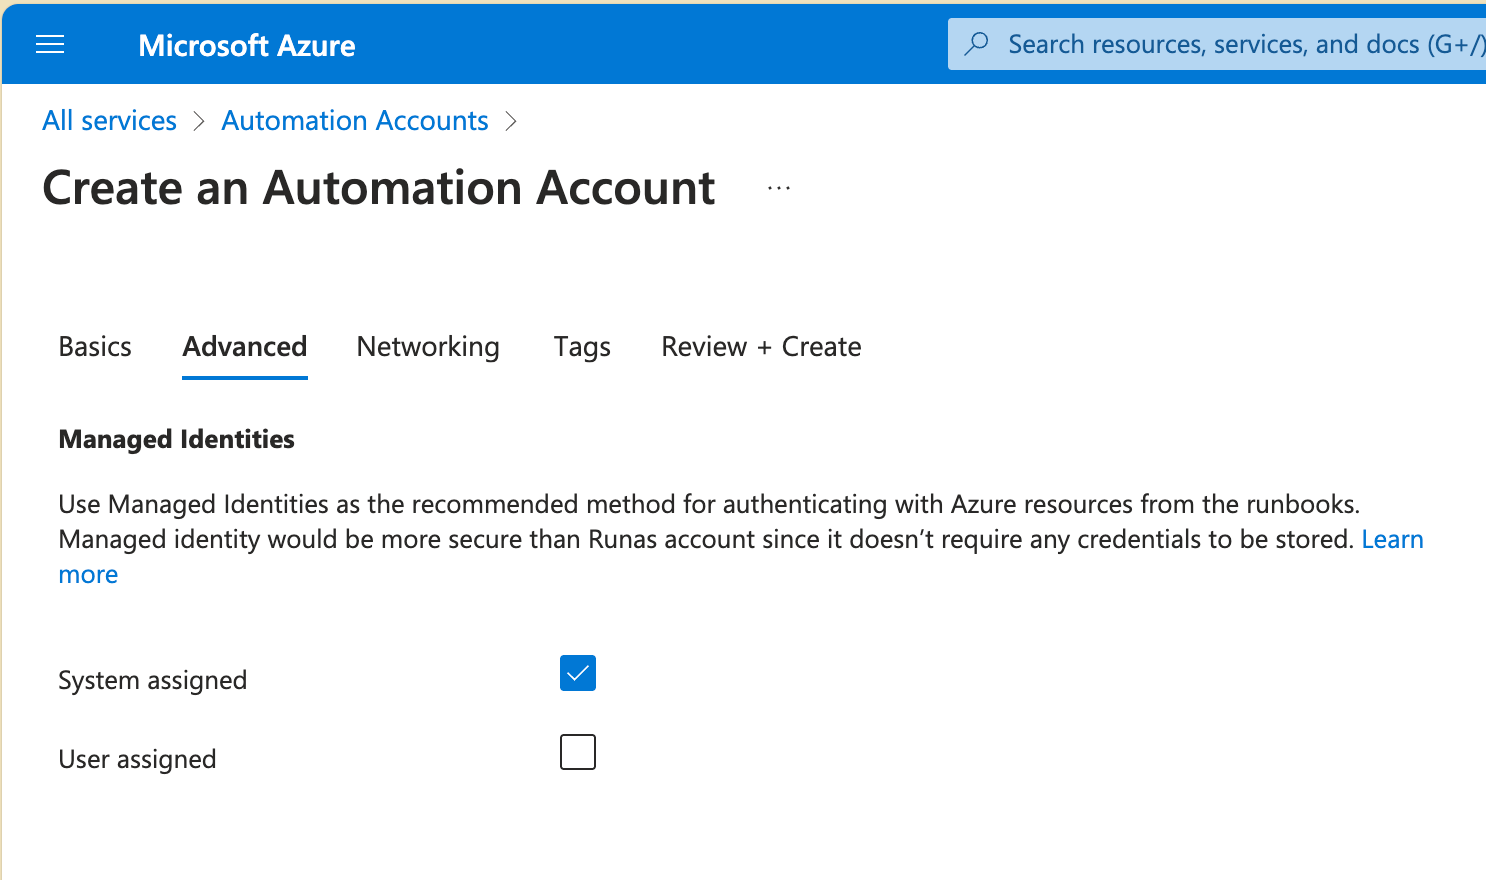
- Create a new Automation Account and enable the system-assigned managed identity under the “Advanced” tab.
-
Enable Managed Identity for an Existing Account:
- Navigate to your Automation Account in the Azure Portal.
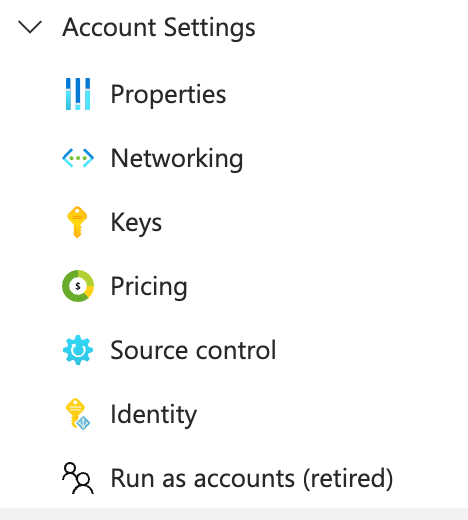
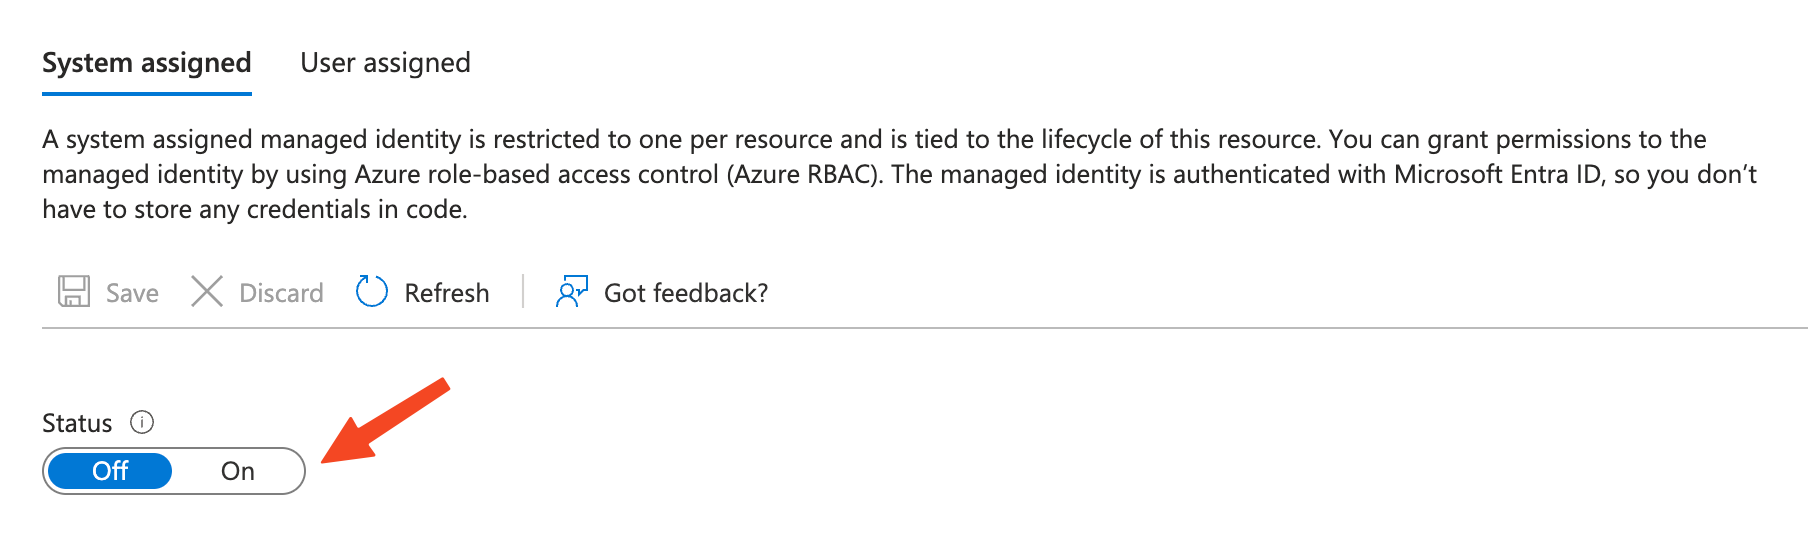
- Go to Account Settings > Identity and toggle the system-assigned identity to “On” and click save.
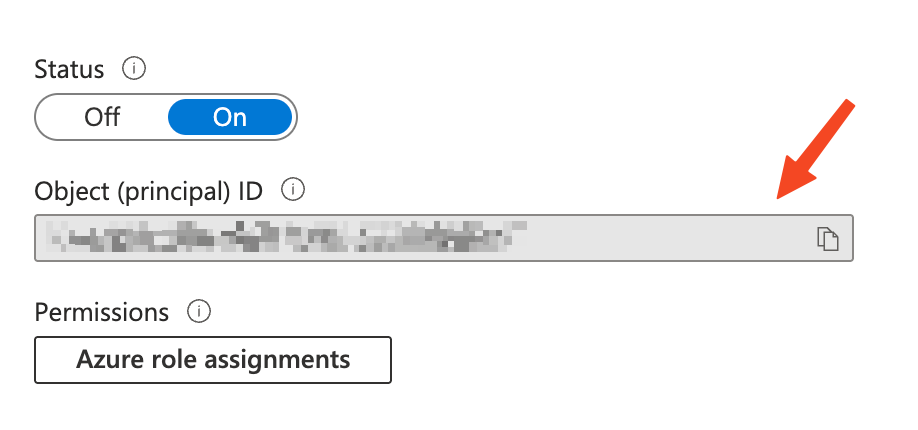
- Note the Principal ID for assigning permissions later.
-
Assign Azure roles to the managed identity:
After enabling the managed identity, you need to assign it the necessary Azure roles to access resources:- Go to the Identity if you just created the Automation Account.
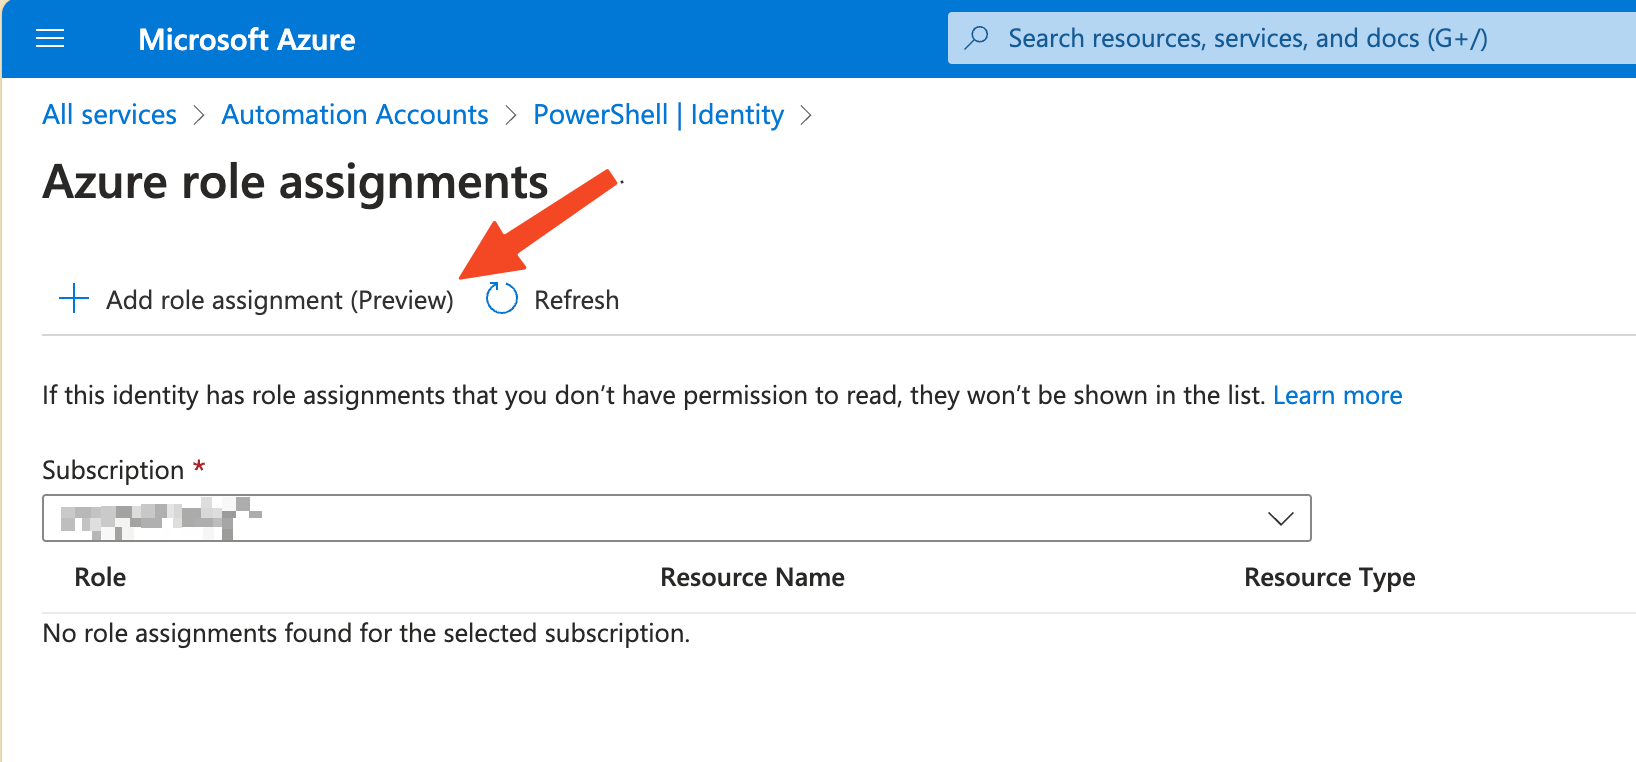
- Click on Azure role assignments.
- Click on Add role assignment and assign at least the read permissions for the resource group. This lets the managed identity access the resources in that group (e.g., Variables, etc. in Azure Automation).
Step 2: Assign Permissions
Grant the managed identity access to the resources your script will interact with:
- For example you need the following roles for your PowerShell script
Group.ReadWrite.AllandSites.FullControl.All
If you want to list all permissions available for the managed identity, you can use the following command:
|
|
- With the following script you can assign the roles to the managed identity:
|
|
4. Writing PowerShell Scripts with PnP.PowerShell
Step 1: Install PnP.PowerShell
- Locally:
Run:1Install-Module -Name PnP.PowerShell -Scope CurrentUser - In Azure Automation:
- Go to your Automation Account in the Azure Portal.
- My Advice: Create Runtime Environment with PowerShell 7.2.
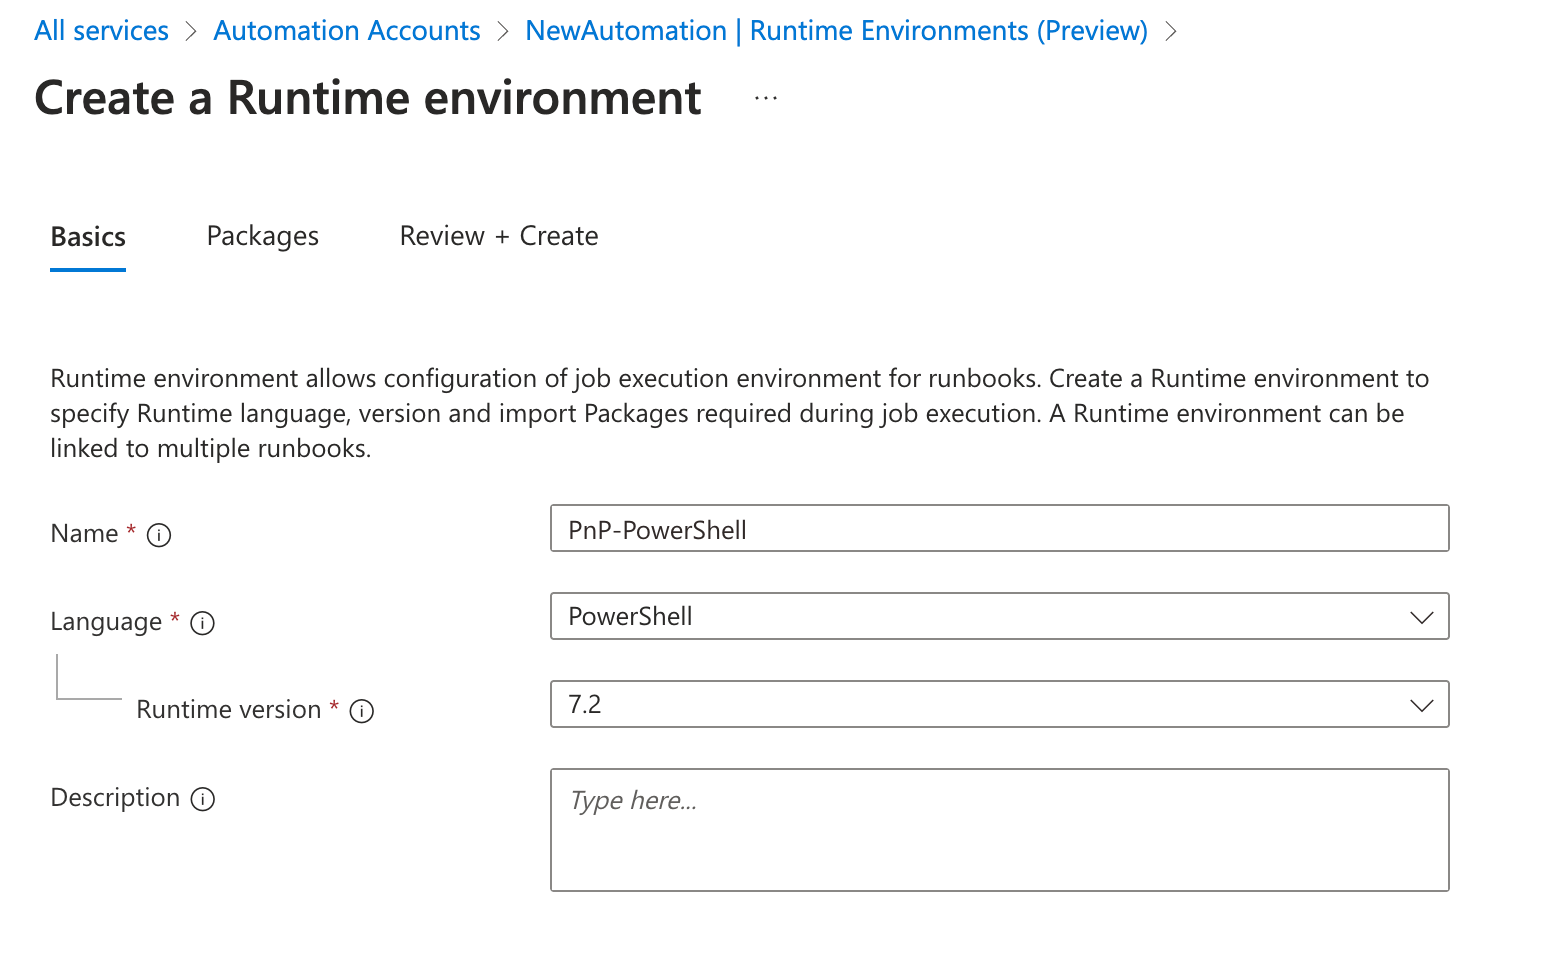
- Go to Packages Tab and add the PnP.PowerShell module and other PowerShell modules you need.
- Click Add from gallery and search for
PnP.PowerShell. - Select the module and click Select in the lower left corner.
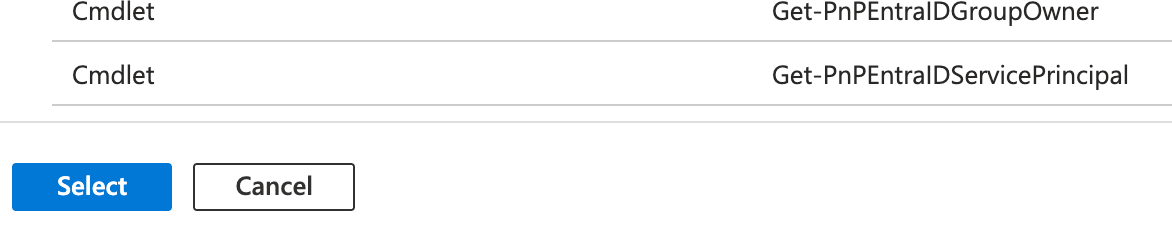
- Click Create to create the runtime environment with the selected modules.
Step 2: Example Script
Now we can write a PowerShell script that uses the managed identity to connect to SharePoint Online and perform operations. Below is an example script that retrieves site details based on a group ID passed as a parameter.
|
|
Key Points:
- The
Connect-PnPOnlinecmdlet supports managed identity authentication. - Use
Get-AutomationVariableto retrieve variables stored in Azure Automation.
5. Testing and Debugging Locally with Visual Studio Code
Step 1: Set Up Your Environment
- Install PowerShell 7.2 from the official repository.
- Install the PnP.PowerShell module:
1Install-Module -Name PnP.PowerShell -Scope CurrentUser - Install the Az and Az.Accounts modules and other modules you need:
1
2
Install-Module -Name Az -Scope CurrentUser Install-Module -Name Az.Accounts -Scope CurrentUser
Step 2: Set Up Visual Studio Code
- Install Visual Studio Code from the official site.
- Install the Azure Automation extension for VS Code.
Step 3: Debug in Visual Studio Code
- Open your script in VS Code by signing into your Azure account in the Azure Automation extension.
- Double click on the script file to open it.
- Since you are now signed into the Automation Account, you can run all the commands directly in VS Code (e.g getting variables, etc. from the Automation Account).
6. Best Practices
- Follow RBAC Principles: Assign only the permissions the managed identity needs.
- Enable Logging: Use verbose logging in your scripts and monitor runbook execution in Azure Automation.
- Test Thoroughly: Test scripts locally and in a staging environment before deploying to production.
7. Conclusion
By following this guide, using managed identities in Azure Automation simplifies authentication and enhances security.
For more details, check out:
- Azure Automation Managed Identity Documentation
- PnP.PowerShell Documentation
- Visual Studio Code PowerShell Guide
Let me know if you have tried this approach or if you have any questions in the comments below!
Published on:
Learn moreWe can help you with Using Managed Identity with Azure Automation & PnP.PowerShell
If you want help implementing, troubleshooting, or improving this product, contact us and we’ll point you in the right direction.
Related posts
Creating Copilot Studio Agents Without an M365 Copilot Premium License
A common assumption when getting started with Copilot Studio is that you need a full Microsoft 365 Copilot Premium license. That assumption is...
Power Automate: Get events (V4) shared mailbox fix
When your flow reads a shared mailbox calendar using the Office 365 Outlook → Get events (V4) connector, it can fail in a way that looks like...
UPDATED - Set Up Pay-as-you-go M365 Chat & SharePoint Agents
Introduction to Pay-as-You-Go Agents in Microsoft 365 Microsoft has introduced a flexible way for organizations to leverage AI capabilities wi...
How to Use Flexible Sections in SharePoint Pages and News
If you’ve been using SharePoint Online to build pages or share news, you know how important it is to have a layout that works for your c...
What's New in SharePoint Pages
1. New Carousel Layout in the Hero Web Part The Hero Web Part has always been a fundamental element of SharePoint pages. The new Carousel Layo...
Power Platform Solutions Made Simple
Introduction to Power Platform Solutions Power Platform Solutions offer many benefits, especially when moving from standalone flows and apps t...
Use your Bluesky post for comments on your Hugo Blog
Since Bluesky is getting really popular by people I interact with, I decided to switch my blog comments to Bluesky posts. In this blog post, I...
Exploring SharePoint Online's SiteAssets Library
The SiteAssets library in SharePoint Online often seems like a mystery to a lot of users I talk to, but it’s important to understand it ...
Step-by-Step Guide to Copy Pages between SharePoint Online
Unfortunately you can’t copy pages in SharePoint through the UI. But sometimes you may need to copy pages and their associated SiteAsset...
Re-creating Multilanguage Links: A Step-by-Step Guide
Maybe you’ve also stumbled upon the issue of missing multilanguage links in your SitePages library in SharePoint Online. This can happen...