
Automate Threads Posts in PowerAutomate:A Step-by-Step Guide

Today, I’m going to show you something pretty cool - how to automate posting to Threads using PowerAutomate. To be honest, I’m pretty excited about this one because it combines two things I love: the Power Platform and social media automation.
The New Kid on the Block: Threads API
Before we jump in, I want to highlight that the Threads API is relatively new. It’s exciting to see Meta opening up this platform for developers and automation enthusiasts like us. If you’ve been following my blog, you might remember my previous post about automating posts to BlueSky and Mastodon using PowerAutomate. Well, consider this a natural evolution of that idea. We’re expanding our social media automation toolkit, and Threads is the latest addition!
Why Automate Posting to Threads?
Let’s face it, staying active on social media can be a real time-sink. But with Threads being the newest addition, it’s a great opportunity to build your presence there. That’s where automation comes in handy. By setting up this flow, we can:
- Schedule our posts
- Ensure consistent content delivery
- Save precious time for other important tasks
Plus, it’s a great way to showcase the power of Microsoft’s Power Platform!
Thread’s developer ID and Access Token
To use the Threads API, you’ll need a Meta App and then pick the Threads Use Case. This will give you a User ID and Access Token that you’ll need to interact with the API. Make sure to store these securely, as they’re your keys to the Threads kingdom! More information on how to get these can be found in the Threads API documentation. This is how it looks in my environment:
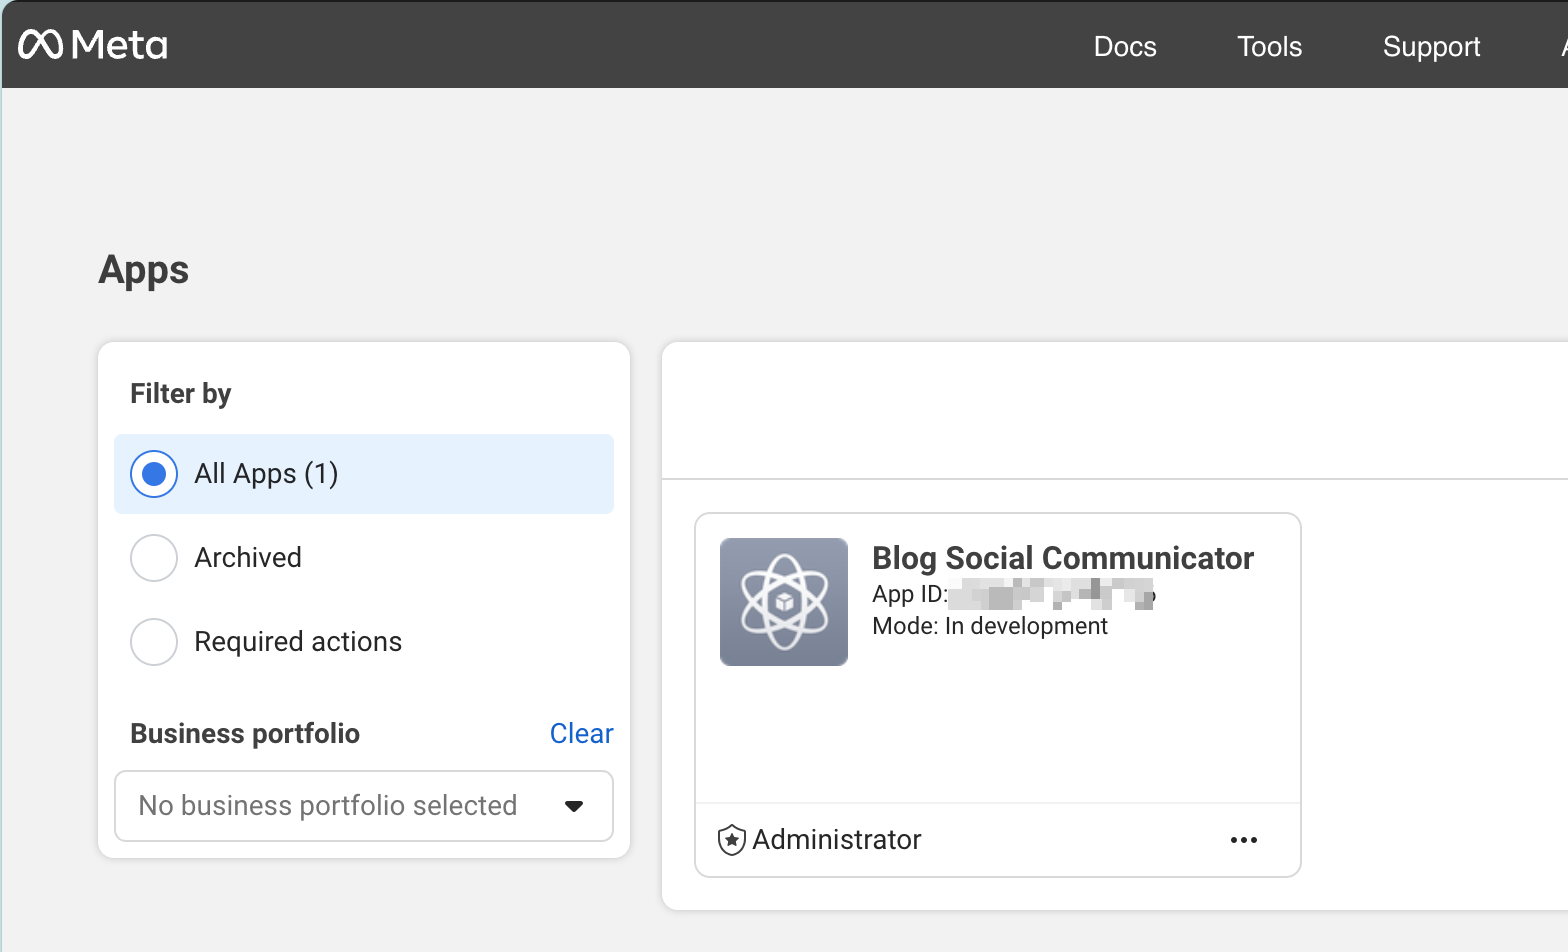
Access the Threads API - Permissions
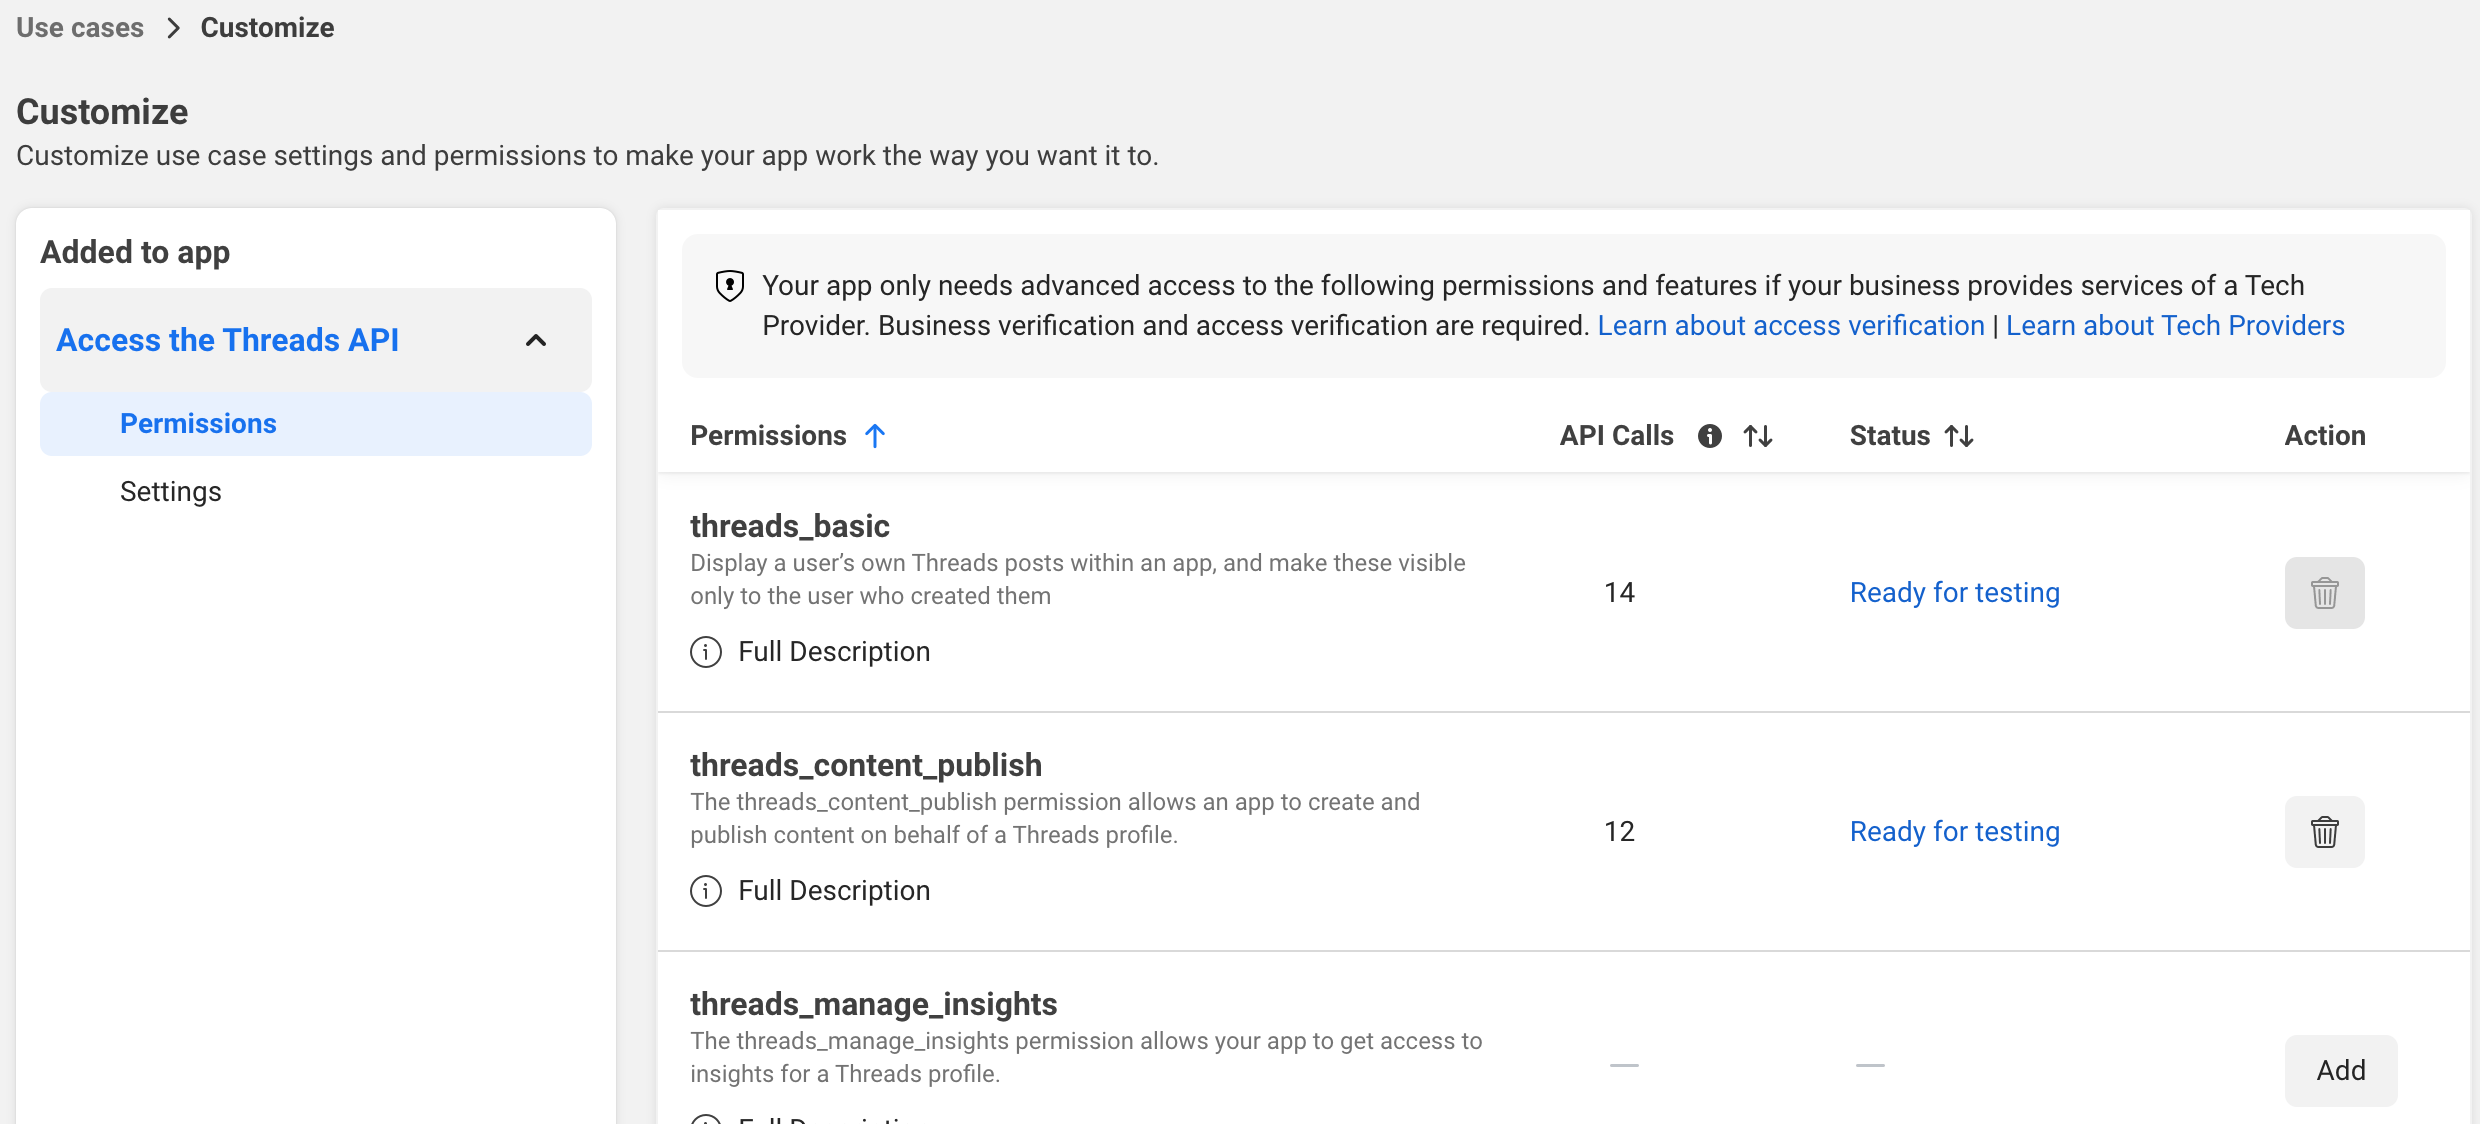
Access the Threads API - Settings
Here you have to set up your Redirect URI. Also you can generate a new Access Token. Please store this securely.
The Flow: Breaking It Down
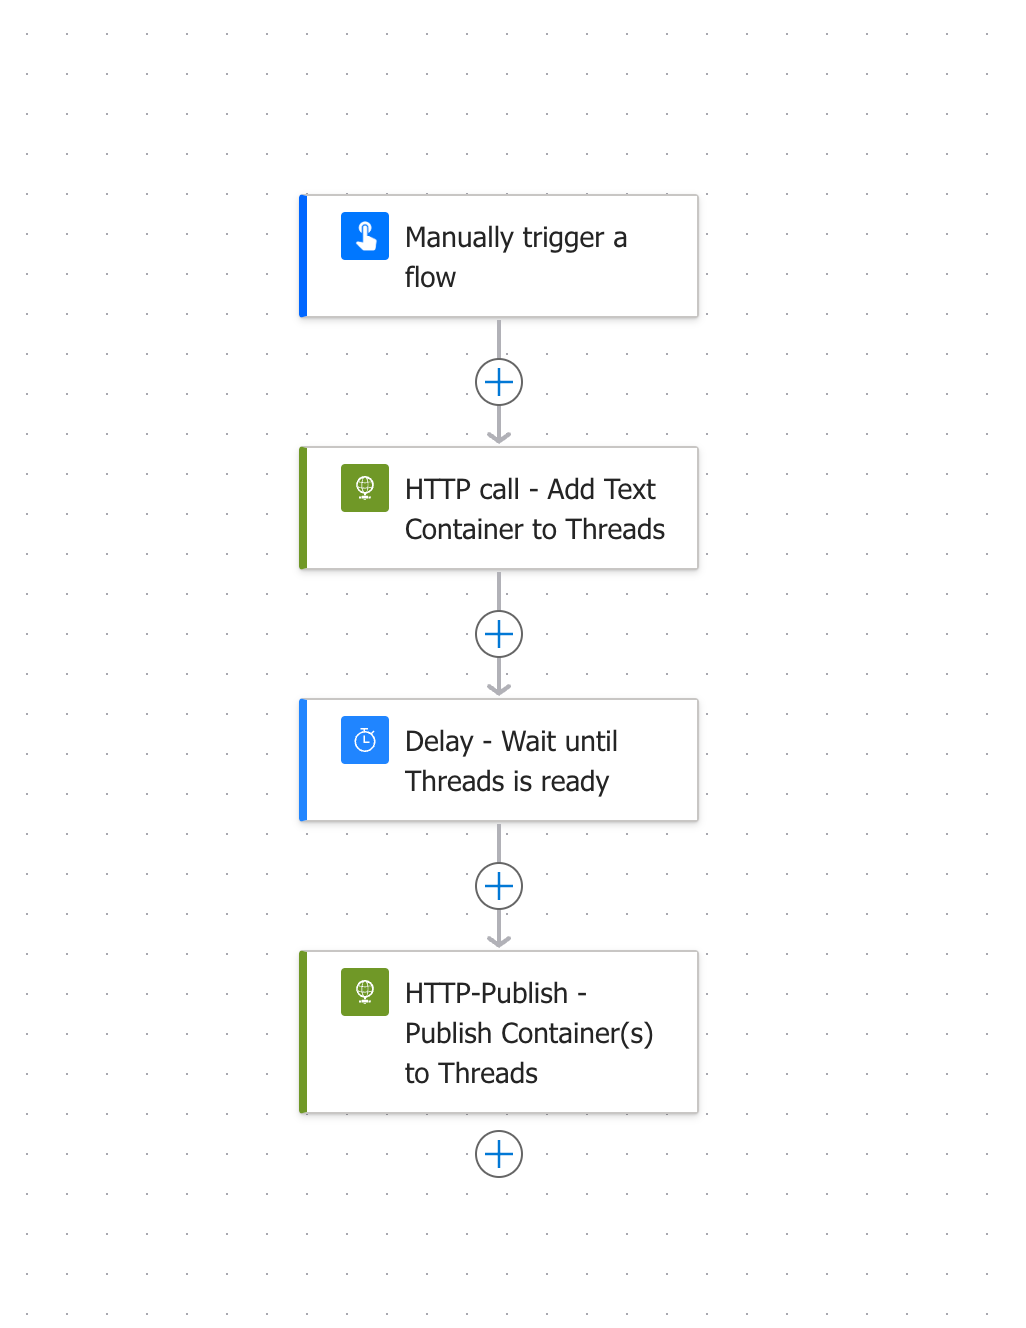
Alright, let’s get into the nitty-gritty of how this flow works. We’ll be using the Threads API, so if you want to follow along, make sure to check out the official Threads API documentation. This is how the flow looks like:
Step 1: Trigger
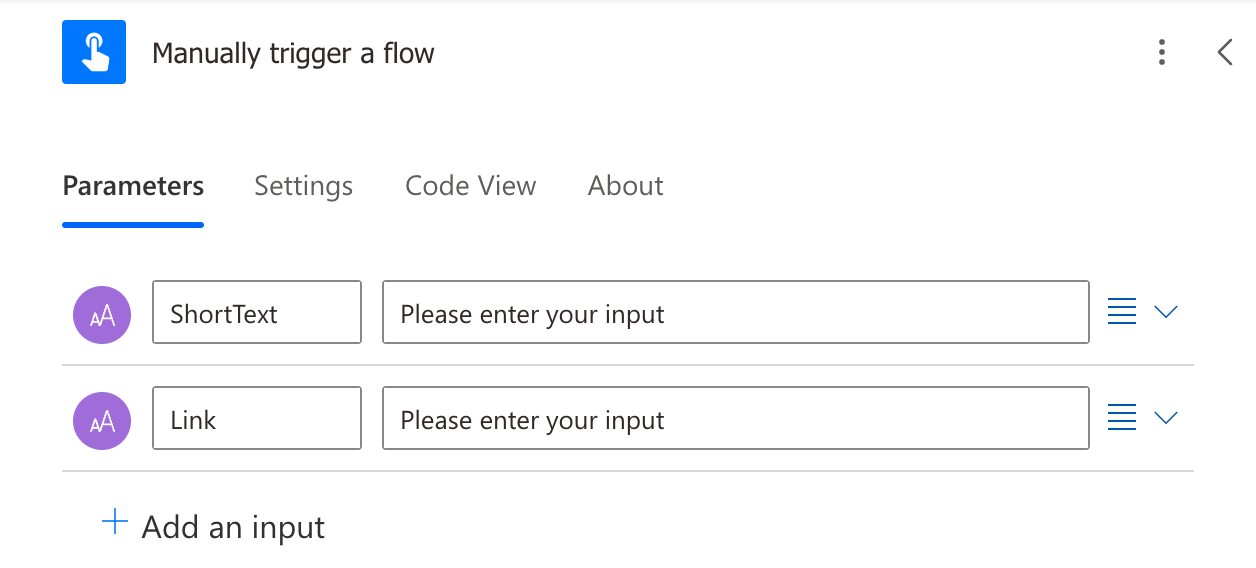
We’re kicking things off with a manual trigger. This gives us control over when to post and what content to include. The trigger collects two pieces of information:
- ShortText: This is where you’ll put the main body of your Threads post.
- Link: Here, you can add a URL you want to include in your post.
Step 2: Create the Post
Next up, we’ve got an HTTP action that creates the post. Here’s what’s happening:
|
|
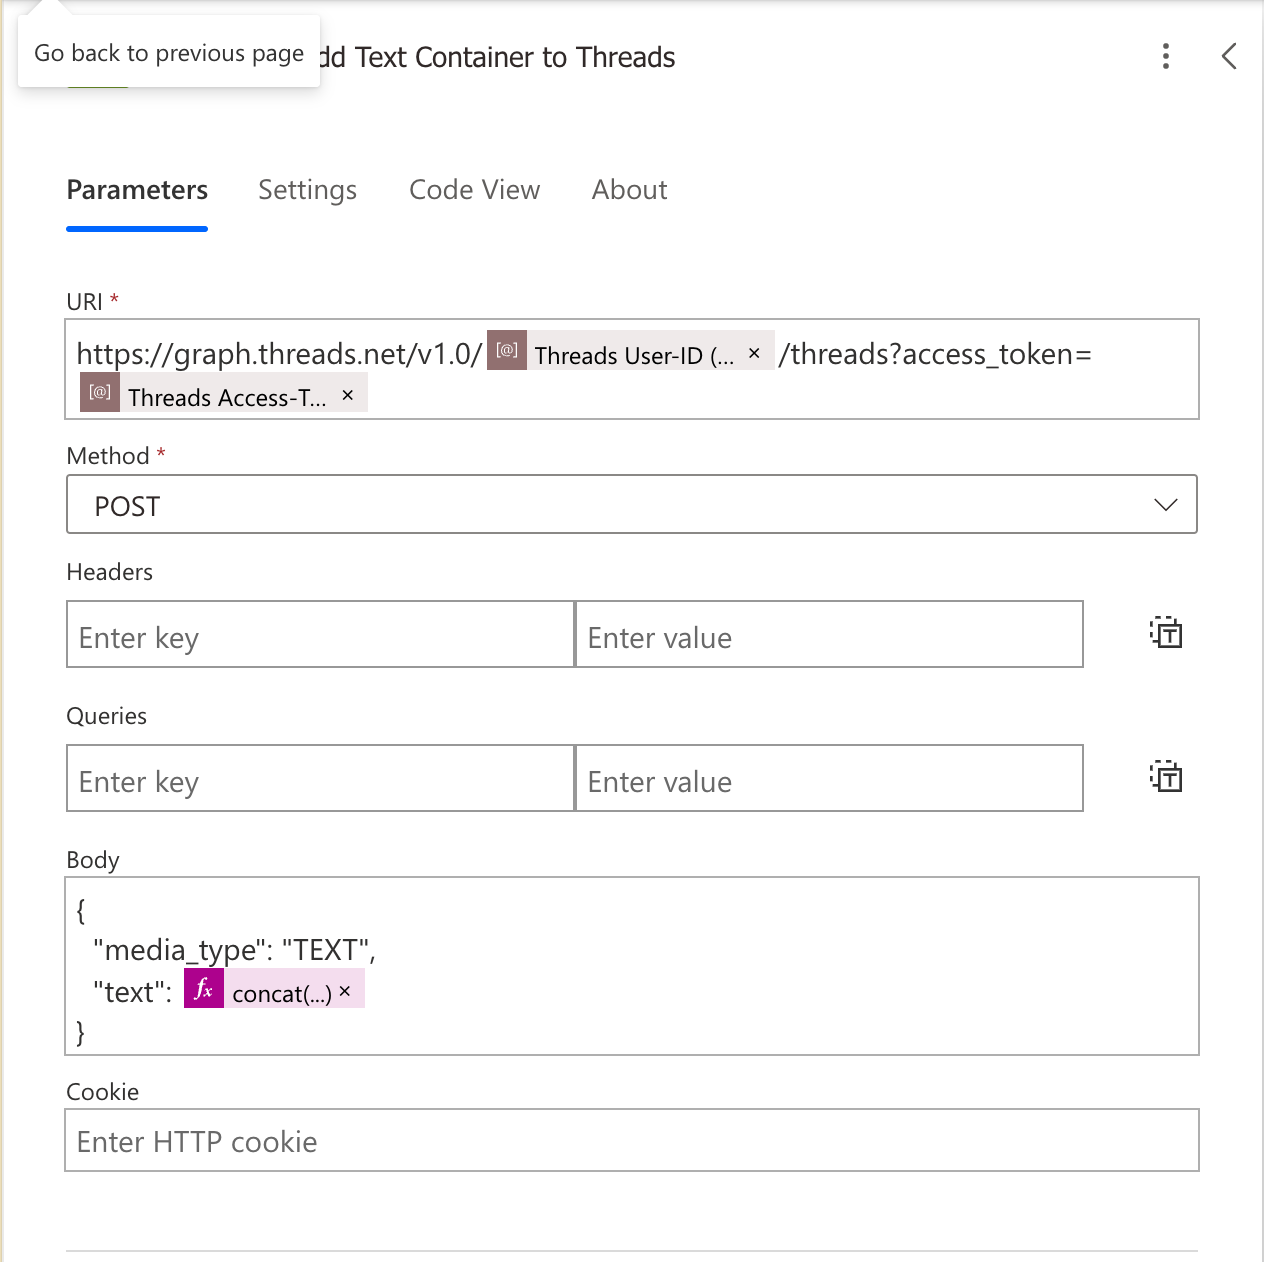
We’re using the Threads User ID and Access Token stored as environment variables (smart move for security!). The concat function combines the ShortText and Link into a single text string for the post.
Step 3: Wait for It…
After creating the post, we’ve got a 31-second delay. Why? Well, Threads needs a bit of time to process the post before we can publish it (see documentation for more infos). Think of it as giving Threads a moment to catch its breath!
Step 4: Publish the Post
Finally, we’ve got another HTTP action to publish the post:
|
|
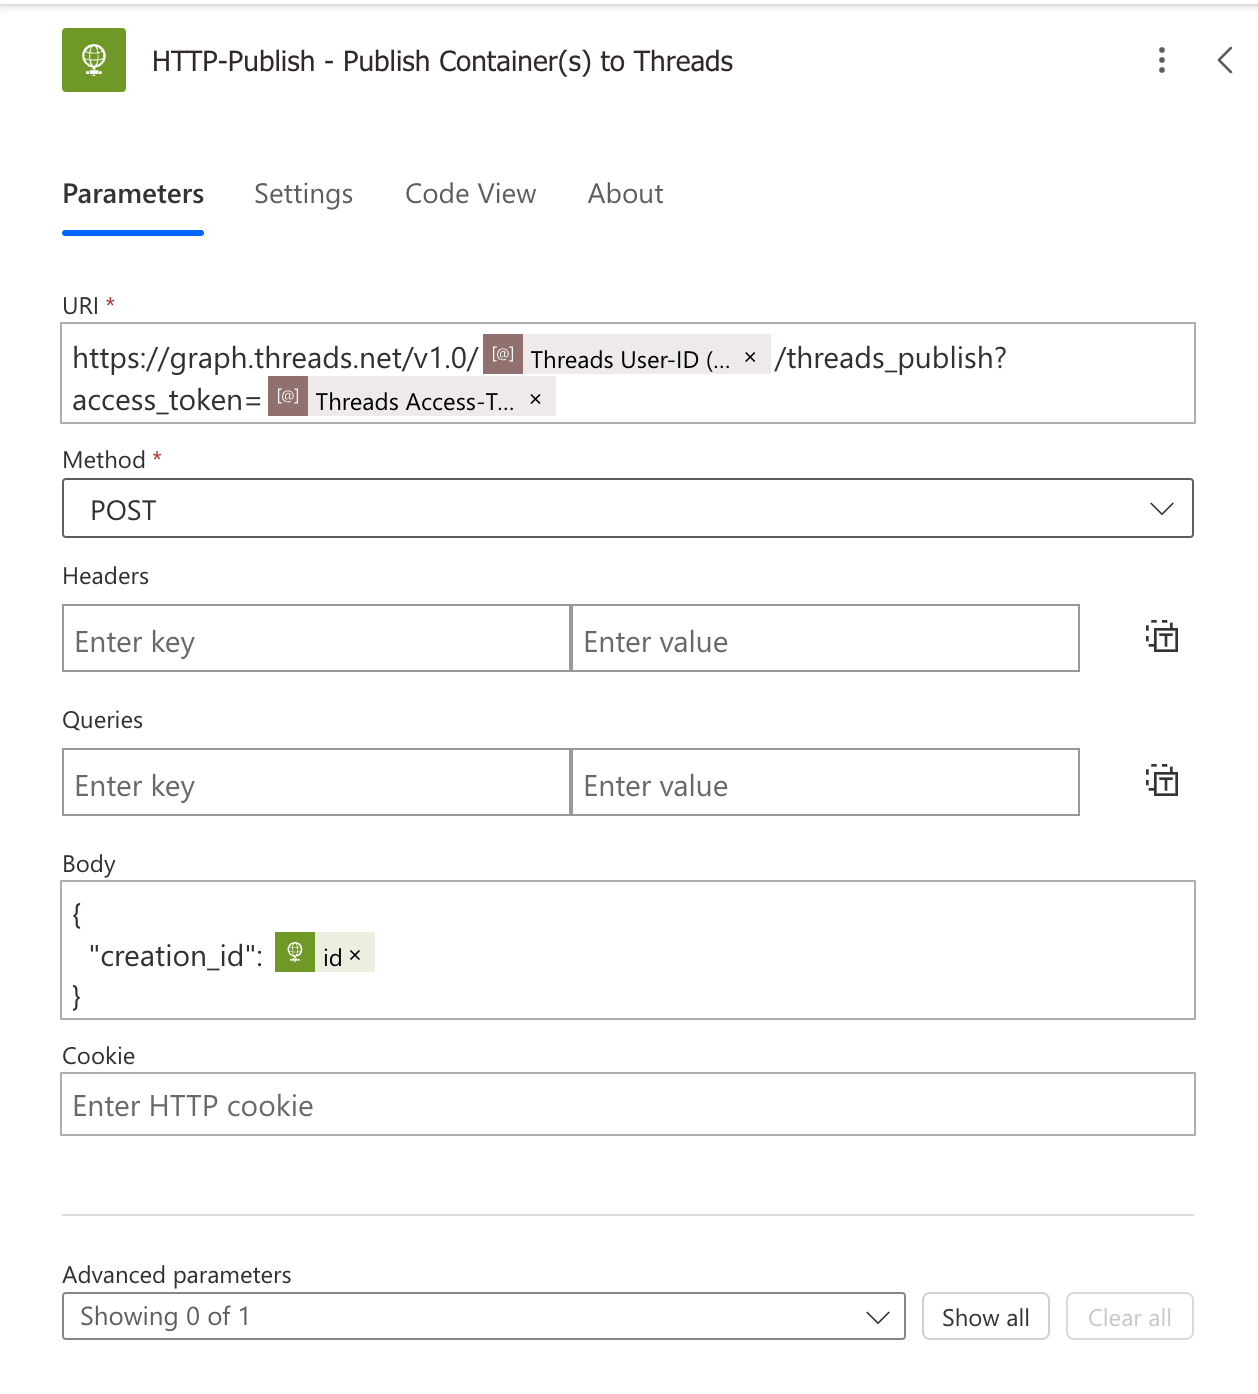
This step takes the ID of the post we created earlier and tells Threads to publish it. And just like that, your post is live!
Wrapping Up
And that’s that! A simple yet powerful flow to automate your Threads posts. This setup gives you the flexibility to craft your posts ahead of time and send them out with just a click of a button.
Remember, while automation is great, it’s important to stay engaged with your audience. Use this flow to maintain a consistent presence, but don’t forget to jump in and interact with your followers directly too!
If you’re interested in automating posts for other platforms, don’t forget to check out my earlier blog post on automating posts to BlueSky and Mastodon and also Social media content creator with AI Prompts. It’s fascinating to see how we can leverage PowerAutomate across different social media platforms!
Got any questions about this flow or ideas on how to extend it? Drop a comment below, and let’s chat! Happy automating!
Further Reading
Published on:
Learn moreWe can help you with Automate Threads Posts in PowerAutomate:A Step-by-Step Guide
If you want help implementing, troubleshooting, or improving this product, contact us and we’ll point you in the right direction.

Related posts
Creating Copilot Studio Agents Without an M365 Copilot Premium License
A common assumption when getting started with Copilot Studio is that you need a full Microsoft 365 Copilot Premium license. That assumption is...
Power Automate: Get events (V4) shared mailbox fix
When your flow reads a shared mailbox calendar using the Office 365 Outlook → Get events (V4) connector, it can fail in a way that looks like...
Using Managed Identity with Azure Automation & PnP.PowerShell
How to Set Up a Managed Identity for Azure Automation Runbooks and Use It in PowerShell Scripts with PnP.PowerShell This guide walks you throu...
UPDATED - Set Up Pay-as-you-go M365 Chat & SharePoint Agents
Introduction to Pay-as-You-Go Agents in Microsoft 365 Microsoft has introduced a flexible way for organizations to leverage AI capabilities wi...
How to Use Flexible Sections in SharePoint Pages and News
If you’ve been using SharePoint Online to build pages or share news, you know how important it is to have a layout that works for your c...
What's New in SharePoint Pages
1. New Carousel Layout in the Hero Web Part The Hero Web Part has always been a fundamental element of SharePoint pages. The new Carousel Layo...
Power Platform Solutions Made Simple
Introduction to Power Platform Solutions Power Platform Solutions offer many benefits, especially when moving from standalone flows and apps t...
Use your Bluesky post for comments on your Hugo Blog
Since Bluesky is getting really popular by people I interact with, I decided to switch my blog comments to Bluesky posts. In this blog post, I...
Exploring SharePoint Online's SiteAssets Library
The SiteAssets library in SharePoint Online often seems like a mystery to a lot of users I talk to, but it’s important to understand it ...
Step-by-Step Guide to Copy Pages between SharePoint Online
Unfortunately you can’t copy pages in SharePoint through the UI. But sometimes you may need to copy pages and their associated SiteAsset...