
Deploying NTT Data UniKix in Azure, Part 2 - Configure TPE and compile the ACCT Application

Overview
This post continues the steps to deploy NTT Data UniKix on Azure. In Part 1, you deployed the preconfigured VM from Azure Marketplace. In this post, you will configure the TPE and BPE, then compile and deploy the ACCT Demo application. Next, you will connect to the ACCT application using any 3270 emulator you choose. For this blog, I used x3270, a freely available open-source emulator.
When you complete this walk-through, you will be running a mainframe legacy application in Azure using the NTT Data UniKix platform. The ACCT application is an example of a CICS/VSAM application, a type that was prevalent from the 1970s through the 1990s. This is an example of Mainframe Application Rehosting. Rehosting is a great way to see the rapid benefit of running these applications in the Cloud, typically at 1/10th the cost.
Semantics and definitions
Before you begin, it is a good idea to go over some of the definitions of terms we will be using. Unless you are familiar with mainframe environments they might be new to you.
- Transaction Processing Environment (TPE). This is where you run your CICS transactions. The TPC is for online users running applications.
- UniKix Regions. Like CICS, which allows you to have separate managed execution environments called CICS Regions, UniKix provides a similar functionality. UniKix Regions provide a security and execution boundary for applications.
- Batch Processing Environment (BPE). The batch environment is a major component of mainframe systems. The BPE is where batch programs are typically called by batch jobs defined by Job Control Language (JCL).
Connect to the VM
1. Complete Part 1 if you have not done so already to create and access the VM.
2. On the Overview tab of Azure portal, select Connect.
3. In the Connect to virtual machine dialog box, copy the public IP address to the clipboard or write it down. By default, port 22 has been made available on the VM for connection via SSH.
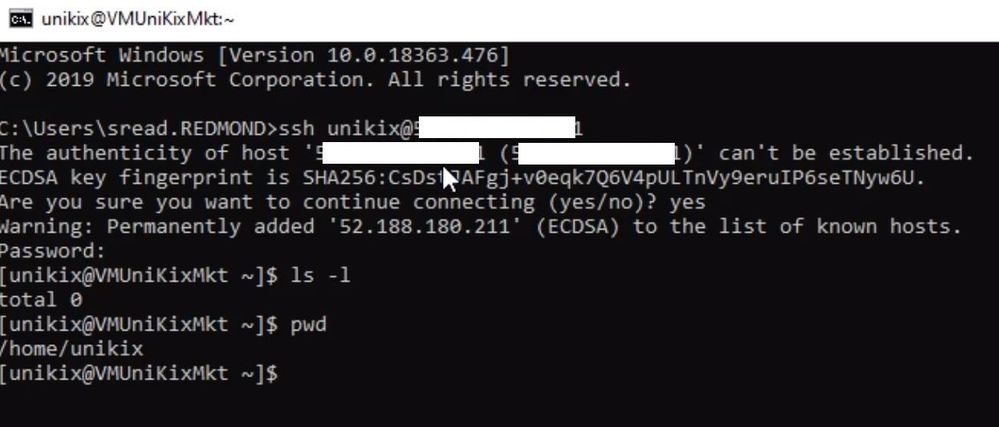
4. Initiate a terminal session to the VM. This can be done in several ways. For example, on a Windows 10 computer, the easiest way is to open a command prompt and type:
Note: Unikix in the command is the name of the administrator you used when creating the VM. Also, if you choose to connect via an ssh private key, you will need to provide the path to the public key pair.
Once connected, you are presented with a terminal session in the unikix user home directory.
Open Port 4444
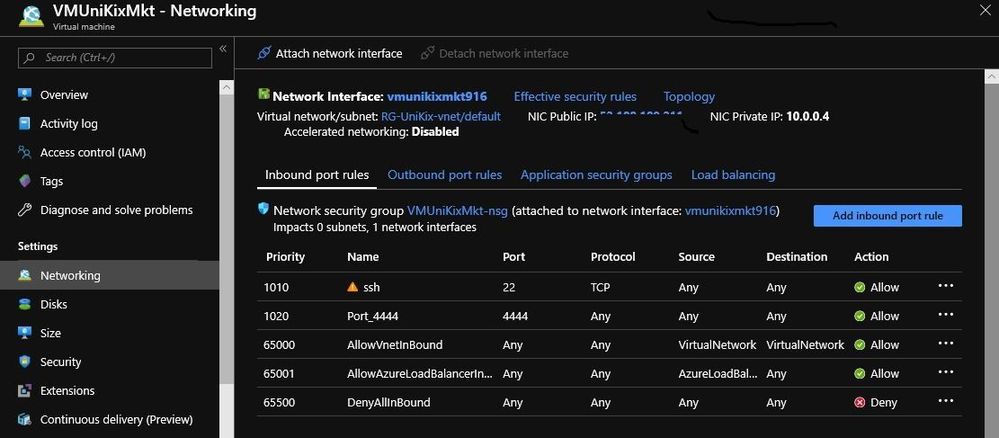
The next step is to open next step is port 4444, which the ACCT application listens on for this walk-through. This port is used to connect with x3270 (or the terminal emulator you choose).
1. In the Azure portal, select the Virtual machine menu, then go to the Networking selection under Settings.
2. Click on the Add inbound port rule and add the rule for port 4444. Allow any protocol and any source. When you are done it should look similar to the following.
Sourcing the System for BPE and TPE
1. Now, go back to your terminal session. You will be in the home directory for the unikix user.
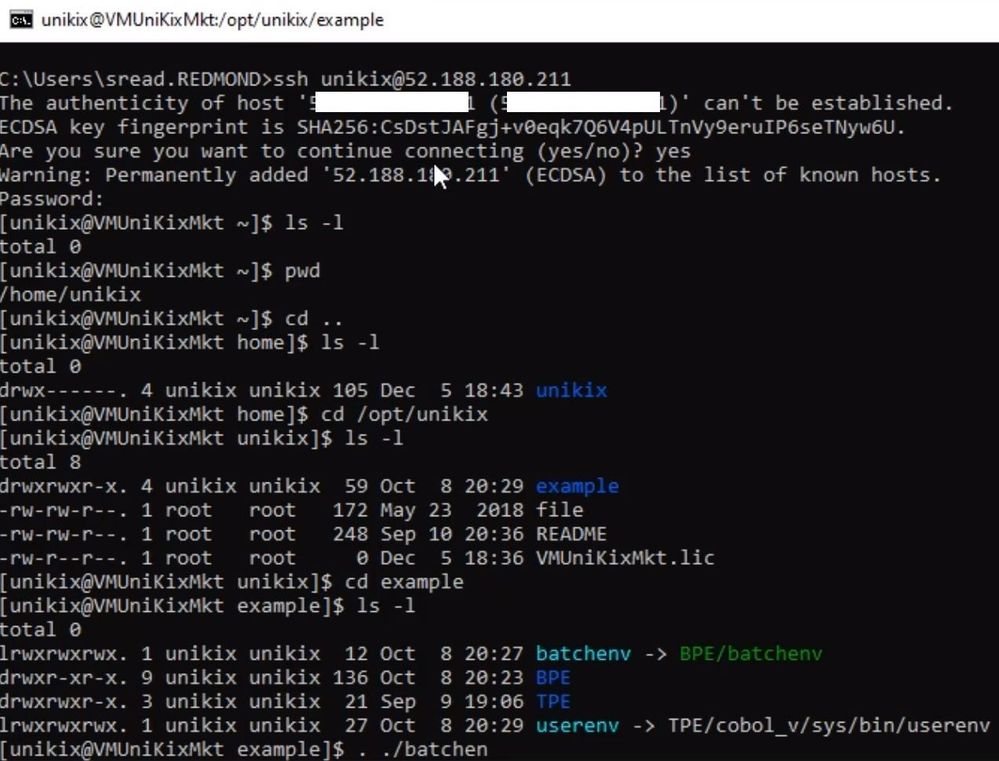
2. Change to the opt/unikix directory cd /opt/unikix
3. Notice that a license file is provided VMUniKixMkt.lic in this directory. You will need this to start the UniKix system.
4. Go to the example directory and run the 2 scripts that will source the BPE and TPE environment. By Source, we mean create the appropriate links, paths and system variables needed by the scripts we will launch. Type:
. ./batchenv
and
. ./userenv
5. After both command run, the command prompt will be displayed. There is no feedback from these scripts. Your terminal should look similar to this.
Start the Batch and UniKix Region
Now you need to start both the Batch environment and UniKix region. To start Batch type:
bam start
To start UniKix, type:
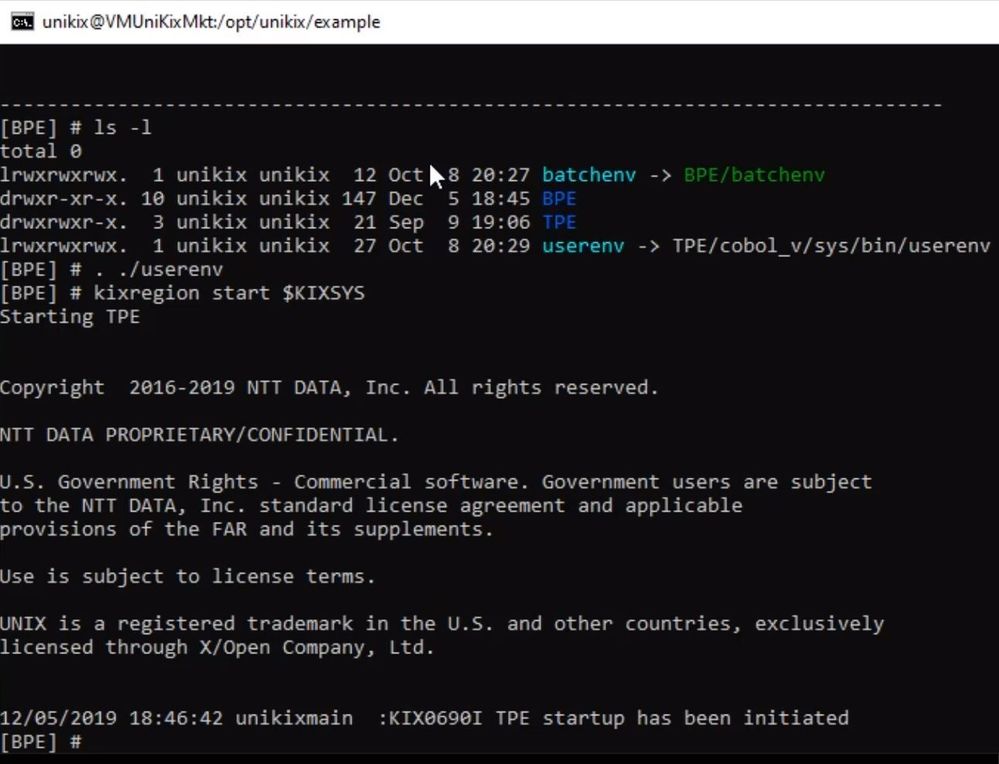
kixregion start $KIXSYS
After you run both scripts, both the Batch and UniKix should be started and running. Look for any errors. You should see a terminal similar to this.
Build the ACCT application
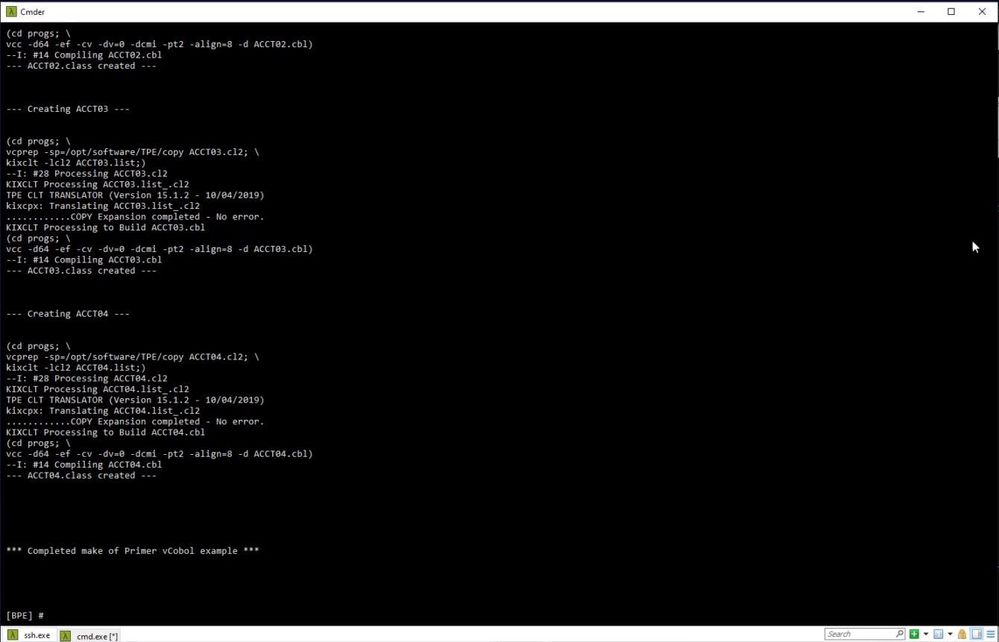
The source code for the ACCT application is on the VM in the /opt/unikix/example/TPE directory. You need to build and deploy the application to the UniKix Region.
To do this type:
/.build_programs
You should see output similar to the following in the terminal window.
Shut Down the internal Red Hat Firewall
The last action you will need to perform on the server is to shut down the internal Red Hat Firewall. By default, on this installation the Red Hat Firewall does not allow network traffic by on ports 4444.
Type the following:
sudo systemctl stop firewalld
Connect to ACCT with the x3270 emulator
Now you can test the application with your 3270 emulator.
1. Get the public IP address of the machine that you copied earlier when you connected to the terminal.
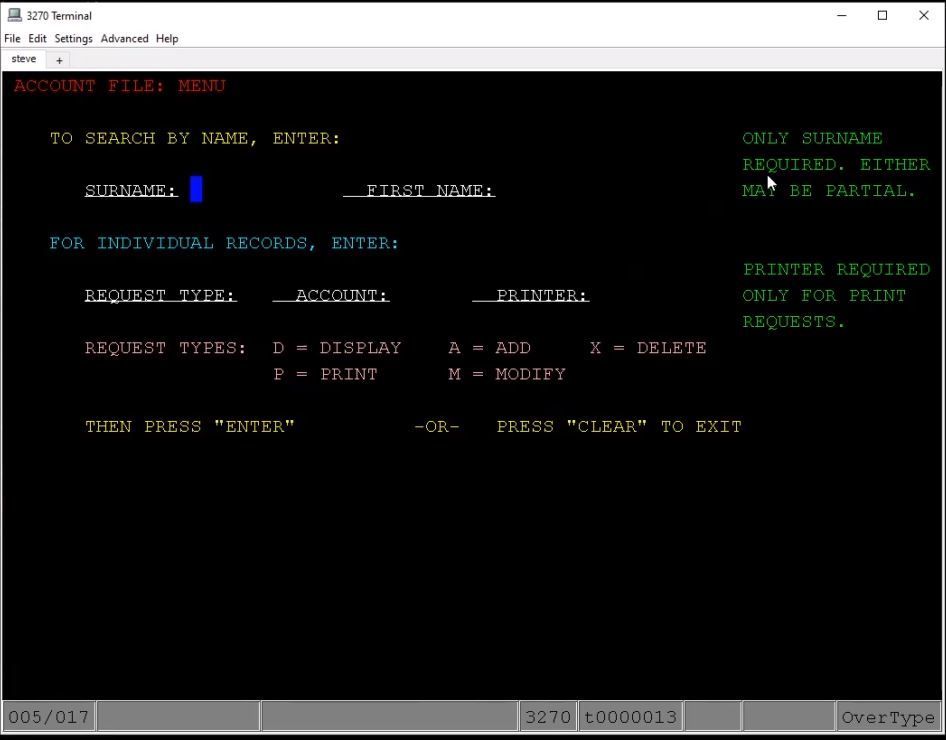
2. Enter this address into the configuration of the 3270 terminal emulator to connect to the UniKix region. When connect, the standard UniKix start screen appears. The UniKix application is listening on port 4444.
3. On the UniKix screen, enter ACCT to launch the initial screen of the ACCT application.
The 3270 session should look like the following.
Conclusion
So, in conclusion, in this blog post, you have successfully deployed a Mainframe Rehosting solution in Azure and have connected to it via a 3270 emulator. Using a similar approach, you can migrate your legacy applications to a modern Cloud platform like Azure.
In the next post in this series, we will setup the Management and Administration tools for NTT Data UniKix.
Published on:
Learn moreWe can help you with Deploying NTT Data UniKix in Azure, Part 2 - Configure TPE and compile the ACCT Application
If you want help implementing, troubleshooting, or improving this product, contact us and we’ll point you in the right direction.
Related posts
Large-scale docking for drug design on Azure
“Only 10 total drugs in 46 years have been intentionally developed for childhood cancer and have reached FDA approval (reference). Childhood ...
E2E deployment of a production ready NDv4 (A100) cluster targeting large deep learning training
Introduction The NDv4 series is very popular for running large deep learning training jobs, which require lots of floating-point perfo...
Performance considerations for large scale deep learning training on Azure NDv4 (A100) series
Background The field of Artificial Intelligence is being applied to more and more application areas, such as self-driving cars, natural langua...
Best Practice for Running Cadence Spectre X on Microsoft Azure
Co-authors: Richard Paw and Andy Chan Electronic Design Automation (EDA) consists of a set of software (tools) and workflows for design...
Spack in a Multi-User HPC Environment on Azure
Spack is a package management tool designed for HPC environments. In this article we will demonstrate how to install and configure Spack...
AzureHPC Lustre Marketplace Offer
The AzureHPC Lustre Marketplace offer provides a fast and easy way to deploy a Lustre Filesystem on Azure. The features include: Deplo...
Mainframe Migration to Microsoft Azure with Intel Architecture on Your Terms.
IntroductionMainframes are still in wide use today for business-critical applications in many industries. According to a 2021 survey by IBM, 7...
Why Organizations are Entrusting Microsoft Cloud with their Mainframes
There is a resurgence of interest and renewed priority to transform core enterprise systems. This resurgence is largely driven by rapidly shif...
Automated HPC/AI compute node health-checks Integrated with the SLURM scheduler
Overview It is best practice to run health-checks on compute nodes before running jobs, this is especially important for tightly coupl...
GPU Monitoring using Azure Monitor
Overview Today, many highly parallel HPC/AI applications use GPU to improve the run-time performance. It is important to be able to monitor t...