
How to calculate Container Level Statistics in Azure Blob Storage with Azure Databricks
Background
This article describes how to get container level stats in Azure Blob Storage, and how to work with the information provided by blob inventory.
The approach presented here uses Azure Databricks and is most suited to be used in storage accounts with a huge amount of data.
At the end of this article, you would be able to create a script to calculate:
- The total number of blobs in the container
- The total container capacity (in bytes)
- The total container capacity (in bytes)
- The total container capacity (in bytes)
- The total number of blobs in the container by BlobType
- The total number of blobs in the container by Content-Type
Approach
This approach is based on two steps:
-
Use Blob Inventory to collect data from Storage account
-
Use Azure Databricks to analyse the data collected with Blob Inventory
Each step has a theoretical introduction and a practical example.
.
the following:
- - A blob inventory run is automatically scheduled every day. It can take up to 24 hours for an inventory run to complete.
- Inventory output - Each inventory rule generates a set of files in the specified inventory destination container for that rule.
- Each inventory run for a rule generates the following files: Inventory file, Checksum file, Manifest file.
- Pricing and billing - Pricing for inventory is based on the number of blobs and containers that are scanned during the billing period.
- Known issues Please find the kwon issues associated with blob inventory here.
This practical example is intended to help the user to understand the theoretical introduction.
Please see below the steps I followed to create an inventory rule:
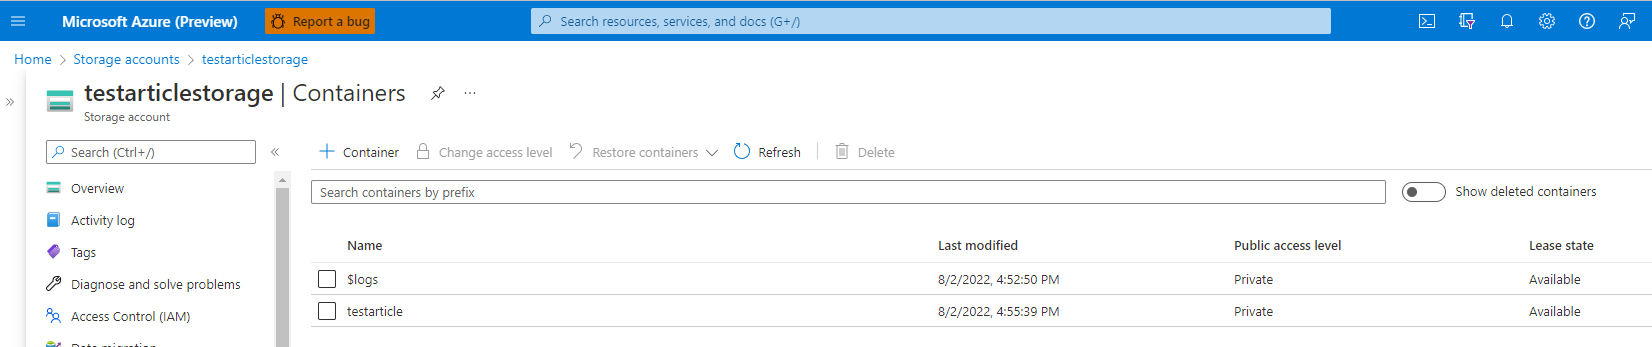
- I created a storage account with a container named "testarticle". On this container, I uploaded 50K blobs.
- I followed the steps presented above to create an inventory rule associated to the testarticle container (steps presented here ) with the following configuration:
- Rule name: blobinventory
- Container: testarticle
- Object type to inventory: Blob
- Blob types: Block blobs, Page blobs, Append blobs
- Subtypes: Include blob versions, include snapshots, include deleted blobs
- Blob inventory fields: All fields
- Inventory frequency: Daily
- Export format: CSV

As I mentioned above, it can take up to 24 hours for an inventory run to complete.
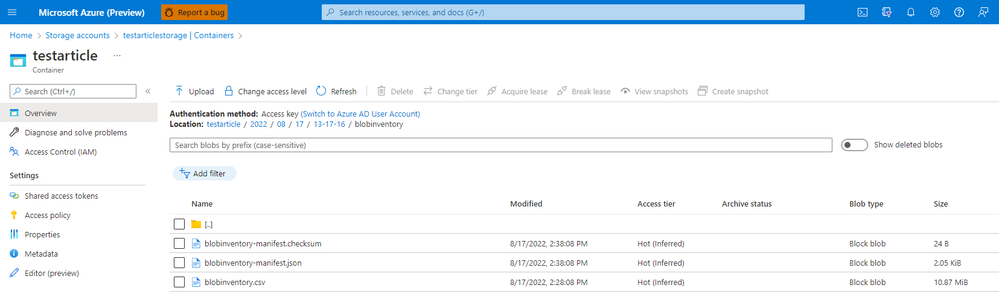
The file generated has almost 11 MiB. Please keep in mind that for files of this size we can use Excel. Azure Databricks should be used when the regular tools like Excel are not able to read the file.
Theoretical introduction
Azure Databricks is a data analytics platform optimized for the Microsoft Azure cloud services platform. Azure Databricks offers three environments for developing data intensive applications: Databricks SQL, Databricks Data Science & Engineering, and Databricks Machine Learning ().
Please be aware of before deciding to use it.
Practical example
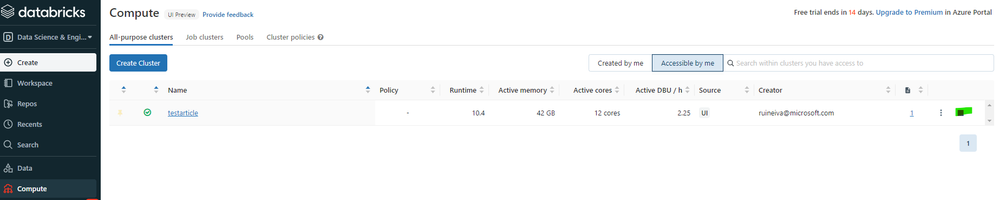
Now that we have an Azure Databricks workspace and a cluster, we will use Azure Databricks to read the csv file generated by the inventory rule created above, and to calculate the container stats.
To be able to connect Azure Databricks workspace to the storage account where the blob inventory file is, we have to create a notebook. Please follow the steps presented here Run a Spark job with focus on steps 1 and 2.
With the notebook created, it is necessary to access the blob inventory file. Please copy the blob inventory file to the root of the container/filesystem.
If you have a ADLS GEN2 account, please follow step 1. If you do not have, please follow step 2:
- To read the blob inventory file please replace storage_account_name, storage_account_key, container, and blob_inventory_file with the information related to your storage account and execute the following code
from pyspark.sql.types import StructType, StructField, IntegerType, StringType import pyspark.sql.functions as F storage_account_name = "StorageAccountName" storage_account_key = "StorageAccountKey" container = "ContainerName" blob_inventory_file = "blob_inventory_file_name" # Set spark configuration spark.conf.set("fs.azure.account.key.{0}.dfs.core.windows.net".format(storage_account_name), storage_account_key) # Read blob inventory file df = spark.read.csv("abfss://{0}@{1}.dfs.core.windows.net/{2}".format(container, storage_account_name, blob_inventory_file), header='true', inferSchema='true') - To read the blob inventory file please replace storage_account_name, storage_account_key, container, and blob_inventory_file with the information related to your storage account and execute the following code
from pyspark.sql.types import StructType, StructField, IntegerType, StringType import pyspark.sql.functions as F storage_account_name = "StorageAccountName" storage_account_key = "StorageAccountKey" container = "ContainerName" blob_inventory_file = "blob_inventory_file_name" # Set spark configuration spark.conf.set("fs.azure.account.key.{0}.blob.core.windows.net".format(storage_account_name), storage_account_key) # Read blob inventory file df = spark.read.csv("wasbs://{0}@{1}.blob.core.windows.net/{2}".format(container, storage_account_name, blob_inventory_file), header='true', inferSchema='true')


Please see below how to calculate the container stats with Azure Databricks organized as follow. First is presented the code sample and after the code execution result).
Calculate the total number of blobs in the container

Calculate the total container capacity (in bytes)

Calculate t

Calculate the total container snapshots capacity (in bytes)


Calculate the total container capacity (in bytes)

Calculate the total number of blobs in the container by BlobType

Calculate the total number of blobs in the container by Content-Type

Final remarks:
Published on:
Learn moreRelated posts
Azure Storage - TLS 1.0 and 1.1 retirement
Overview TLS 1.0 and 1.1 retirement on Azure Storage was previously announced for Nov 1st, 2024, and it was postponed recently to 1 year later...
Efficient Management of Append and Page Blobs Using Azure Storage Actions
Overview In Azure Storage, Blob Lifecycle Management (BLM) allows you to automate the management of your data based on rules defined by...
[Azure AI Search] Internal Server Error when creating CMK encrypted objects
Scenario Customers follow the Microsoft doc to create CMK encrypted objects (data source, index etc.), but get the 500 Internal Serv...
Optimizing Azure Table Storage: Automated Data Cleanup using a PowerShell script with Azure Automate
Scenario This blog’s aim is to manage Table Storage data efficiently. Imagine you have a large Azure Table Storage that accumulates logs from ...
Optimizing Azure Table Storage: Automated Data Clean-up using a PowerShell script with Azure Automat
Scenario This blog’s aim is to manage Table Storage data efficiently. Imagine you have a large Azure Table Storage that accumulates logs from ...
Restoring Soft-Deleted Blobs with multithreading in Azure Storage Using C#
Blob soft delete is an essential feature that safeguards your data against accidental deletions or overwrites. By retaining deleted data for a...
Performing simple Azure Table Storage REST API operations using curl command.
The blog provides guidance to perform simple Table Storage REST API operations such as Create table, Delete Table, Insert entity, Delete entit...
Bulk delete all the old jobs from the batch account
Deleting a Job also deletes all Tasks that are part of that Job, and all Job statistics. This also overrides the retention period for Task dat...
Utilizing Azure Storage and Runbooks for scheduled automated backups of Azure SQL Databases
In this article, we are going to provide detailed steps to create a scheduled Azure SQL Database backup to storage account using automation. T...
[Azure Service Bus] JMS messages getting dead-lettered
The article discusses a problem where numerous messages end up in the dead letter queue (DLQ) when the JMS service bus consumer connects to th...