
Manually roll over a Common Name based Service Fabric cluster certificate using resources.azure.com

Applies To: Azure service fabric clusters secured with common name-based certificate. If you are trying to rollover a thumbprint-based certificate, please refer to this article
A certificate is an instrument meant to bind information regarding an entity (the subject) to their possession of a pair of asymmetric cryptographic keys, and so constitutes a core construct of public key cryptography. The keys represented by a certificate can be used for protecting data. The client and server use certificates to ensure the privacy and integrity of their communication, and also to conduct mutual authentication. In service fabric, certificates are used to provide security and for authentication.
When a Service Fabric cluster certificate is close to expiry, you need to update the certificate. Certificate rollover is simple if the cluster was Set up to use certificate based on common name (instead of thumbprint). Get a new certificate from a certificate authority with a new expiration date. Self-signed certificates are not support for production Service Fabric clusters, to include certificates generated during Azure portal Cluster creation workflow. The new certificate must have the same common name as the older certificate.
Service Fabric cluster will automatically use the declared certificate with a further into the future expiration date, when more than one valid certificate is installed on the virtual machine scale set. You need to upload a new certificate to a key vault and then install the certificate on the virtual machine scale set.
Add new certificate to key vault
Get a new certificate from a certificate authority e.g. DigiCert, GeoTrust, Comodo etc., with a later expiration date and Upload certificate in Azure Key Vault.
*Note: Please note that here we are not promoting any certificate authority, this is just for your reference.
Install the certificate on the virtual machine scale set
Before starting the process of installing the certificate on virtual machine scale set, do check the certificate issuer thumbprint of old and new certificate.
*Note: Issuer thumbprint is the thumbprint of intermediate in the certification path and not of the leaf (certificate itself). Please refer below screenshot for more clarity.

Finding the issuer thumbprint of old certificate:
Old certificate Issuer thumbprint you can check from Resource Explorer (azure.com). Please follow the steps below for checking the issuer thumbprint of old certificate:
- In the Microsoft.ServiceFabric/clusters resource, navigate to certificateCommonNames property.
- In commonNames setting you will see certificateIssuerThumbprint.
Below is the snippet of resource explorer:
"certificateCommonNames": {
"commonNames": [
{
"certificateCommonName": "[parameters('certificateCommonName')]",
"certificateIssuerThumbprint": "[parameters('certificateIssuerThumbprintList')]"
}
],
"x509StoreName": "[parameters('certificateStoreValue')]"
}
Finding the issuer thumbprint of new certificate:
For a new certificate, please install the certificate in your machine and then you can check the issuer thumbprint from certification path. Please follow the steps below to check issuer thumbprint (intermediate thumbprint) for new certificate:
- Open ‘manage user certificates’ by searching in windows search bar. A window like the screenshot below will open.
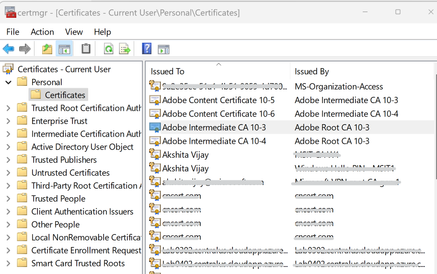
- Expand Personal and click on certificates. It will show you all the certificates installed in your current user. Choose the certificate that you want to install in your cluster by double clicking on it.
- Open that certificate -> click on certification path -> double click on intermediate (middle one from the list) -> navigate to details -> scroll to bottom and check the property thumbprint.
- You can refer to the snippet below as a reference:

Based on both the issuer thumbprints:
- If both the thumbprints are same: No need for any cluster upgrade, can directly go for installing certificate on VMSS.
- If both the thumbprints are different: In this scenario you need to add new issuer thumbprint in cluster resource. Please follow the steps below for the same.
For adding the new issuer thumbprint in cluster, please follow the below steps:
- Go to resources explorer and navigate to the cluster. Please refer to the screenshot below for complete path:

- In the Microsoft.ServiceFabric/clusters resource, navigate to certificateCommonNames property. In commonNames setting you will see certificateIssuerThumbprint. Choose Read/Write mode from the top and click on Edit to add a new value.

"certificateCommonNames": {
"commonNames": [
{
"certificateCommonName": "[parameters('certificateCommonName')]",
"certificateIssuerThumbprint": "[parameters('certificateIssuerThumbprintList')]"
}
],
"x509StoreName": "[parameters('certificateStoreValue')]"
}
- In the certificateIssuerThumbprintList add comma separated new issuerthumbprint.
For e.g., "certificateIssuerThumbprint": “thumbprintOld, thumbprintNew”
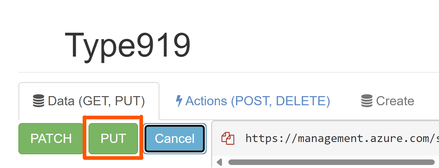
- After making the changes, click on Put on the top and wait for provisioningState to become Succeeded from Updating.
Installing certificate on VMSS:
Now you need to install the certificate on virtual machine scale set. Follow the steps below:
- Go to Resource Explorer (azure.com) and navigate to the virtual machine scale set configured for the cluster.
subscriptions
└───%subscription name%
└───resourceGroups
└───%resource group name%
└───providers
└───Microsoft.Compute
└───virtualMachineScaleSets
└───%virtual machine scale set name%
- Make changes to all the Microsoft.Compute/virtualMachineScaleSets resource definitions - Locate the Microsoft.Compute/virtualMachineScaleSets resource definition. Choose Read/Write mode from the top and click on Edit to add a new value.
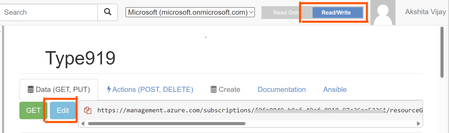
- Scroll to the "vaultCertificates": under "OSProfile". Add certificateUrl and certificateStore of new certificate.
"vaultCertificates": [
{
"certificateUrl": "[parameters('oldCertificateUrlValue')]"
"certificateStore": "[parameters('oldCertificateValue')]",
},
{
"certificateUrl": "[parameters('newCertificateUrlValue')]"
"certificateStore": "[parameters('newCertificateValue')]"
}
]
- After the above changes, we need to click on "PUT" button and wait for provisioningState to get Succeeded.

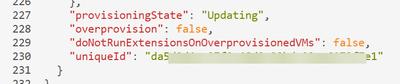
VMSS provisioning state in updating

VMSS provisioning state in Succeeded
NOTE: Make sure that you have repeated the above step for all the nodetypes (Microsoft.Compute/virtualMachineScaleSets) resource definitions in your template. If you miss one of them, the certificate will not get installed on that virtual machine scale set and you will have unpredictable results in your cluster, including the cluster going down. So double check, before proceeding further.
To check if the new certificate is deployed successfully or not. Navigate to service fabric explorer (SFX). Then expand any node and in the essential section, expand Health evaluations -> All and see the certificate expiry. It will be the later expiry of new certificate. Refer below screenshot:

*Note: Please don’t get confused by the thumbprint mentioned in the screenshot or on service fabric explorer. As even if you are using common name based certificate, that certificate will still have some thumbprint and service fabric explorer in this section shows that thumbprint only.
Published on:
Learn moreRelated posts
Azure Storage - TLS 1.0 and 1.1 retirement
Overview TLS 1.0 and 1.1 retirement on Azure Storage was previously announced for Nov 1st, 2024, and it was postponed recently to 1 year later...
Efficient Management of Append and Page Blobs Using Azure Storage Actions
Overview In Azure Storage, Blob Lifecycle Management (BLM) allows you to automate the management of your data based on rules defined by...
[Azure AI Search] Internal Server Error when creating CMK encrypted objects
Scenario Customers follow the Microsoft doc to create CMK encrypted objects (data source, index etc.), but get the 500 Internal Serv...
Optimizing Azure Table Storage: Automated Data Cleanup using a PowerShell script with Azure Automate
Scenario This blog’s aim is to manage Table Storage data efficiently. Imagine you have a large Azure Table Storage that accumulates logs from ...
Optimizing Azure Table Storage: Automated Data Clean-up using a PowerShell script with Azure Automat
Scenario This blog’s aim is to manage Table Storage data efficiently. Imagine you have a large Azure Table Storage that accumulates logs from ...
Restoring Soft-Deleted Blobs with multithreading in Azure Storage Using C#
Blob soft delete is an essential feature that safeguards your data against accidental deletions or overwrites. By retaining deleted data for a...
Performing simple Azure Table Storage REST API operations using curl command.
The blog provides guidance to perform simple Table Storage REST API operations such as Create table, Delete Table, Insert entity, Delete entit...
Bulk delete all the old jobs from the batch account
Deleting a Job also deletes all Tasks that are part of that Job, and all Job statistics. This also overrides the retention period for Task dat...
Utilizing Azure Storage and Runbooks for scheduled automated backups of Azure SQL Databases
In this article, we are going to provide detailed steps to create a scheduled Azure SQL Database backup to storage account using automation. T...
[Azure Service Bus] JMS messages getting dead-lettered
The article discusses a problem where numerous messages end up in the dead letter queue (DLQ) when the JMS service bus consumer connects to th...