
Azure Tips and Tricks - Set up an Azure Pipeline with Node.js

Set up an Azure Pipeline with Node.js
Build a Node.js application with Azure Pipelines
A great way to improve the quality of your application is to automatically build it whenever you make changes. This enables you and your team to see if the application still works and fix errors quickly. You can easily set up a build pipeline with Azure Pipelines, which is part of Azure DevOps.
In this post, we'll create an Azure Pipeline that builds and tests a Node.js application.
Prerequisites
If you want to follow along, you'll need the following:
- An Azure DevOps account. If you don't have one yet, you can start by creating a free account here
- A GitHub account. If you don't have one yet, you can create a free account here
Create an Azure Pipeline that builds and tests a Node.js application
Let's automate the build process of a Node.js app! For this example, we'll use an existing Node application from GitHub. Before we can start, we need to fork it:
- Go to https://github.com/MicrosoftDocs/pipelines-javascript and sign in with your GitHub account
- Click the Fork button at the top of the repository. This will fork the repository to your account so that we can use it in our pipeline
Now we'll create the pipeline to build and test the Node application:
- Go to the Azure DevOps portal and sign in
- Create a new project and click on it when you are done
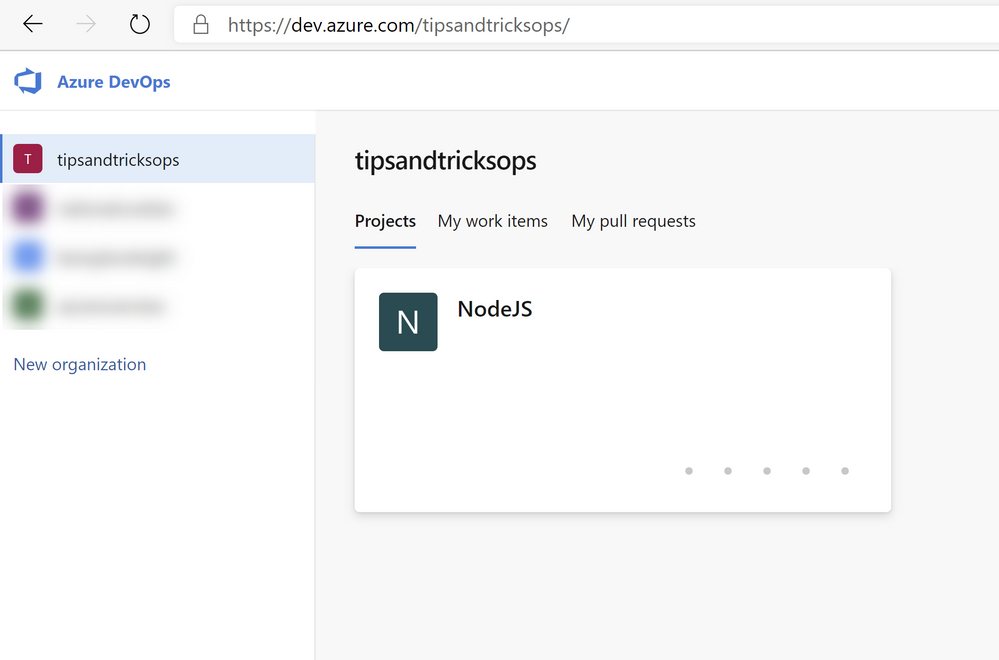
(Azure DevOps project)
- In the "Welcome to the project!" pane, click on Pipelines to start creating a new Azure Pipeline. This will start a wizard
- First, we need to indicate where our code is. It is in GitHub, so select GitHub

(Code choices in the Azure Pipelines wizard)
- Next, you'll see a list of repositories in your GitHub account. Select the forked repository that contains the sample Node.js application a. You might have to authorize Azure DevOps to use the GitHub repository. If so, click Approve & Install
- In the next step, select Node.js to configure the pipeline for Node.js

(Configuration choices in the Azure Pipelines wizard)
-
The next screen shows you the YAML code that defined the pipeline. You can learn more about YAML here. This code determines that node.js will be used and that the pipeline will perform a build. This code will only build the code and not execute any unit tests. Let's change that:
a. In the script section of the YAML code, add the following to enable the pipeline to run the unit tests in the code:npm test b. Below the scripts section, add the following code to publish the test results to the build results:
- task: PublishTestResults@2 inputs: testResultsFormat: 'JUnit' testResultsFiles: '**/TEST-*.xml'
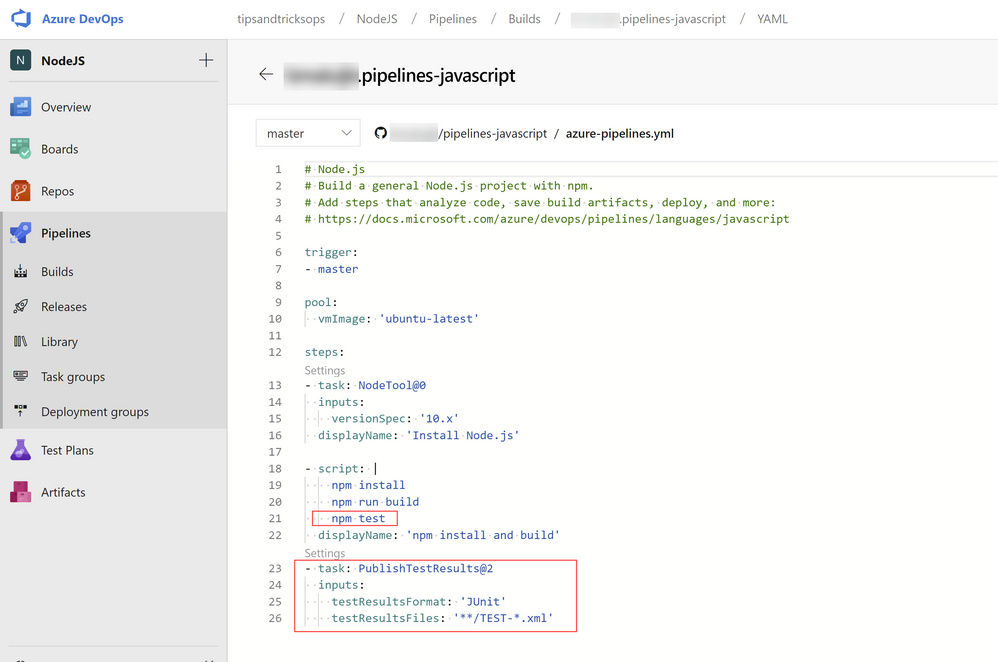
(YAML code of the Azure Pipeline)
- Now click Save and run to save the pipeline and start it. The pipeline will now start building and testing the code. When it is done, you'll see the results like in the image below:

(Results of the Azure Pipeline)
- The build was successful! In the screen of the build results, you can click the Tests tab to see the results of the Unit Tests
- In the test result screen, you can see the Unit Tests that ran (which is only one test in this case), and what the result of the run was

(Test results of the Azure Pipeline)
That's it. We have set up a pipeline that automatically builds and tests the application when changes are made to it. From here, you can set up more pipelines, like a release pipeline, that takes the build result and deploys it to a server. You can learn more about that here.
Conclusion
Setting up a Continuous Integration (CI) process, which builds your code automatically, is one of the simplest ways to increase the quality of your applications. It is very easy to set up a CI pipeline with Azure Pipelines, regardless of the programming language that you use or where your code is. To learn more, create a trial account today and go and check it out
Published on:
Learn moreRelated posts
This Month in Azure Static Web Apps | 09/2024
We are back with another edition of the Azure Static Web Apps Community! :party_popper: September was yet another month ...
GitHub Copilot for Azure: 6 Must-Try Features
As developers, we are constantly seeking tools that streamline our workflows and boost productivity. … Enter GitHub Copilot for Azure, now in ...
Responsible AI Mitigation Layers
Generative AI is increasingly being used in various kinds of systems to augment humans and infuse intelligent behavior into existing and new a...
Streamline Your Azure Workflow: Introducing GitHub Copilot for Azure in VS Code
I'm excited to announce the public preview of GitHub Copilot for Azure - a new addition to your toolkit that seamlessly integrates with G...
Build Intelligent Apps Code-First with Prompty and Azure AI
Building Generative AI applications can feel daunting for traditional app developers. What does the end-to-end applicati...
Certificación AI-900 (Fundamentos de IA) con Chicas en IA
La inteligencia artificial ha llegado para quedarse, ¡y más aún con la revolucionaria IA generativa! Para ayudar a los profesionales a especia...
Get certified with Learn Live GitHub series!
GitHub Universe is coming, and Microsoft and GitHub are partnering to offer a new special Learn Live series in Brazilian Portuguese, English a...
Certifícate con Learn Live GitHub en Español
Microsoft y GitHub se han unido para ofrecer una nueva serie especial de Learn Live en inglés y español: GitHub 2024. Del 10 al 24 de Octubre,...
Evaluating generative AI: Best practices for developers
As a developer working with generative AI, you've likely marveled at the impressive outputs your models can produce. But how do you ensure the...
Introducing Azure Product Retirement Livestreams
The Azure Retirements team, in collaboration with key partner groups, is excited t...