How to Increase Default Time-out limit for Dual-write Sessions

Problem statement:
The issue of time-outs for dual-write sessions has been noticed in a couple of scenarios.
Analysis:
A default time-out of two minutes is not adequate for Dual-write sessions.
Solution:
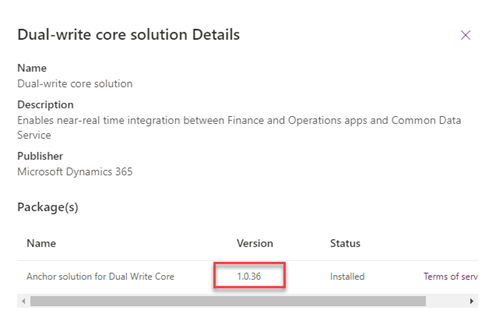
Prerequisites: Dual-write core solution (Anchor solution for Dual-write Core) version 1.0.36. and later must be installed in Dataverse.
- Log in to https://admin.powerplatform.microsoft.com/home
- Navigate to Environments
Select your Environment
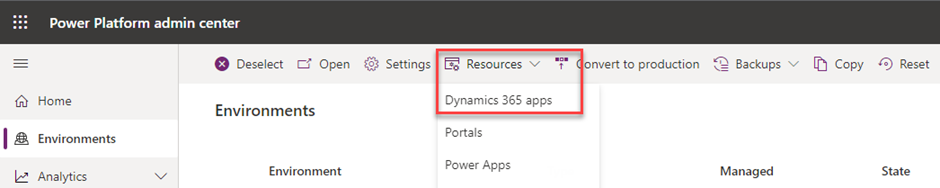
Navigate to Resources and select Dynamics 365 apps
- Select Dual-write core solution
- Click on and then select details option

- Validate version number
Lets understand first, the core of Dual-write
What is Dual-write?
Dual-write is an out-of-the-box infrastructure that allows near-real-time bidirectional data integration capability between Dataverse & Dynamics 365 Finance & Operations (ERP).
How does the data sync mechanism work in a Dual-write statement? By design, as soon as a transactions trigger gets initiated between Dataverse and D365 FO or vice versa immediately data starts getting synchronized unidirectional or bi-directional depending upon how you have set up Dual-write table maps.
Table maps are the construct that allows the mapping of Dataverse table fields with D365 FO entities fields.
Under the hood, it leverages the Odata technology with a tight coupling of transaction scope to avoid data inconsistency in both apps.
Configure the Dual-write for Developer (Tier-1) and customer-hosted hosted environment
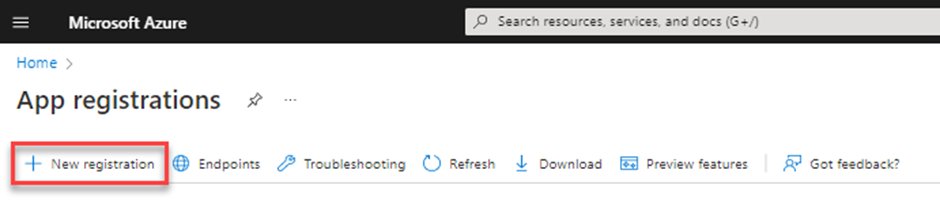
Azure Active Directory (AAD) App registration
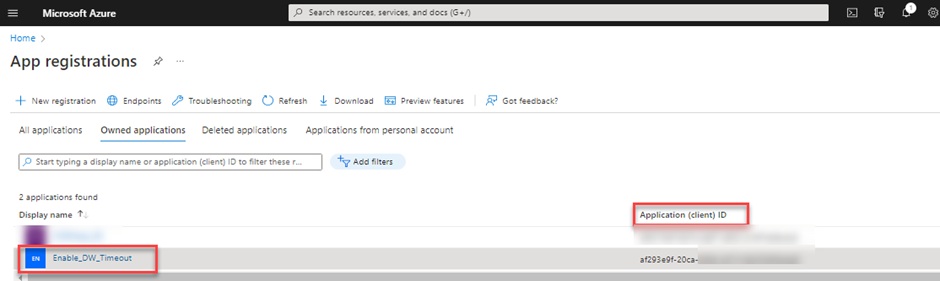
Open Azure portal and select Azure Active Directory > App registrations
- Click on New registration
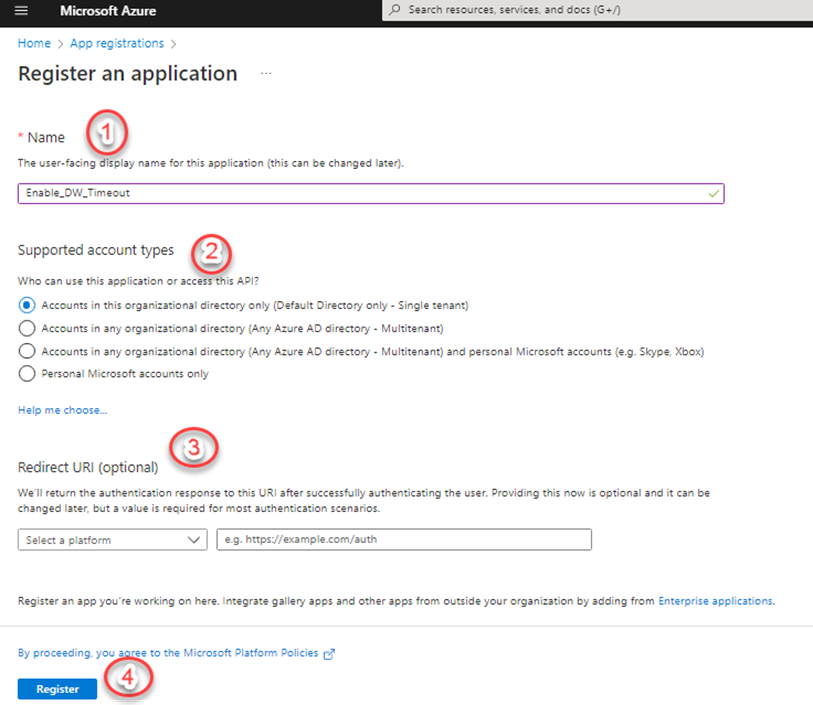
 Enter the following information:
- Name: Enter a unique name for app
- Account type : Select supported account types (single or multi-tenant)
- Redirect URI : Keep this field blank
- Copy Application (client) id value in a separate document, you will require this value later
- Navigate to newly created Azure application, select Certificates & secrets option
- Click on New client secret
- Provide description and expiration date
- Click on Add
- Copy the generated key for later use
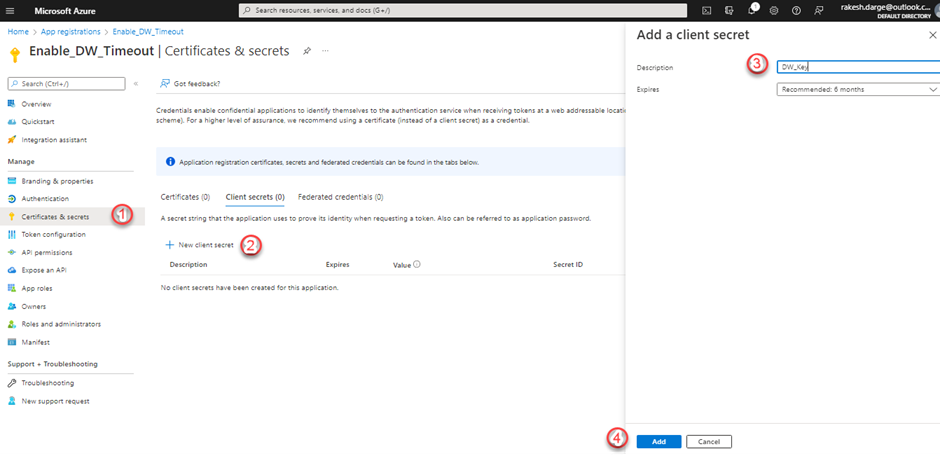
- Copy the generated key for later use

- Grant app permissions in D365 FO for Dataverse to call D365 FO apps
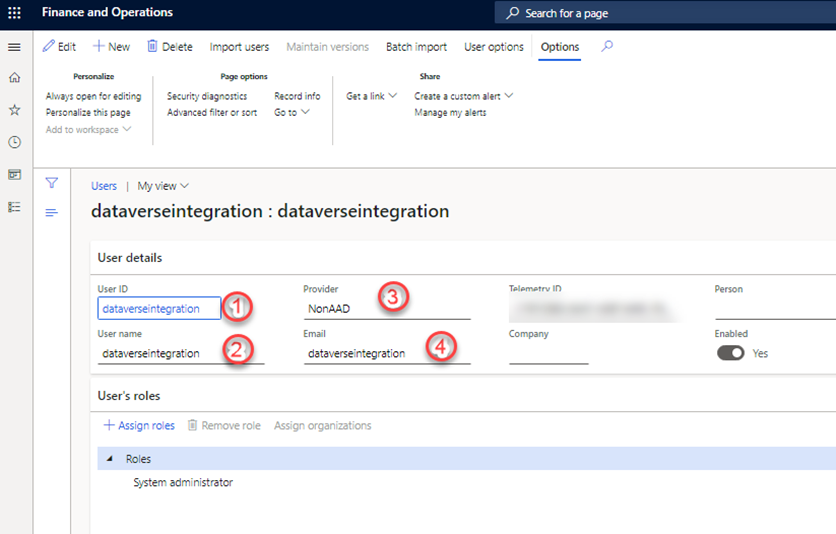
a. Navigate to D365 FO System Administration > Users > Users
b. Create new user as described in the below snap
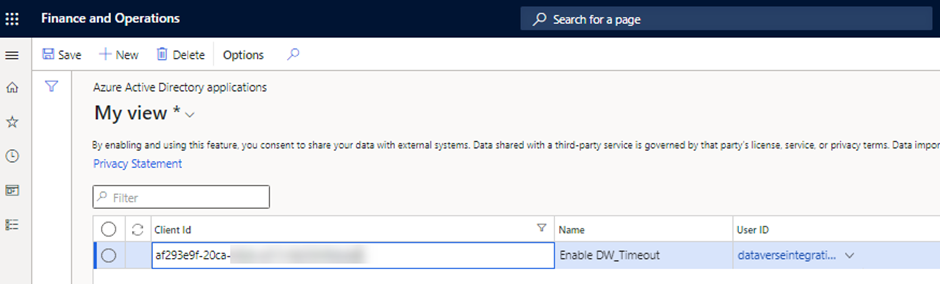
c. Navigate to System Administration Module > Setup > Azure Active Directory applications to register Dataverse
Configure the virtual entity data source
This step will allow Dataverse to connect to D365 FO instance
a. Log in to https://admin.powerplatform.microsoft.com/home
b. Navigate to Advanced Settings > Settings > Administration > Virtual Entity Data Sources
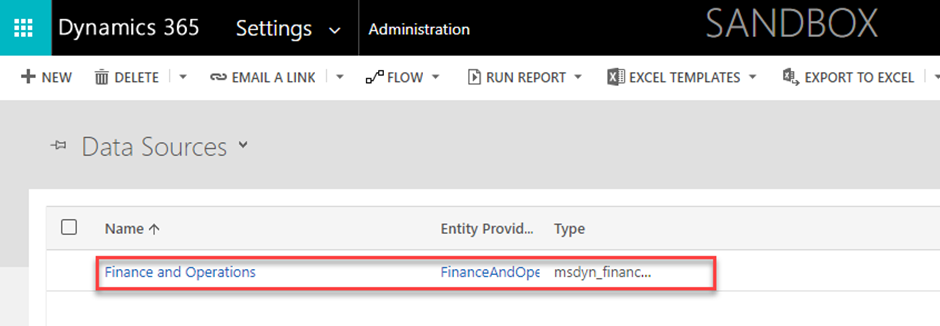
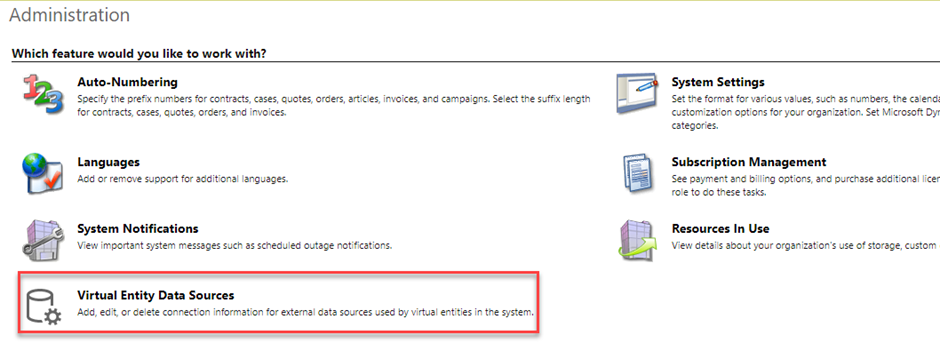 c. Select the data source finance and operations
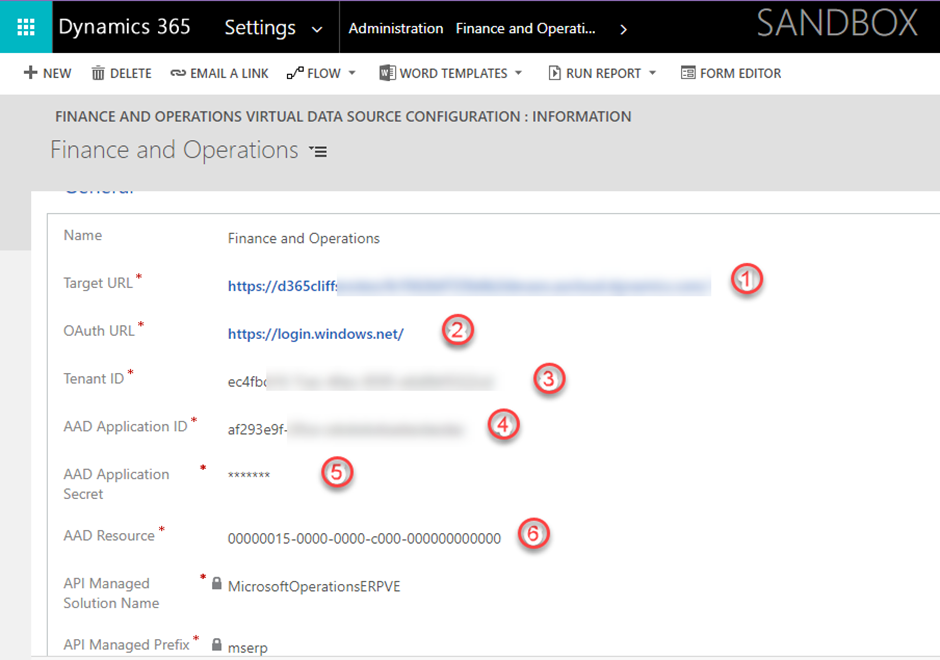
 Enter the below information:
- Target URL Enter the URL of D365 finance and operations apps.
- OAuth URL Enter https://login.windows.net/.
- Tenant ID Enter your tenant, such as ABC.com
- AAD Application ID Enter the Application ID value that you copied earlier
- AAD Application Secret Enter the secret that copied earlier
- AAD Resource Enter 00000015-0000-0000-c000-000000000000. (This value is the value for the Azure AD application that represents finance and operations. It is always constant text.
- Post-run activities
a. Stop and rerun dual-write maps
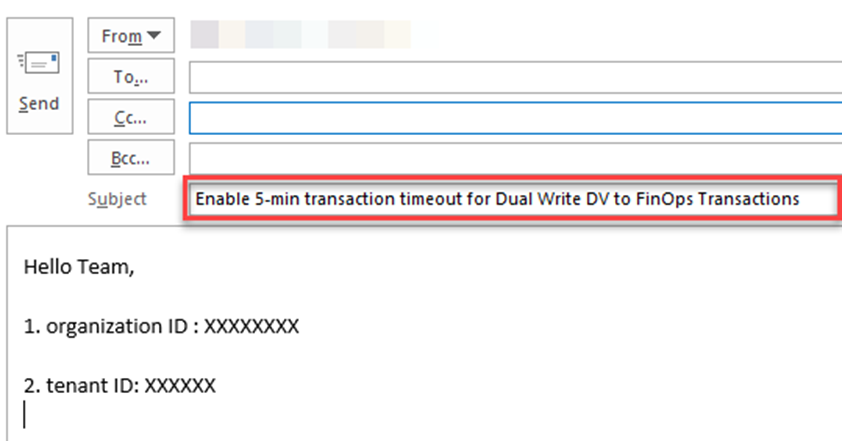
 b. Contact Microsoft's support team to open a support ticket. Enter "Enable 5-minute transaction timeouts for dual-write DV to FinOps transactions" in the title and provide the tenant ID or organization ID. Your session time-out window will be set to five minutes by Microsoft
Sandbox and production environments
Contact Microsoft's support team to open a support ticket. Enter "Enable 5-minute transaction timeouts for dual-write DV to FinOps transactions" in the title and provide the tenant ID or organization ID. Your session time-out window will be set to five minutes by Microsoft.
Conclusion
Using the above step-by-step approach, you will be able to increase the default time-out limit from 2 minutes to 5 minutes.
Thank you for Reading - Let's Connect!
Enjoy my blog? For more such awesome blog articles - follow, subscribe and let's connect on LinkedIn , Twitter ,YouTube
Stay tuned!
Published on:
Learn more