Display Omnichannel chat widget in the footer of your portal

The combination of PowerPortals, Dynamics 365 Omnichannel and Power Virtual Agents increases the level of customer engagement for customers, in this post I'm going to guide you how to add your Omnichannel chat widget that you configured to your portal.
First, below are the pre-requisites to follow the blog,
- You have at least one Portal
- Omnichannel is installed
- Power Virtual Agent bot is configured to hand of chat conversations to Omnichannel
After having the above pre-requisites done, follow the below steps,
- From the "Omnichannel admin center" model-driven application
- Go to Workstreams and create and configure a new workstream based on your channel
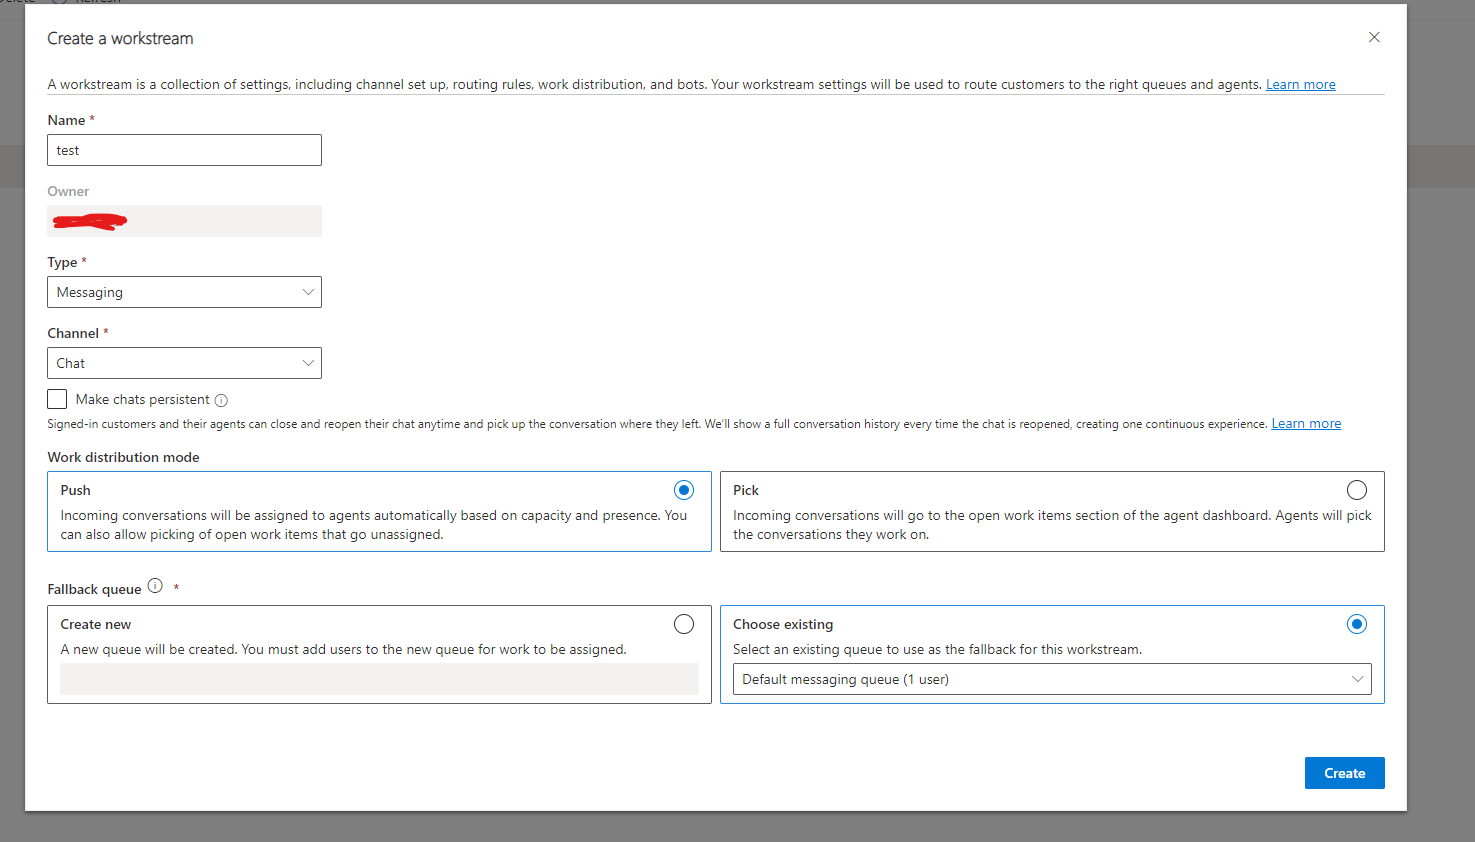
- Enter your stream record, and click on "Copy code snippet"

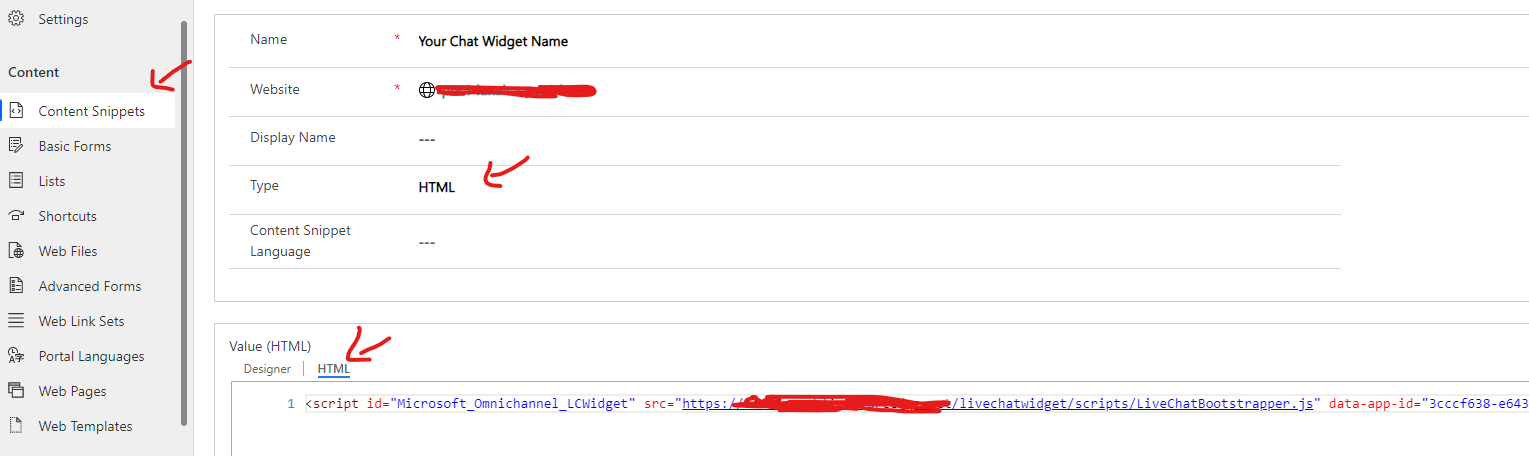
- Switch to "Portal Management" model-driven app
- Create a new content snippet and past the copied snippet from Omnichannel work steam
- Go to "Web Templates" and enter the "Footer" record

- Search for the footer tag and add the widget using the below code
{% include 'snippet' snippet_name:'Your Chat Widget Name' %}
The footer tag will look like this
<footer role="contentinfo">
  <div class="footer-top hidden-print">
    <div class="container">
      <div class="row">
        <div class="col-md-6 col-sm-12 col-xs-12 text-left">
          {% editable snippets 'About Footer' type: 'html' %}
          {% include 'snippet' snippet_name:'Your Chat Widget Name' %}
        </div>
      </div>
    </div>
  </div>
- Clear your portal cache by navigating to "<< Your portal URL >>/_services/about"
You need to be logged in to your portal with a contact that has administrator portal role
click on "Clear Cache" button
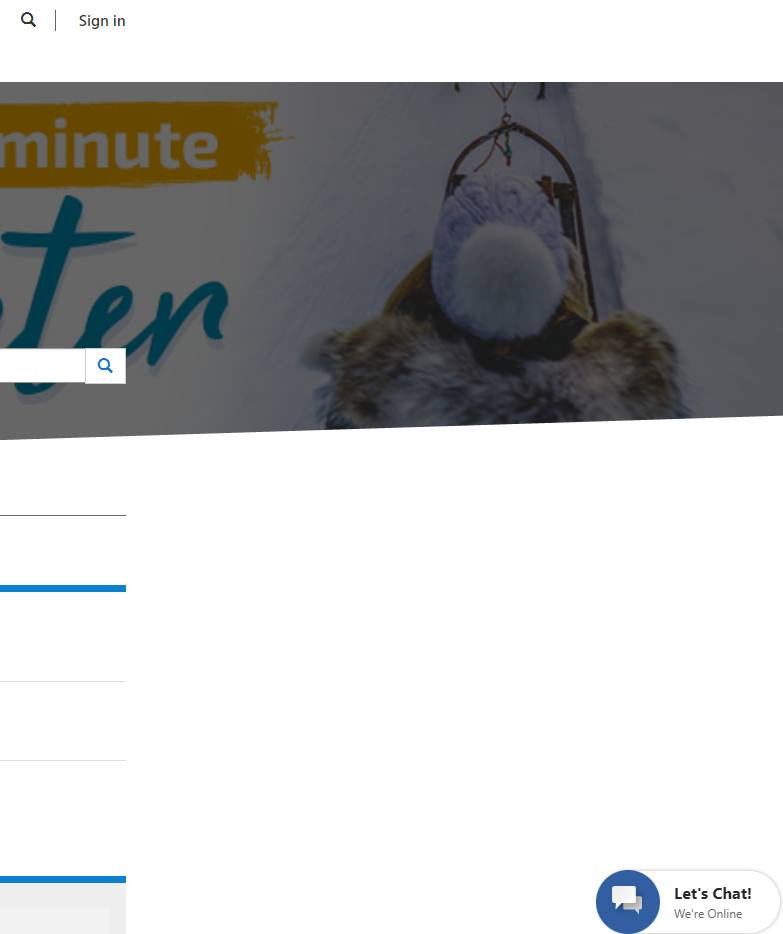
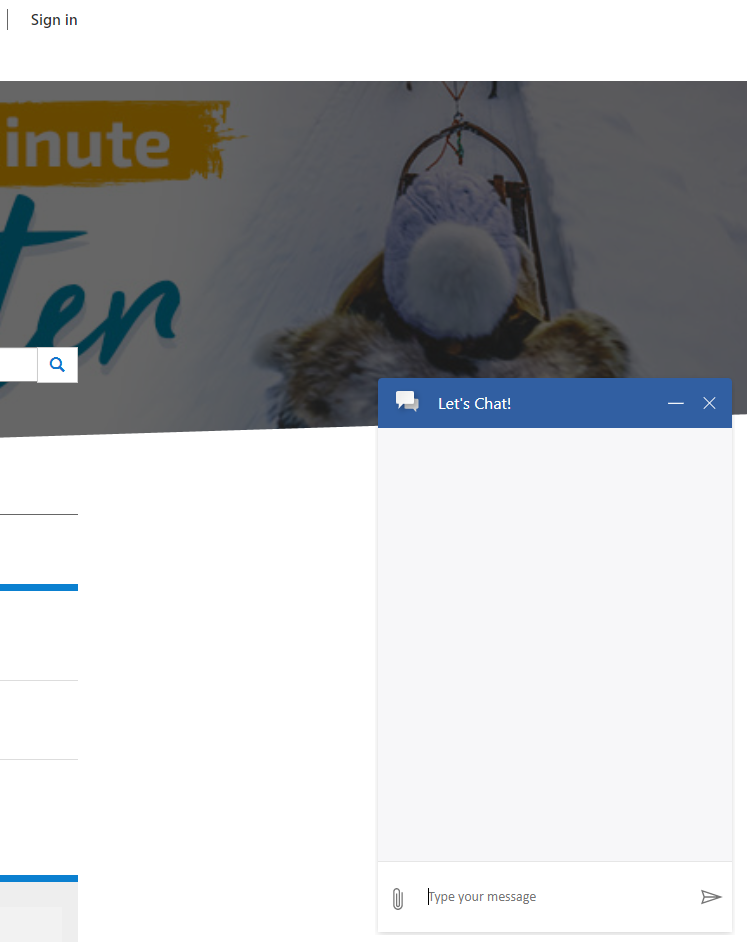
- Refresh your portal and you will see the chat widget displayed!
That's it!
You want to add it to more web templates? follow the steps from step number 5 on the web template you like.
Published on:
Learn moreRelated posts
New in Spring 2024: Map Routing and Visualization for Power Pages Portals
“Morning Jo, what is the Tea this morning?”, Josh asked as he rushed into the office. “Well, Maplytics is now available in Power Pages Portals...
Simplify Record Search in Power Pages with Natural Language Search
Power Pages makes it relatively straightforward to build business portals. However, as the amount of data grows, helping users quickly find th...
How to Backup a Microsoft Power Pages (Power Apps Portals) Website
Microsoft Power Pages (formerly known as Power Apps Portals) is a low-code platform for building secure, external-facing websites that integra...
AI-Powered Smart Form in Power Pages Part 4: Dataverse Save, Testing & Production Checklist
Inject AI metadata into hidden fields before submission, add the new_originaltext and new_aiconfidence columns to your ent...
Configure authentication with Security Agent in Power Pages
As part of the 2026 Release Wave 1, Microsoft introduced the Security Agent in Power Pages to help makers configure and improve website securi...
Add AI-Powered Search Capabilities to Your Power Pages Site
Finding information quickly is one of the most important aspects of any website. As Power Pages sites grow with knowledge articles, documentat...
AI-Powered Smart Form in Power PagesPart 3: Portal HTML & JavaScript Smart Fill Engine
The complete Power Pages page layout — AI input panel HTML, dark widget CSS, and the full JavaScript engine that maps extracted fields to your...
Microsoft Power Pages General Availability (GA): What's New in 2026
Most businesses have a portal idea sitting in a backlog somewhere. A customer self-service site. A partner hub. An employee request portal. Th...