Revolutionize Your DevOps Workflow: Integrating GitLab and AWS with OIDC
In the fast-changing cloud computing and DevOps world, security and efficiency of workflows come first. The challenge for a DevOps engineer most of the time is to integrate all platforms and services to drive operations seamlessly. One of these tasks is setting up GitLab to work with AWS, so developers can run AWS commands directly from their CI/CD pipelines. This guide will walk you through setting up a secure, functional integration between GitLab and AWS.
Use Case
Imagine you are a DevOps engineer who is asked to create a pipeline that will enable the developers to assume an AWS IAM role using GitLab’s OIDC identity provider. It will be used to execute AWS commands within GitLab CI/CD pipelines without the exposure of static credentials. The ultimate result will be an automated and secure workflow by temporary security credentials.
Demo
Step 1: Configure GitLab Identity Provider on AWS
First, we’re going to establish some trust between AWS and GitLab. It’s done by configuring GitLab as an identity provider in AWS.
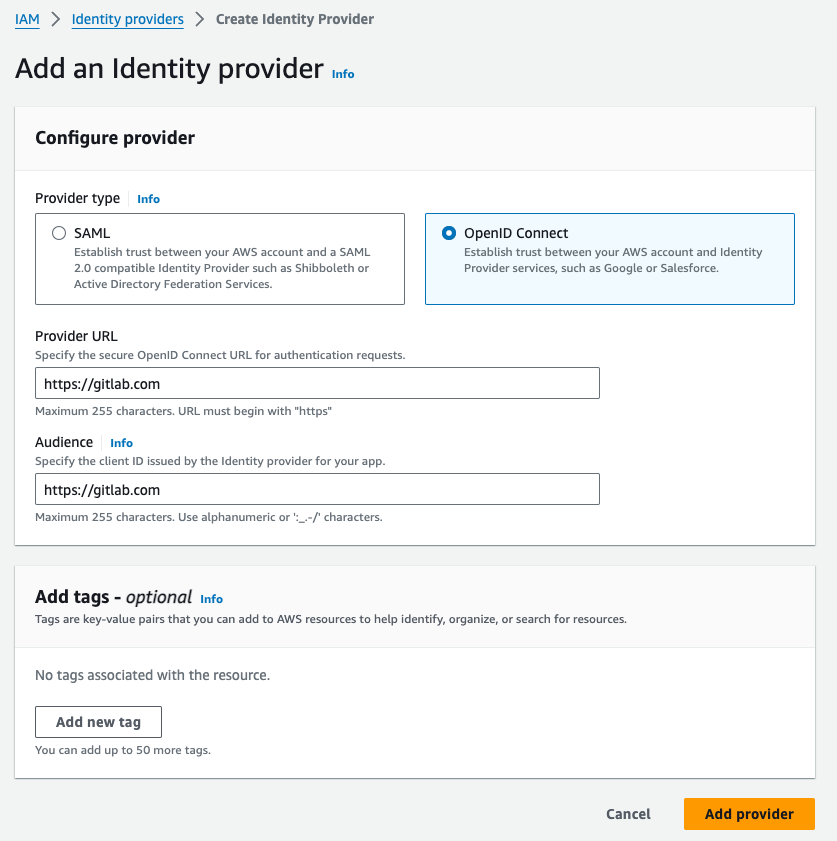
- Create an Identity Provider in AWS:
- Navigate to the IAM console in AWS.
- Select
Identity providersand chooseAdd provider. - Set the provider type to
OpenID Connectand enter theGitLab Provider URLandAudience.
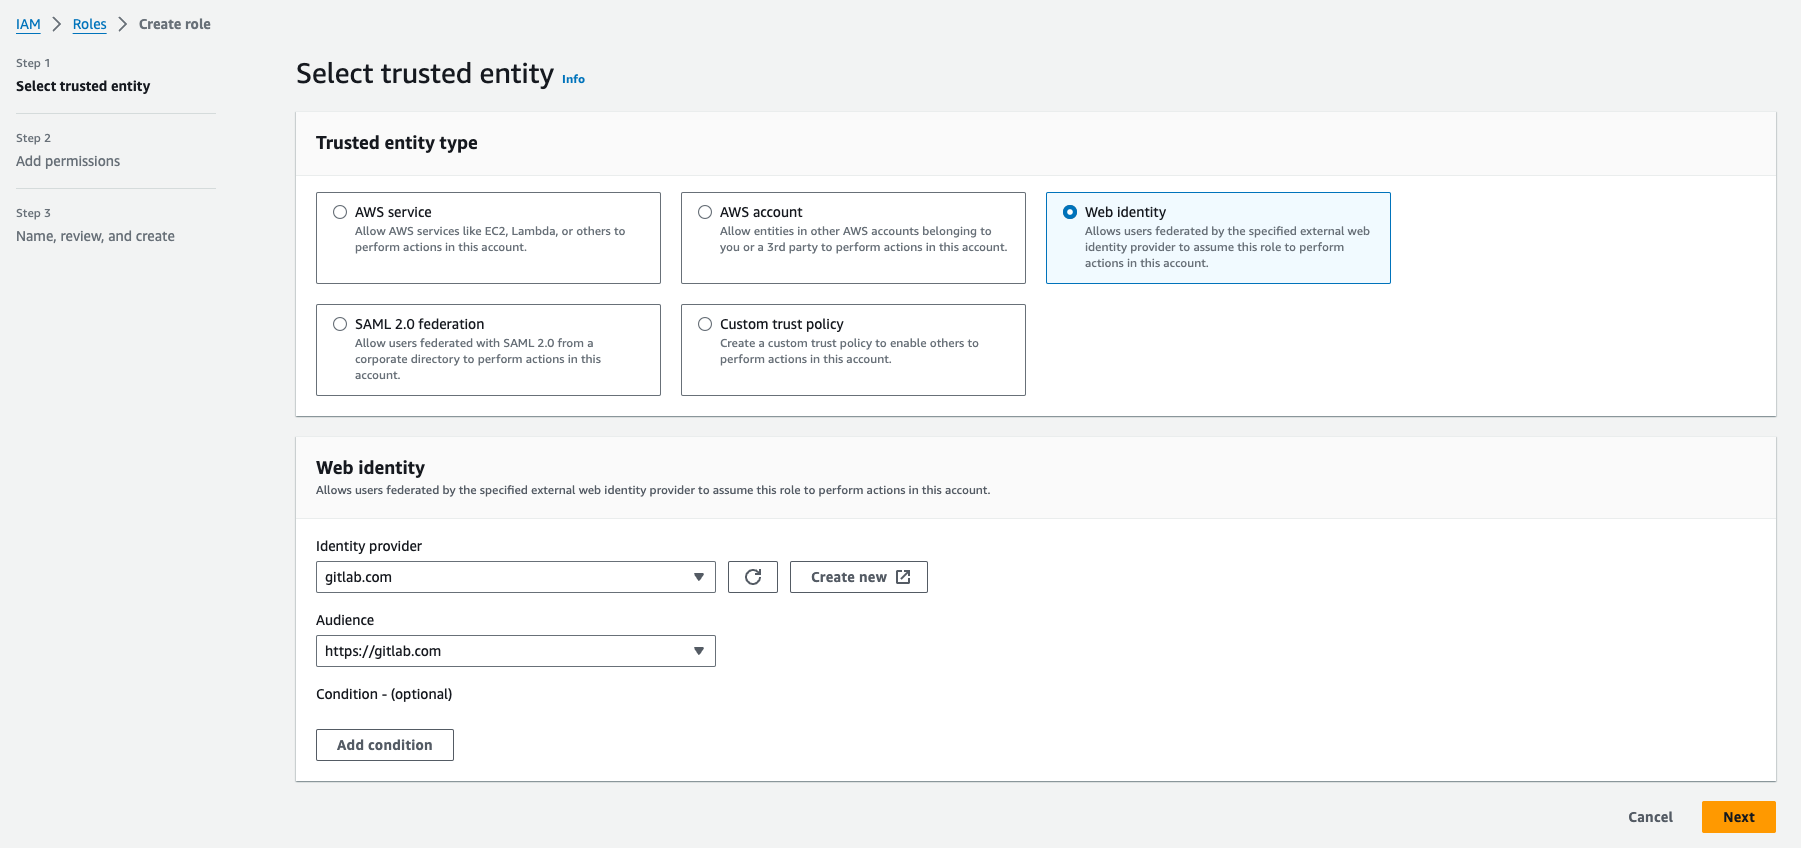
- Create a Trust Policy for a New IAM Role:
- Create a new IAM role with a trust policy that allows GitLab to assume this role. The trust policy should specify the GitLab OIDC provider and the conditions under which the role can be assumed.
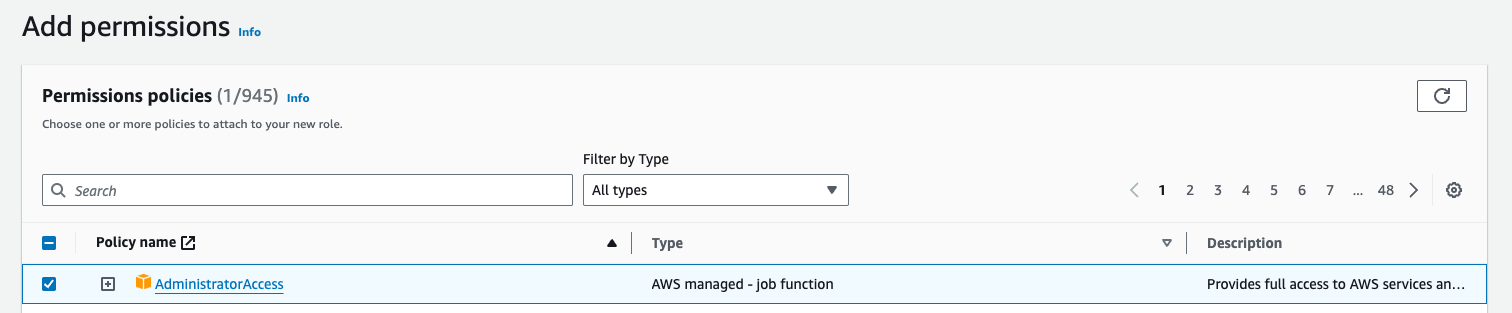
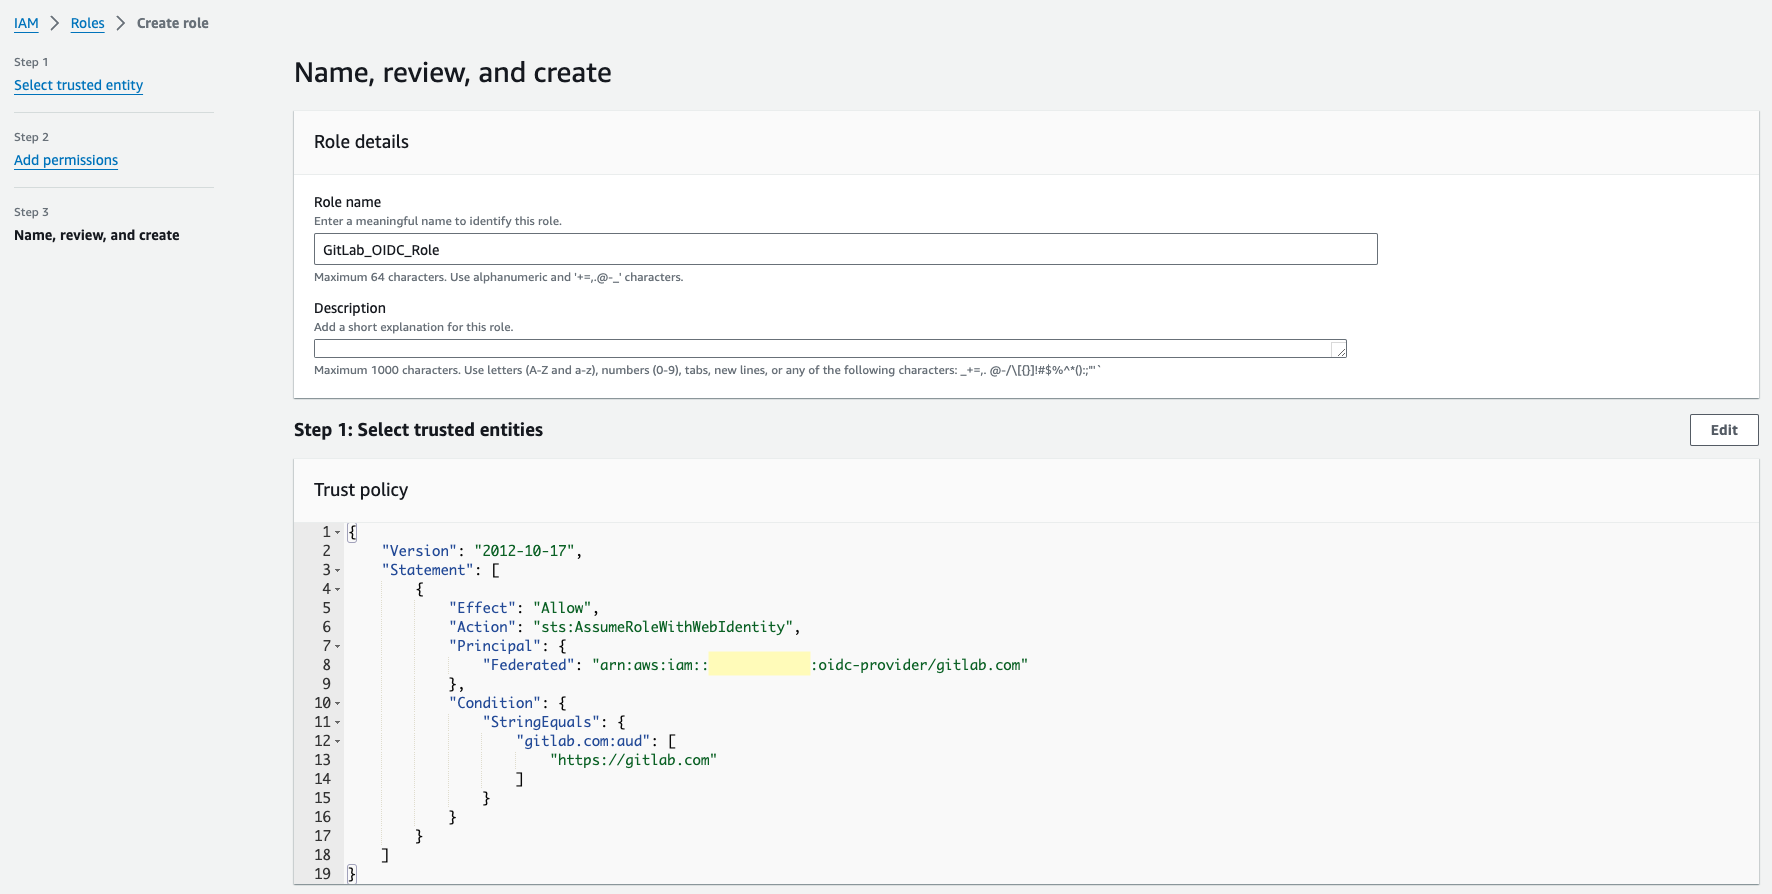
Step 2: Configure Trust Policy for a New IAM Role with Admin Access
To perform administrative actions, create an IAM role with a policy granting admin access and attach the trust policy from the previous step.
Note: For the sake of this example, I have granted my IAM role full administrative privileges. If you were to use this in production, you would want to make sure that you have in place the principle of least privilege—in other words, just assigning only those privileges needed by your particular task to avoid exposing yourself to potential security risks. Always tailor the IAM policies according to the needs of your application or process at hand.
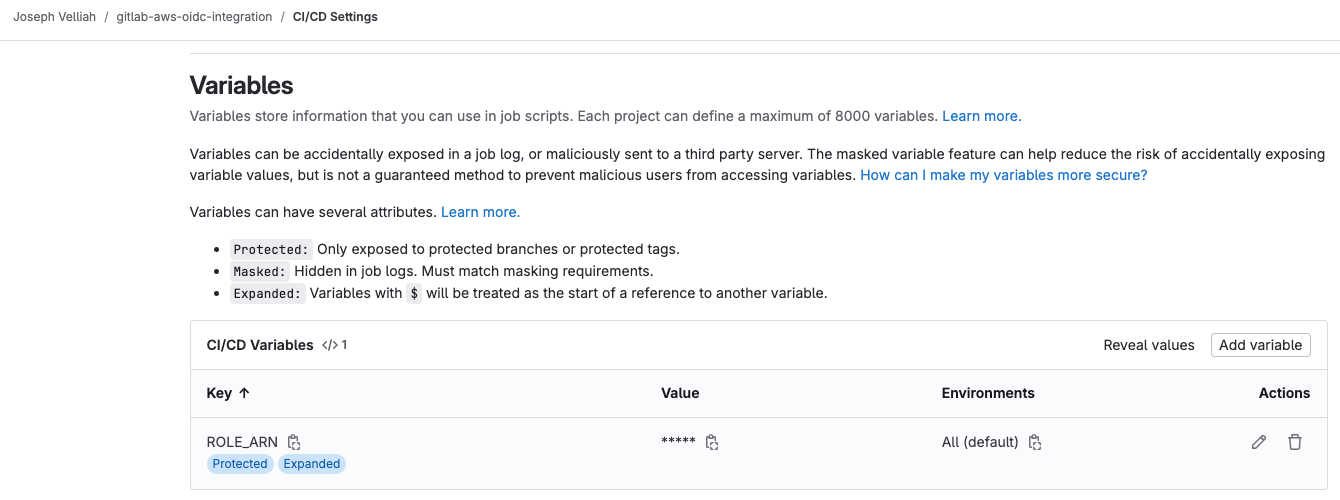
Step 3: Configure Role ARN as an Environment Variable in GitLab CI/CD Variables
- Go to your GitLab project.
- Navigate to “Settings” > “CI/CD” > “Variables.”
- Add a new variable named ROLE_ARN and set its value to the ARN of the IAM role you created.
Step 4: Configure ID Token Generation in GitLab CI Job in .gitlab-ci.yml and Configure Role Assumption in CI Job
In this section, we will go into greater detail on how you can configure the generation of ID tokens and the assumption of roles directly from within your GitLab CI job by modifying .gitlab-ci.yml.
The configuration id_tokens in .gitlab-ci.yml will instruct GitLab to generate an OIDC token scoped for GitLab, with the audience set to https://gitlab.com, which later will be utilized as the authentication medium to assume this AWS IAM role.
The test stage defines a job using the Docker image amazon/aws-cli:latest. The before_script section exports AWS credentials, assuming a role with the generated OIDC token. It sets up the environment so that AWS CLI commands will run using temporary credentials.
--role-arn ${ROLE_ARN}: Specifies the ARN of the role to be assumed.
--role-session-name "GitLabRunner-${CI_PROJECT_ID}-${CI_PIPELINE_ID}": Creates a unique session name using the project and pipeline IDs.
--web-identity-token ${GITLAB_OIDC_TOKEN}: Uses the OIDC token generated by GitLab.
--duration-seconds 3600: Sets the duration for the assumed role session.
--query 'Credentials.[AccessKeyId,SecretAccessKey,SessionToken]' --output text: Extracts and exports the temporary security credentials (access key, secret access key, session token).
The setup idea here is to make sure that your GitLab CI jobs are able to communicate securely with AWS services using temporary credentials through an assumed role, without having static credentials in your pipeline for the same job.
Significance of Using amazon/aws-cli:latest Docker Image
In this step, we’ll be using the amazon/aws-cli:latest Docker image from Docker Hub. This image is provided with the AWS CLI out of the box, which means running AWS commands is quite simple without installing anything extra. It saves not only time but also gives a completely predictable environment for your CI jobs to hold all the appropriate tools.
stages:
- test
image:
name: amazon/aws-cli:latest
entrypoint: [""]
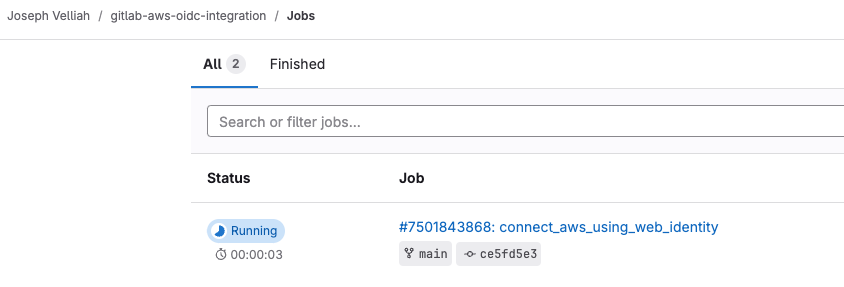
connect_aws_using_web_identity:
id_tokens:
GITLAB_OIDC_TOKEN:
aud: https://gitlab.com
stage: test
before_script:
- >
export $(printf "AWS_ACCESS_KEY_ID=%s AWS_SECRET_ACCESS_KEY=%s AWS_SESSION_TOKEN=%s"
$(aws sts assume-role-with-web-identity
--role-arn ${ROLE_ARN}
--role-session-name "GitLabRunner-${CI_PROJECT_ID}-${CI_PIPELINE_ID}"
--web-identity-token ${GITLAB_OIDC_TOKEN}
--duration-seconds 3600
--query 'Credentials.[AccessKeyId,SecretAccessKey,SessionToken]'
--output text))
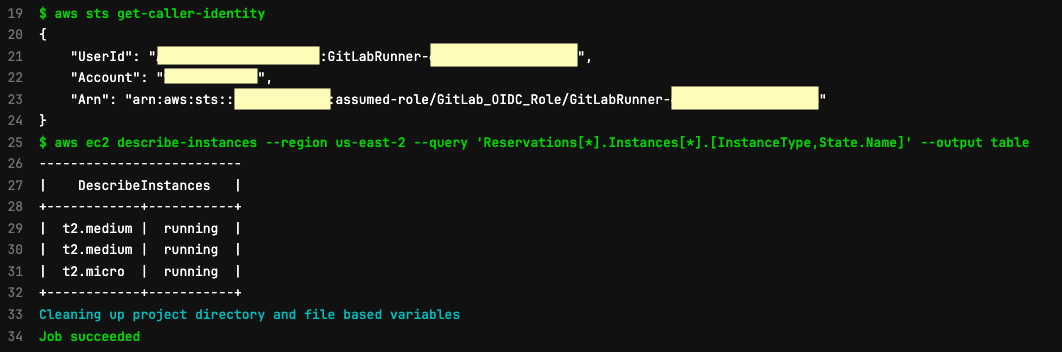
Step 5: Run AWS Command Using Assumed Role’s Temporary Credentials
In the GitLab job script, you can now run AWS commands using the temporary credentials obtained by assuming the role.
  script:
    - aws sts get-caller-identity
    - aws ec2 describe-instances --query 'Reservations[*].Instances[*].[InstanceType,State.Name]' --output table
Conclusion
This way, you can integrate GitLab with AWS over OIDC securely, allowing your CI/CD pipelines to assume IAM roles for execution of AWS commands without static credentials. All of this setup improves security with temporary credentials and ensures smooth automated processes for your Development Team.
Published on:
Learn more