
How to use powerapps-modals
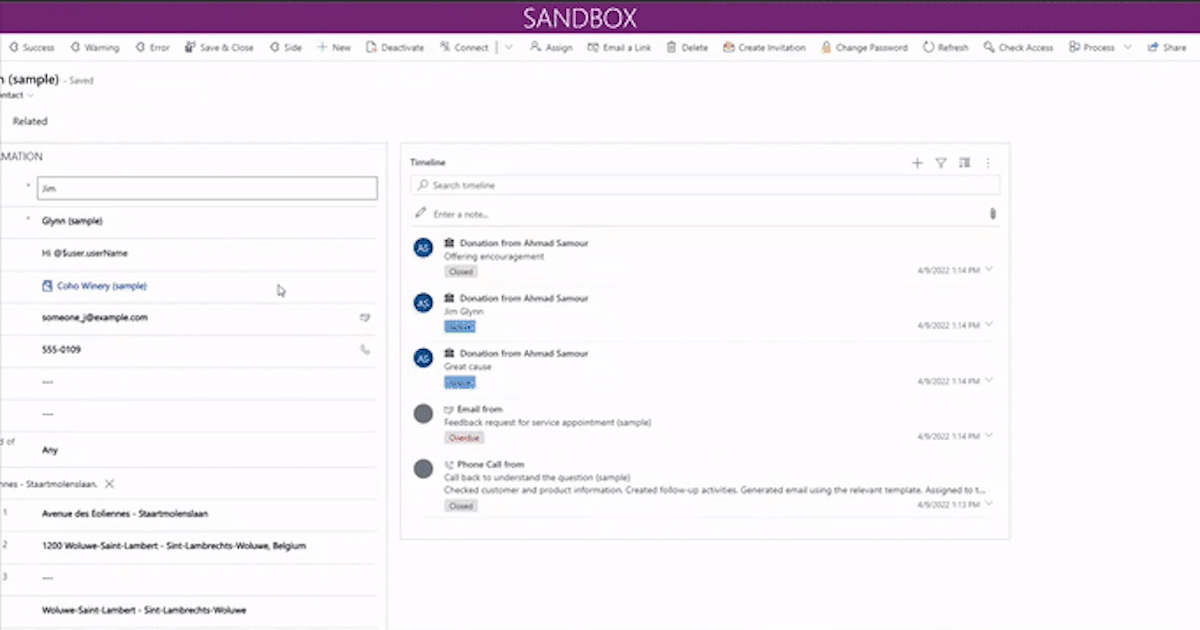
In this blog, I'm writing some examples that power-apps modals can be used.
🧑💻 Source code
Main function to call modals here
function displayPopup(modalObject: any, width, height, position) {
  var pageInput: Xrm.Navigation.PageInputHtmlWebResource = {
    pageType: "webresource",
    webresourceName: "vite_/viteapps/pages/modals.html",
    data: JSON.stringify(modalObject),
  };
  var navigationOptions: Xrm.Navigation.NavigationOptions = {
    target: 2, // 2 is for opening the page as a dialog.
    width: width, // default is px. can be specified in % as well. 400
    height: height, // default is px. can be specified in % as well. 500
    position: position, // Specify 1 to open the dialog in center; 2 to open the dialog on the side. Default is 1 (center). 1
    title: "Record activation modal", //change the title here, recommended to enter title here
  };
  Xrm.Navigation.navigateTo(pageInput, navigationOptions).then(
    function success(returnedValues) {
      console.log(returnedValues);
    },
    function error(e) {
      // Handle errors
    }
  );
}
Success modal with dropdown input
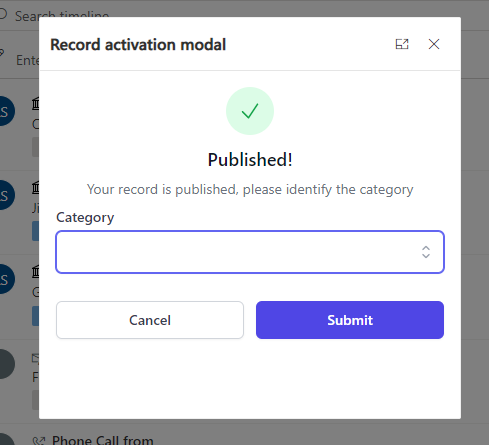
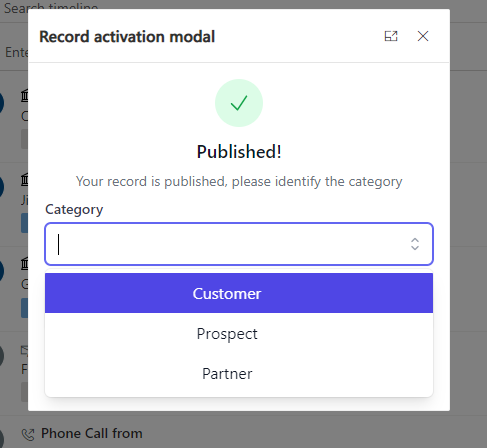
1- Json object
 {
    icon: "success",
    labels: [
      { text: "Published!", type: "h1" },
      {
        text: "Your record is published, please identify the category",
        type: "h2",
      },
    ],
    inputs: [
      {
        id: "choiceexample",
        label: "Category",
        type: "choice",
        options: [
          { id: "opt1", label: "Customer" },
          { id: "opt2", label: "Prospect" },
          { id: "opt3", label: "Partner" },
        ],
      },
    ],
    buttons: [
      {
        id: "button-cancel", //used to know what button was clicked, retunred with modal return object
        label: "Cancel",
        type: "white", //blue //red
      },
      {
        id: "button-submit",
        label: "Submit",
        type: "blue",
      },
    ],
  }
2- Call from JS
displayPopup(yourJsonObject, 400, 400, 1); //width & height 400px, and 1 is the position as a popup
Alert confirmation modal
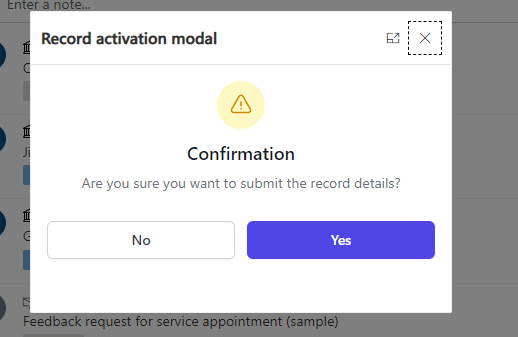
1- Json object
{
    icon: "warning",
    labels: [
      { text: "Confirmation", type: "h1" },
      {
        text: "Are you sure you want to submit the record details?",
        type: "h2",
      },
    ],
    buttons: [
      {
        id: "button-cancel", //used to know what button was clicked, returned with modal return object
        label: "No",
        type: "white", //blue //red
      },
      {
        id: "button-submit",
        label: "Yes",
        type: "blue",
      },
    ],
  }
2- Call from JS
displayPopup(yourJsonObject, 400, 300, 1); //width 400px & height 300px, and 1 is the position as a popup
Error dialog with Radio buttons
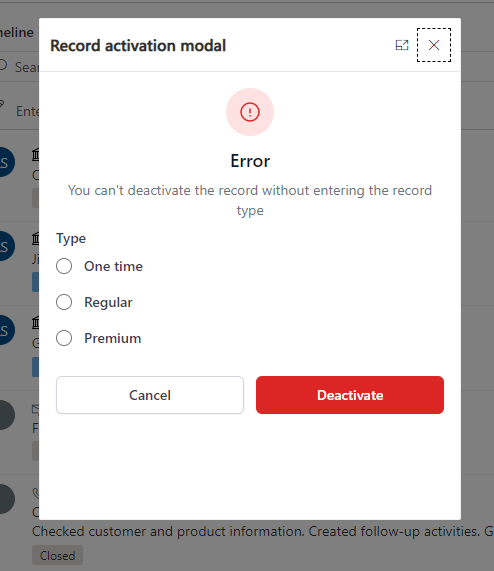
1- Json Object
{
    icon: "error", //warning //error
    labels: [
      { text: "Error", type: "h1" },
      {
        text: "You can't deactivate the record without entering the record type",
        type: "h2",
      },
    ],
    inputs: [
      {
        id: "radioexample",
        label: "Type",
        type: "radio",
        options: [
          { id: "opt1", label: "One time" },
          { id: "opt2", label: "Regular" },
          { id: "opt3", label: "Premium" },
        ],
      },
    ],
    buttons: [
      {
        id: "button-cancel", //used to know what button was clicked, returned with modal return object
        label: "Cancel",
        type: "white", //blue //red
      },
      {
        id: "button-submit",
        label: "Deactivate",
        type: "red",
      },
    ],
  }
2- Call from JS
displayPopup(yourJsonObject, 400, 500, 1);//400px width, 500px height, postition 1 for render as popup
Side dialog with multiple inputs
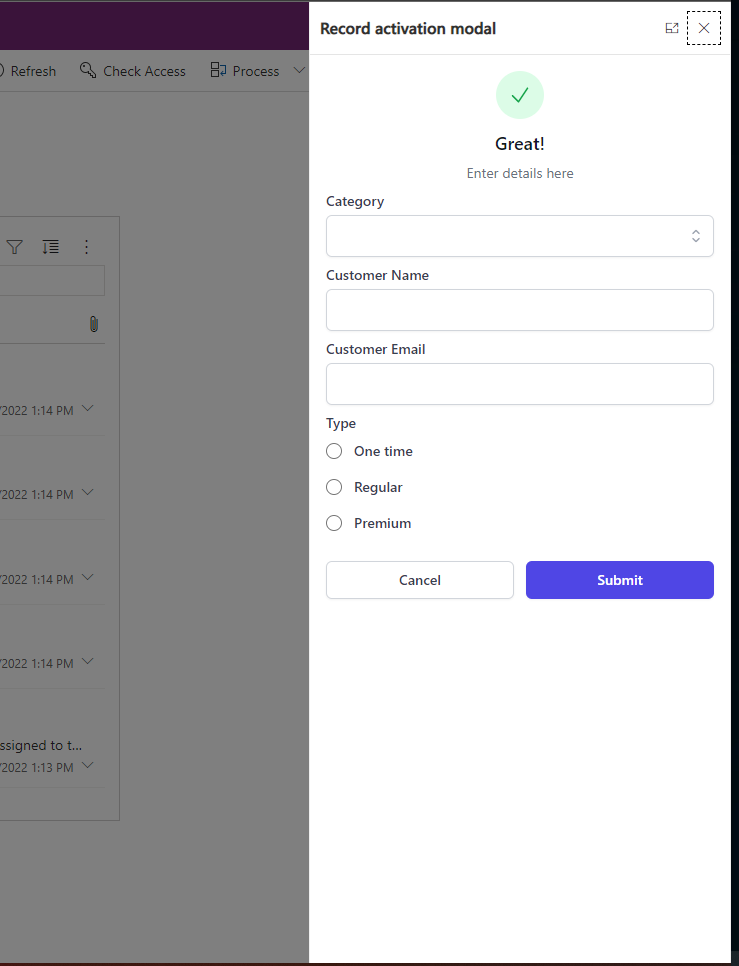
1- Json Object
{
    icon: "success",
    labels: [
      { text: "Great!", type: "h1" },
      {
        text: "Enter details here",
        type: "h2",
      },
    ],
    inputs: [
      {
        id: "choiceexample",
        label: "Category",
        type: "choice",
        options: [
          { id: "opt1", label: "Customer" },
          { id: "opt2", label: "Prospect" },
          { id: "opt3", label: "Partner" },
        ],
      },
      {
        id: "customername", //used to get the value when the modal object is returned
        label: "Customer Name",
      },
      {
        id: "customeremail",
        label: "Customer Email",
      },
      {
        id: "radioexample",
        label: "Type",
        type: "radio",
        options: [
          { id: "opt1", label: "One time" },
          { id: "opt2", label: "Regular" },
          { id: "opt3", label: "Premium" },
        ],
      },
    ],
    buttons: [
      {
        id: "button-cancel", //used to know what button was clicked, returned with modal return object
        label: "Cancel",
        type: "white", //blue //red
      },
      {
        id: "button-submit",
        label: "Submit",
        type: "blue",
      },
    ],
  }
2- Cal from JS
displayPopup(yourJsonObject, 400, "100%", 2);//Width 400px, height 100% of the height page(becomes responsive) and 2 as position to render it on the side of the page
Published on:
Learn moreRelated posts
Alert Control
Intro Use Alerts to create non-intrusive alerts that do not interrupt the user. For installation follow the link here Parameters Title The t...
Alert Control
Intro Use Alerts to create non-intrusive alerts that do not interrupt the user. For installation follow the link here Parameters Title The t...
Improve site speed in PowerPages
What is CDN? In short, Content Delivery Network (CDN) caches your public assets of your site in distributed servers, so if you have a website ...
Improve site speed in PowerPages
What is CDN? In short, Content Delivery Network (CDN) caches your public assets of your site in distributed servers, so if you have a website ...
Advanced Text Area
Intro Advanced Text Area is a control that speeds up creating records. Why advanced? The control can be configured to let users attach files ...
Advanced Text Area
Intro Advanced Text Area is a control that speeds up creating records. Why advanced? The control can be configured to let users attach files ...
Radio Group
Intro Radio group control is a control that represents single select options in different radio representations For installation follow the l...
Radio Group
Intro Radio group control is a control that represents single select options in different radio representations For installation follow the l...
Combo Box Control
Intro ComboBox control is an auto-complete dropdown where users are able to search and navigate between options. For installation follow the ...
Combo Box Control
Intro ComboBox control is an auto-complete dropdown where users are able to search and navigate between options. For installation follow the ...