This is the third post in a series of Automating SharePoint Integration with Dataverse using Power Automate. You can check out the other posts via these links (
Part 1,
Part 2,
Part 4,
Part 5,
Part 6,
Part7,
Part 8)
In
my first post, I have explained how to automatically create the SharePoint Document Location using the cloud flow when a new row is added to the Dataverse/Dynamics 365 table. But if you want to automatically create the folder for the tables related to a specific Account or Contact, you need a few additional steps to create the subfolders under the Account/Contact folder.
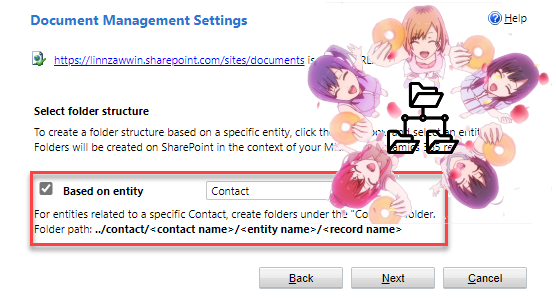
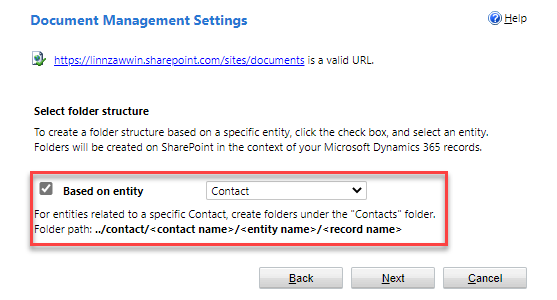
In this post, you will learn about how to automatically create the SharePoint Document Location as a subfolder under the related Account/Contact folder. The SharePoint folder of the tables related to a specific Account/Contact are created as the subfolders under the Account/Contact folder when the Document Management Settings is configured as below and either Account or Contact is chosen to be based on.
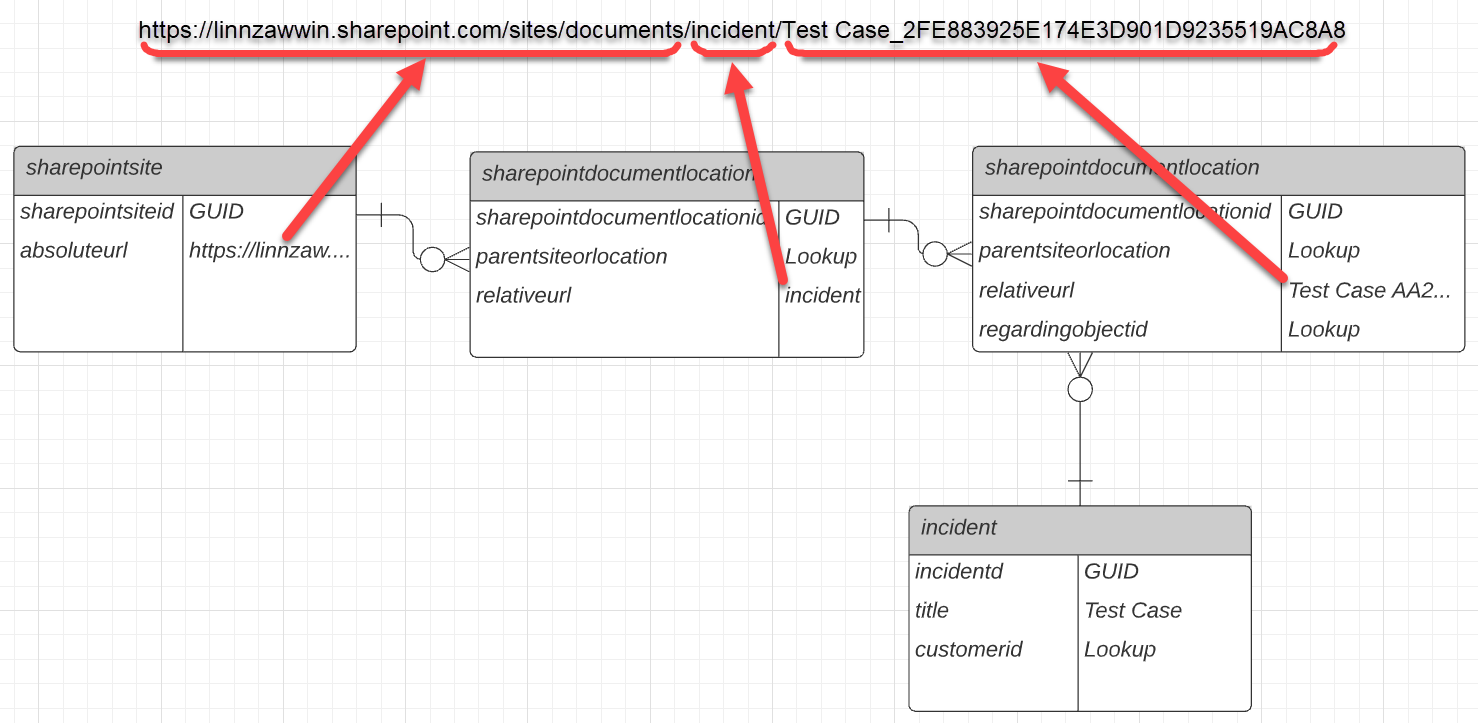
Before we jump into creating the cloud flow for this solution, I would like to explain a little bit about the folder structure based on a specific Account/Contact. As an example, I will use the Case table related to the Contact table (via Customer lookup) for the following ERD as well as the cloud flow below but it can be applied to any other table with document management enabled and related to Account or Contact.

The diagram is similar to
the one in my first post but the there are two more additional
Document Locations for the
Case in this diagram. Since the folder structure is ../contact/«contact name»/«table logical name»/«row name», the SharePoint folder for the
Case is created under
incident folder under the SharePoint folder for the
Contact. Since the Relative URL of the
Document Location does not contain "/" character, each folder name between two forward slashes "/«folder name»/" need to be created as the
Document Location. Since the
incident folder is not related to any specific row,
regardingobjectid lookup for that
Document Location is empty.
In the second scenario, the
Case is related to the
Account (instead of
Contact) or if the
Customer lookup of the
Case is empty. When the
Document Location is created for this scenario, the SharePoint folder for the
Case is created under the root SharePoint document library with the table logical name "incident" like a normal SharePoint folder structure that is not based on a specific table. (Technically, a
Case cannot be created with an empty
Customer lookup but it is possible for the other
Contact lookup on the other tables).
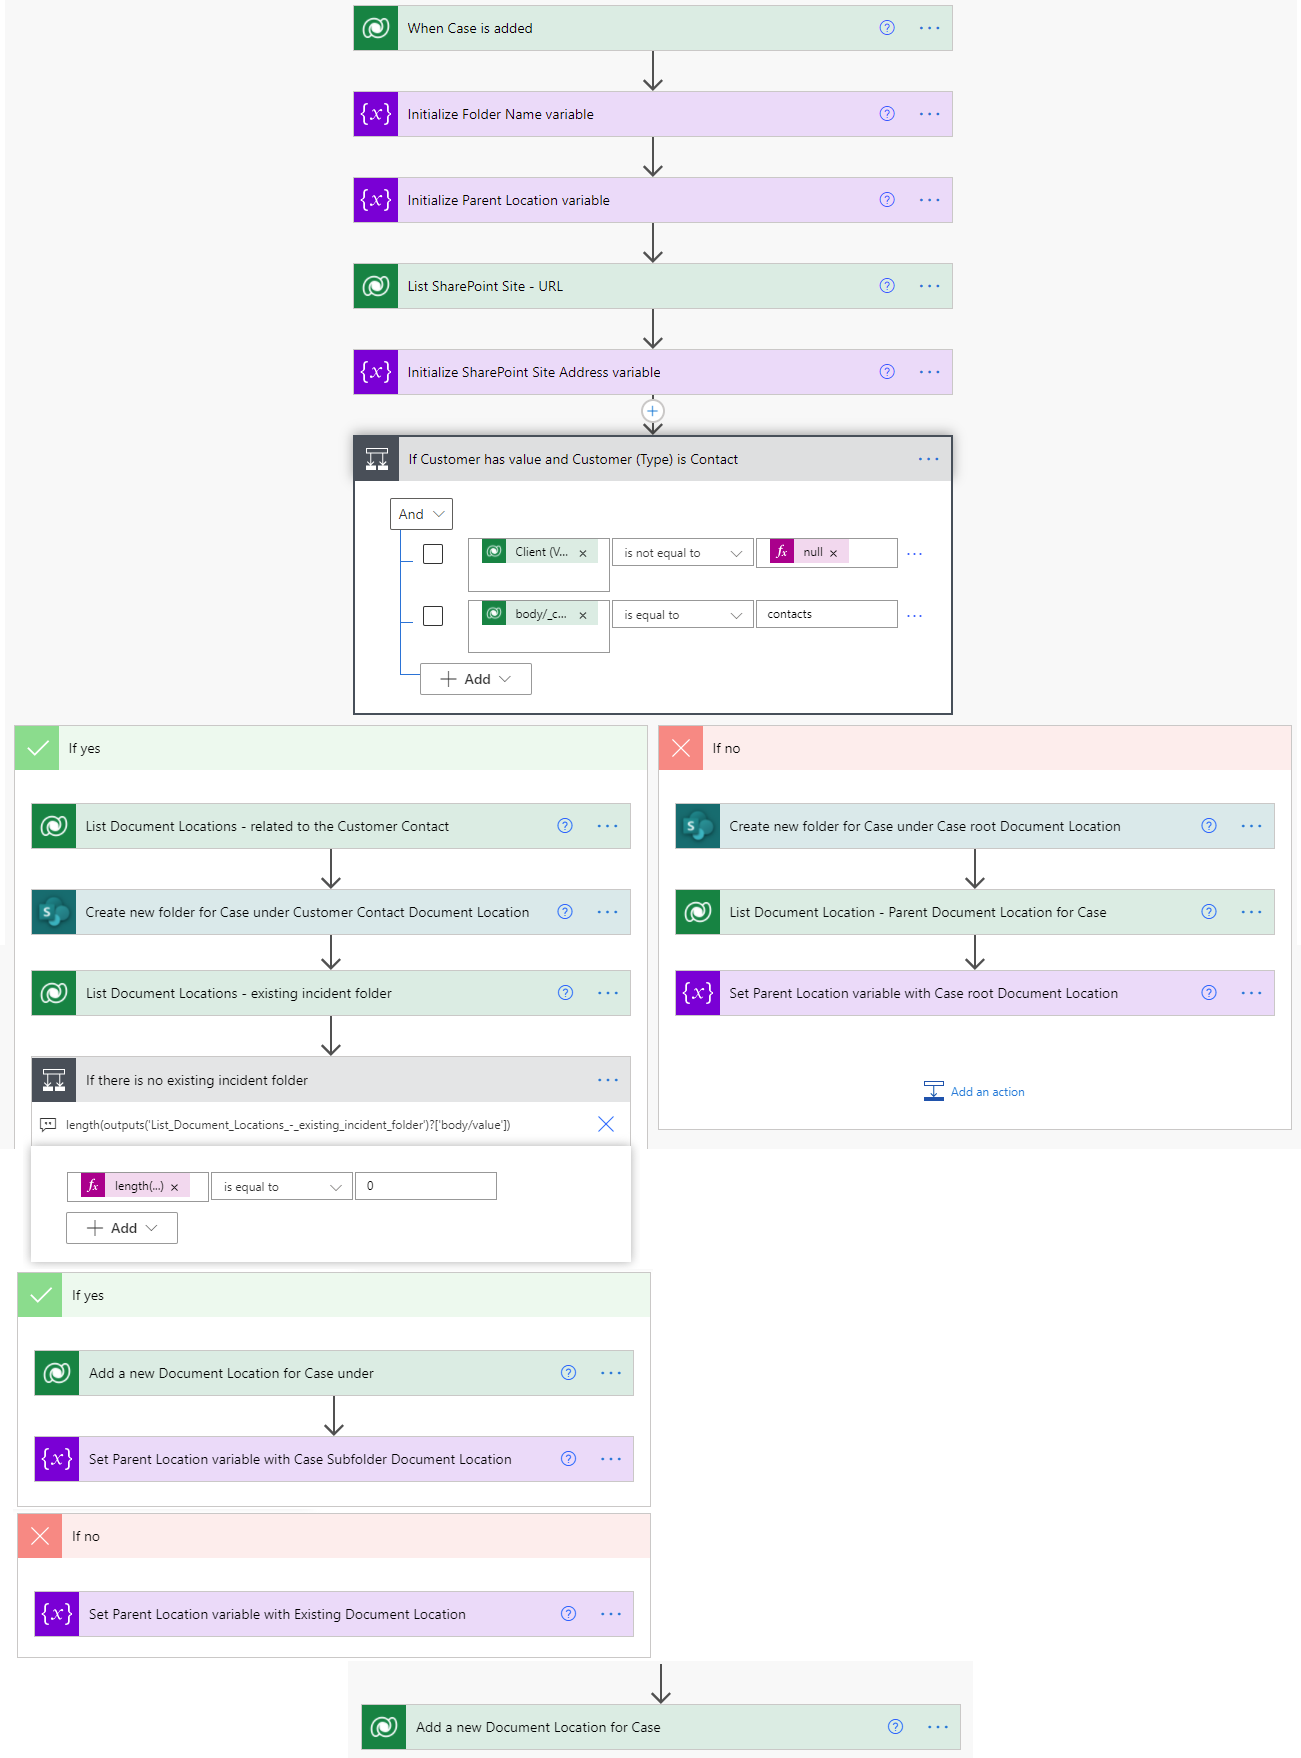
These are all the steps included in the cloud flow for this solution.
The trigger is just on Create of the Case. The folder name is initialised as a variable with the format of «case title»_«incidentid in uppercase without '-'»
toUpper(replace(triggerOutputs()?['body/incidentid'], '-', ''))
Parent Location variable is to store the Document Location GUID to set as the parent for the case folder in the last step.
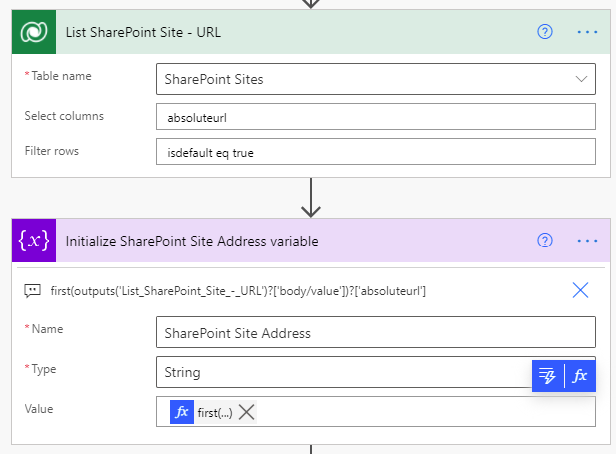
The next step is to get the URL of the SharePoint site so that the Site Address can be dynamically populated and deployed to different environments without having to be changed. The site URL is then, set to the variable since it will be used in a couple of places.
first(outputs('List_SharePoint_Site_-_URL')?['body/value'])?['absoluteurl']
This is for the first scenario where the SharePoint folder for the Case is created as a subfolder under the related Contact folder. The flow will run these actions when the Customer lookup (customerid) is not equal to Null and the type of the customerid is "contacts". For checking the type of the Customer lookup, you need to use the following expression instead of choosing the
Customer (Type) from the dynamic value.
triggerOutputs()?['body/_customerid_type']
The output of the trigger is different from the Get a Row by ID or List Rows actions. Read
Alex Shlega's blog post for more details.
First of all, retrieve the Document Location of the Contact related to the Customer lookup value. Then, use the relativeurl from the retrieved Document Location to create the SharePoint folder under the Contact library. In this step, populate the Site Address parameter with the SharePoint Site Address variable.
first(outputs('List_Document_Locations_-_related_to_the_Customer_Contact')?['body/value'])?['relativeurl']
Then, List Rows action to retrieve the existing "incident" Document Location under the specific Contact. If there is no existing one, create the Document Location for the "incident" folder under the Contact SharePoint folder by setting the Parent Location with the result from the step above. This Document Location is not related to any particular data so that the Regarding lookup will be empty. Set the GUID of the newly created Document Location in this step into the Parent Location variable.
first(outputs('List_Document_Locations_-_related_to_the_Customer_Contact')?['body/value'])?['sharepointdocumentlocationid']
If there is an existing Document Location, set the Parent Location variable with retrieved value.

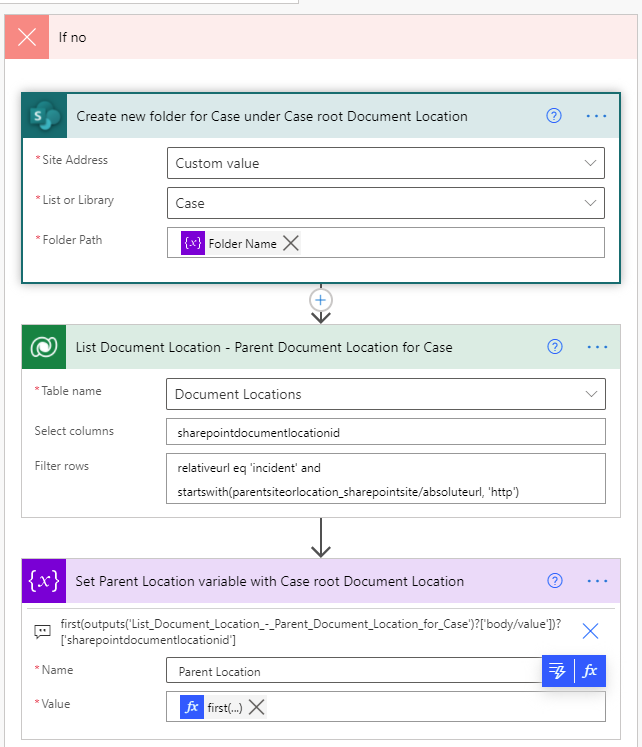
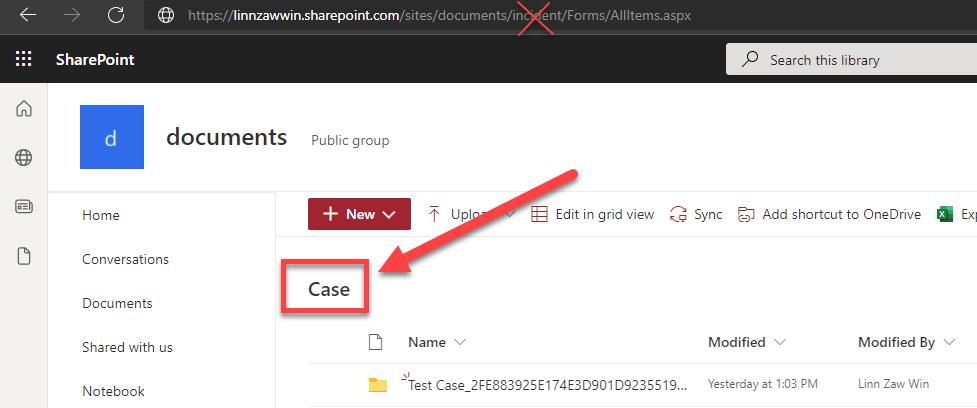
This is for the second scenario where the Case is not related to the Contact and the SharePoint folder is created under the root "incident" SharePoint document library. Just like the other SharePoint step, populate the Site Address parameter with the SharePoint Site Address variable. For the List of Library parameter, populate with the name of the library "Case" and not to be confused with the URL of the document library "incident"
The next step is to retrieve the parent Document Location for the Case document library and set it to the Parent Location variable.
first(outputs('List_Document_Location_-_Parent_Document_Location_for_Case')?['body/value'])?['sharepointdocumentlocationid']
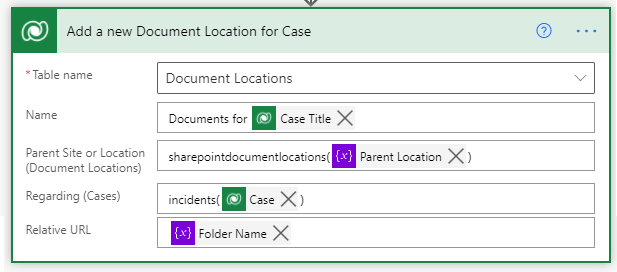
Lastly, create the Document Location for the Case with the
Parent Location variable.
Summary
Automatically creating the SharePoint document folder for the tables as subfolders under related Account/Contact can be achieved by covering two scenarios:
- Create the SharePoint folder under the related Account/Contact folder
- Create the SharePoint folder under the root document location if there is no related Account/Contact
")