Implementing warehouse management with a wizard in Dynamics 365 FnO
Implementing warehouse management with a wizard in Dynamics 365 FnO
Introduction
If you have ever implemented a warehouse management in Dynamics 365, you know that it is not a simple task. The list of settings and parameters that need to be configured in warehouse management is quite long and most of them must be discussed with a customer beforehand. In this case, it is easy to overlook or forget something.
If you have ever created your own checklist of the required settings when implementing warehouse management, you no longer need to do so, as such a checklist is now available in Dynamics 365. Additionally, a new warehouse implementation wizard has been added to guide you step-by-step through the warehousing configuration process, making sure that you don’t forget anything, and potentially reducing the implementation effort.
Let’s take a closer look at the new features.
Workspace – Warehouse implementation tasks
The “Warehouse implementation tasks” workspace displays a list of predefined tasks with descriptions and the sequence in which the tasks should be completed to set up the warehouse management module from scratch. It helps you track your progress while you complete the tasks. To create a list of tasks, you must first create a new project or copy tasks from an existing project:
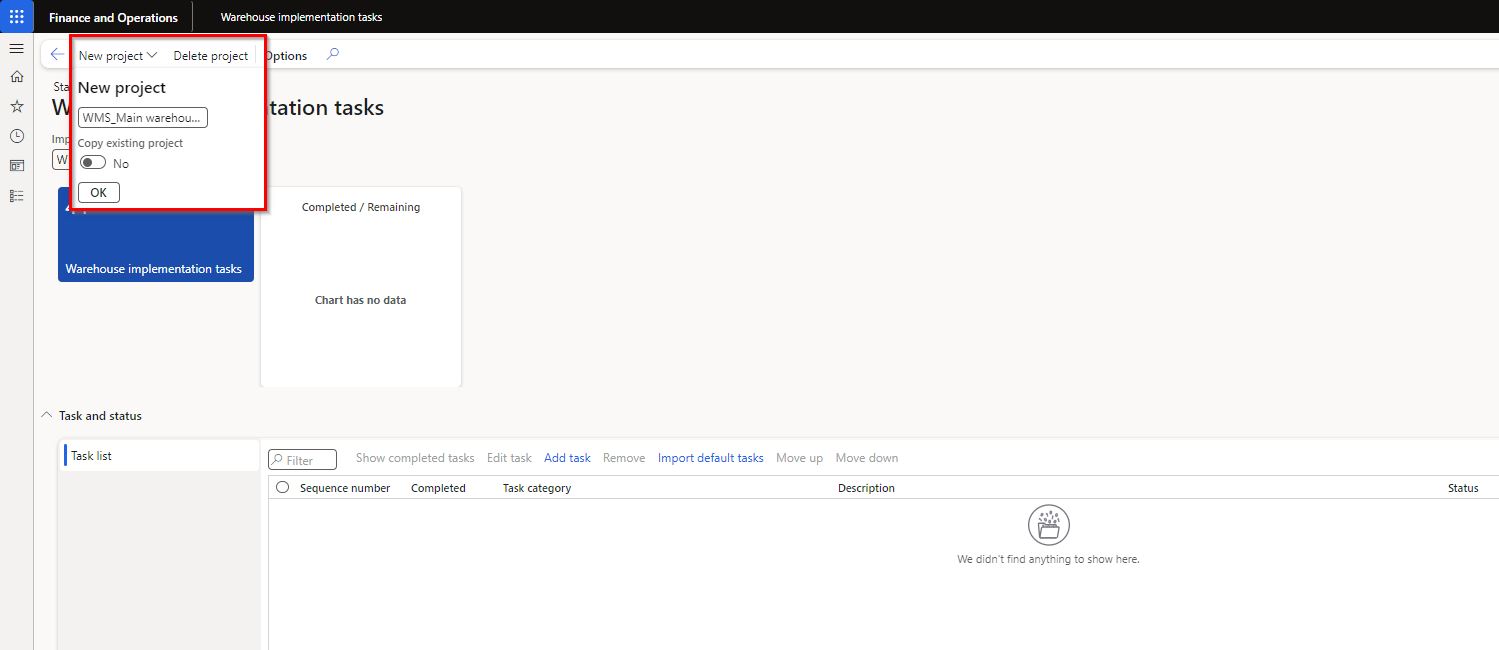
Once a new project is created, you can add implementation tasks in two ways:
- Button “Import default tasks” – it creates a predefined list of tasks.
- Button “Add task” – it allows you to manually create a task and link it to a specific menu item in the system. Adding task can be useful if the warehouse requires specific settings that are not included in the predefined standard tasks. For example, if you need to set parameters for integration your warehouse with an external tool or software. To keep in mind, to set up the parameters for integration you can add the task manually.
I have imported default tasks and added a new task specific to my warehouse to setup parameters for integration with an external carrier shipping software:
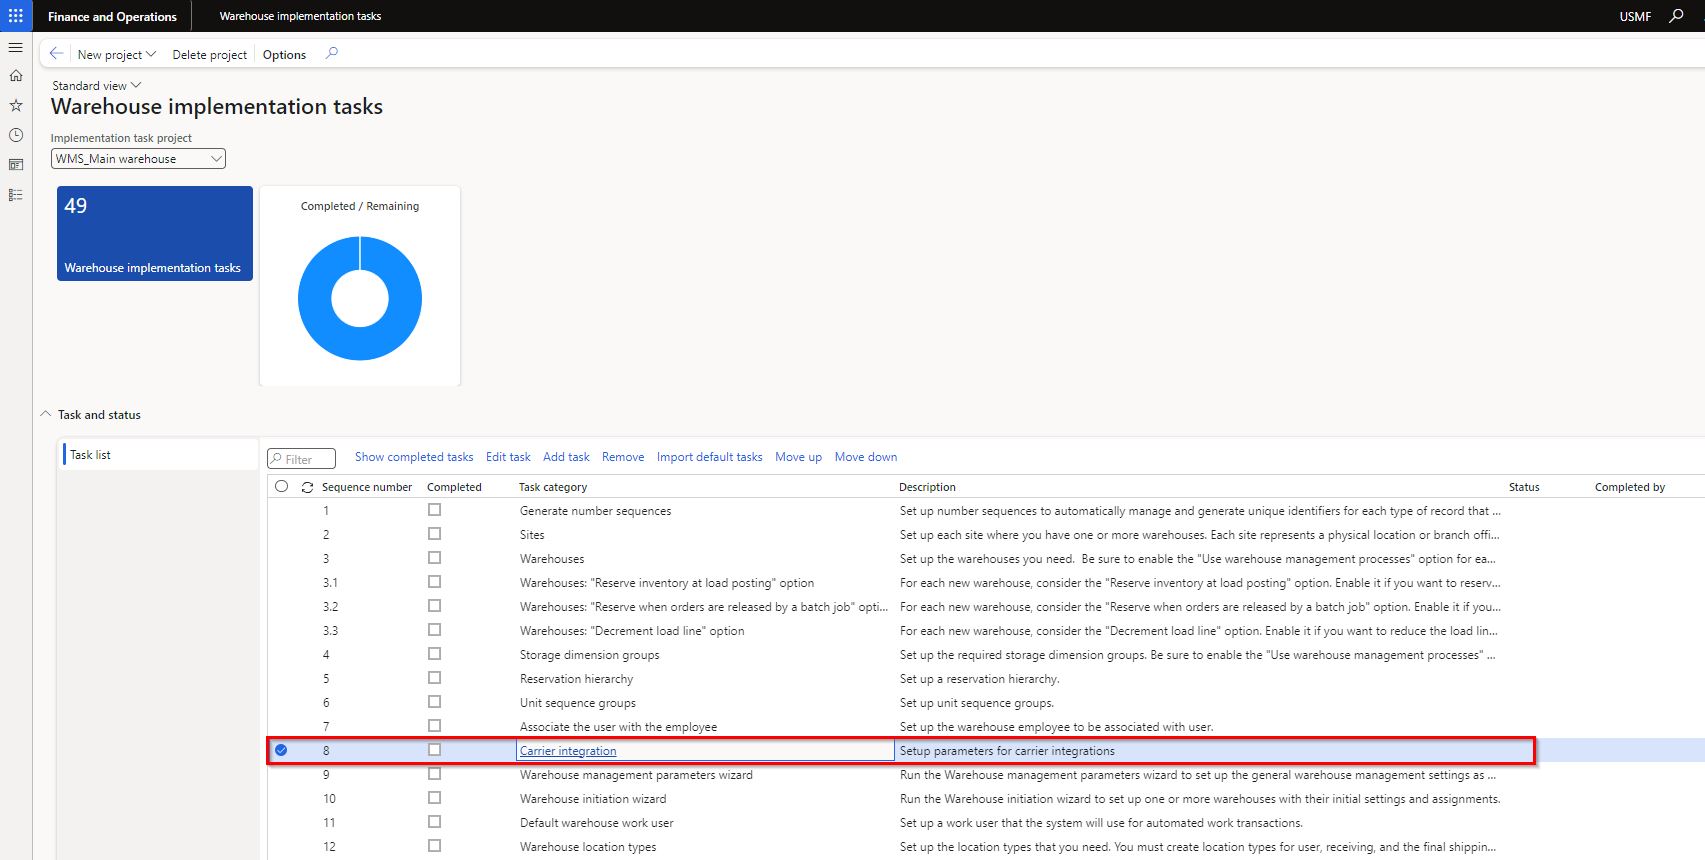
The task list is flexible, meaning that the sequence of tasks can be adjusted with the “Move up” and “Move down” buttons. If a task is not applicable to your implementation, you can remove it from the list, for example if you don’t plan to use containerization and packing process in your warehouse, you can remove the related tasks:

Completing tasks is straightforward. The predefined tasks are linked to the corresponding form in the system, so you don’t need to know or search for the exact location of the form in the system. Just click on the task category and the form, where you need to complete the task, will open.
For example, if you set up the sites, just click on the task category “Sites” and you will be taken to the Sites form, where you complete the setup: 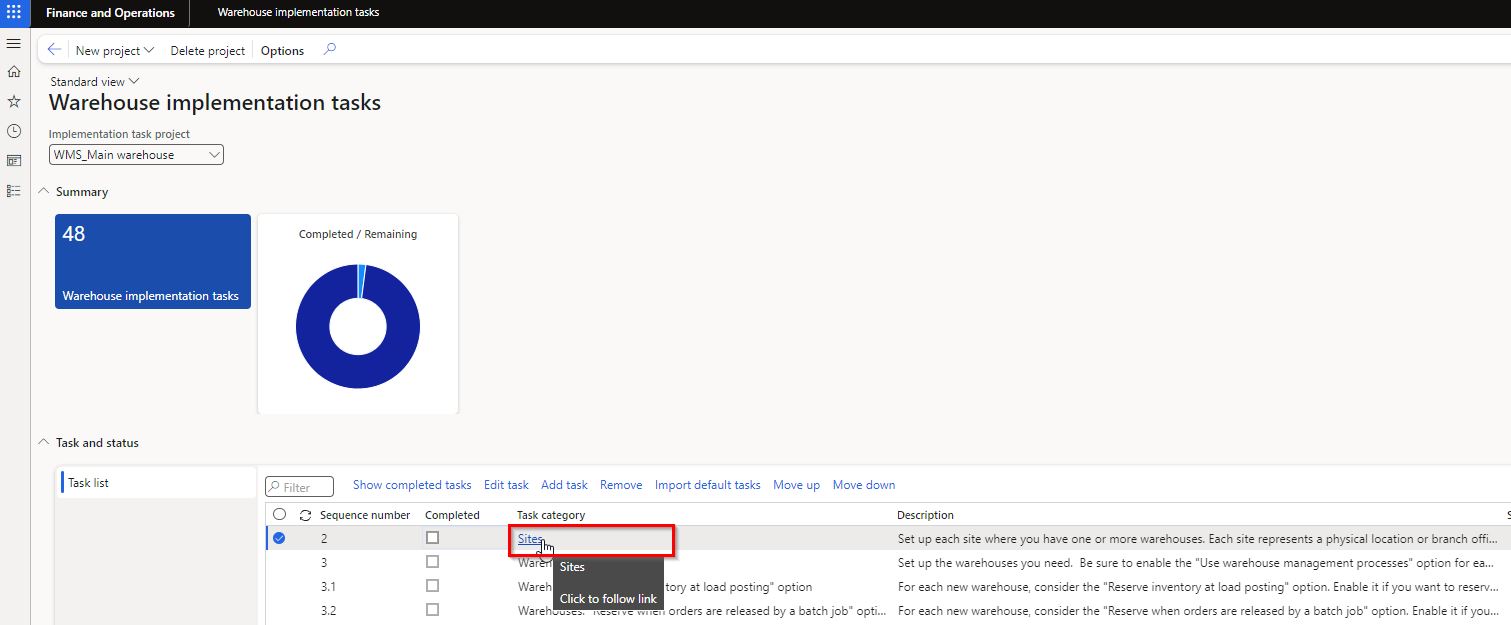
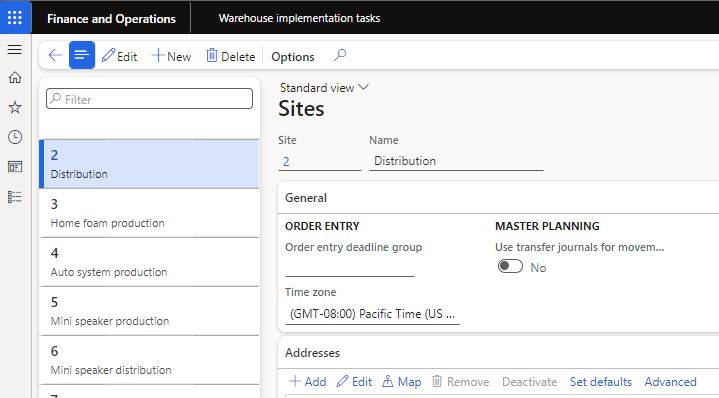
When you are finished with setup, simple tick the flag “Completed” for a configuration task. The additional fields “Status”, “Completed by” and “Completed date” will be filled automatically. You can display the completed tasks by clicking the “Show completed tasks” button: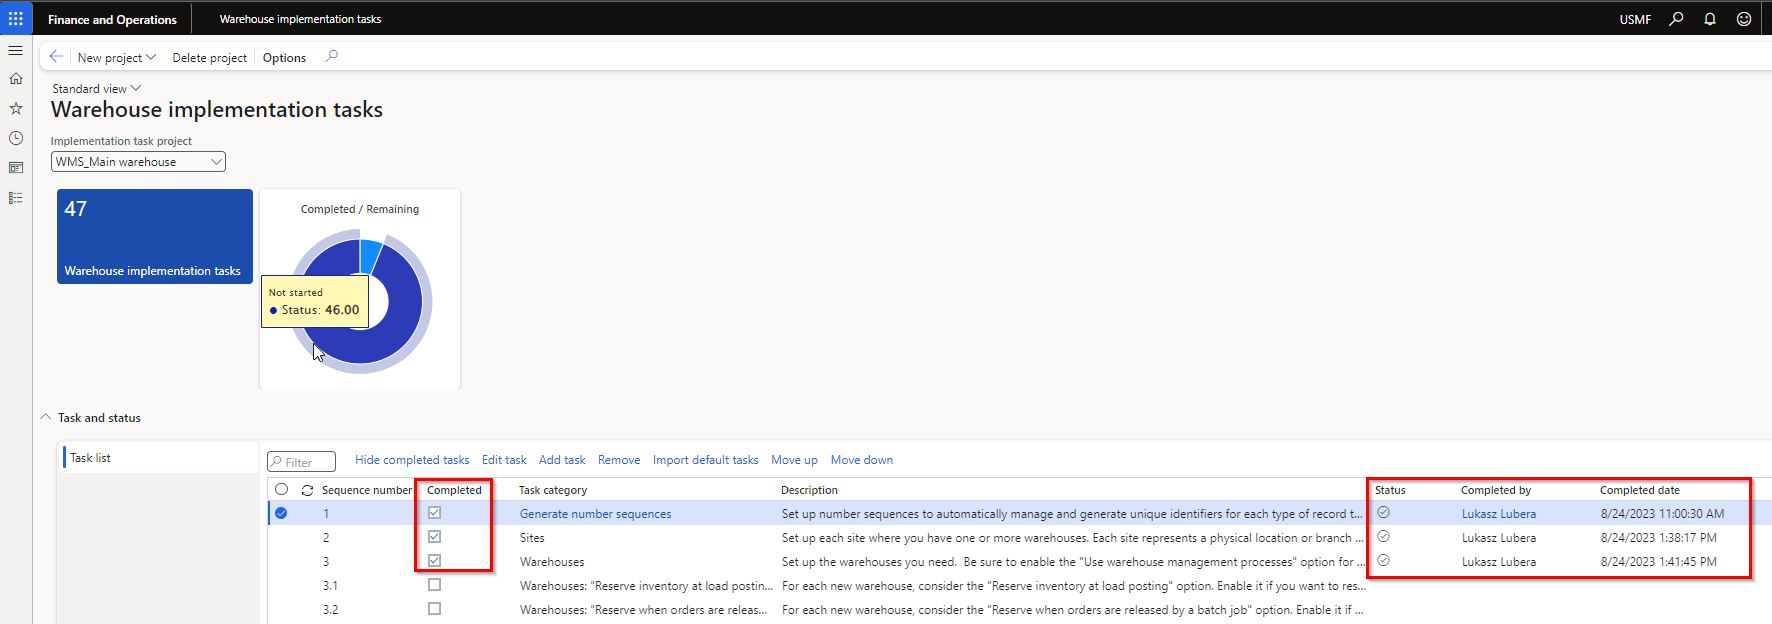
The implementation task list allows you to track the progress of the warehousing implementation and shows a complete history of who completed each task and when. The pie chart above shows how many tasks remain to be completed.
Warehouse configuration wizards
Along with the warehouse implementation tasks, there are three warehouse configuration wizards available that guide you step-by-step through the necessary setup and configuration for the warehouse management module:
- Warehouse management initiation wizard – it guides you through the initial configuration for the warehouse management module.
- Inbound configuration wizard – it guides you through the configuration for the inbound operations.
- Outbound configuration wizard – it guides you through the configuration for the outbound operations.
The individual predefined implementation task described before triggers the specific wizard. You can also run the wizards independently in the Warehouse management module > Setup > Wizards. However, it is recommended that you run then when you are asked to do so.
Let’s take a closer look at the Warehouse management initiation wizard.
When you open the wizard, there is a summary of the setup that the wizard is going to do for you:

On the next page you need to enter the names that will be used to create the following setup:
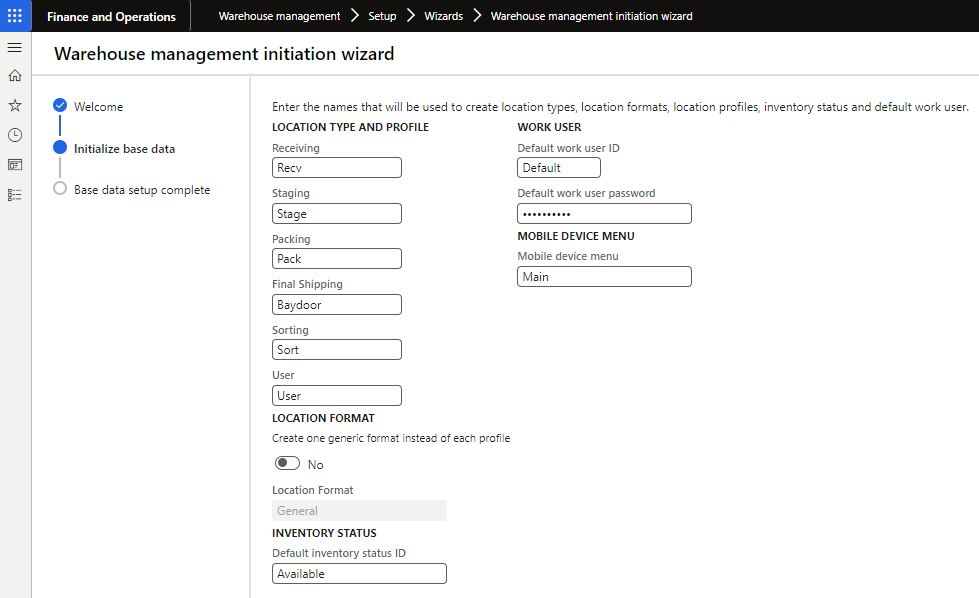
On the last page, you can see a summary of the actions that the system will execute when you click on the “Finish” button. The system will now create the records in the appropriate tables with the names we have specified.
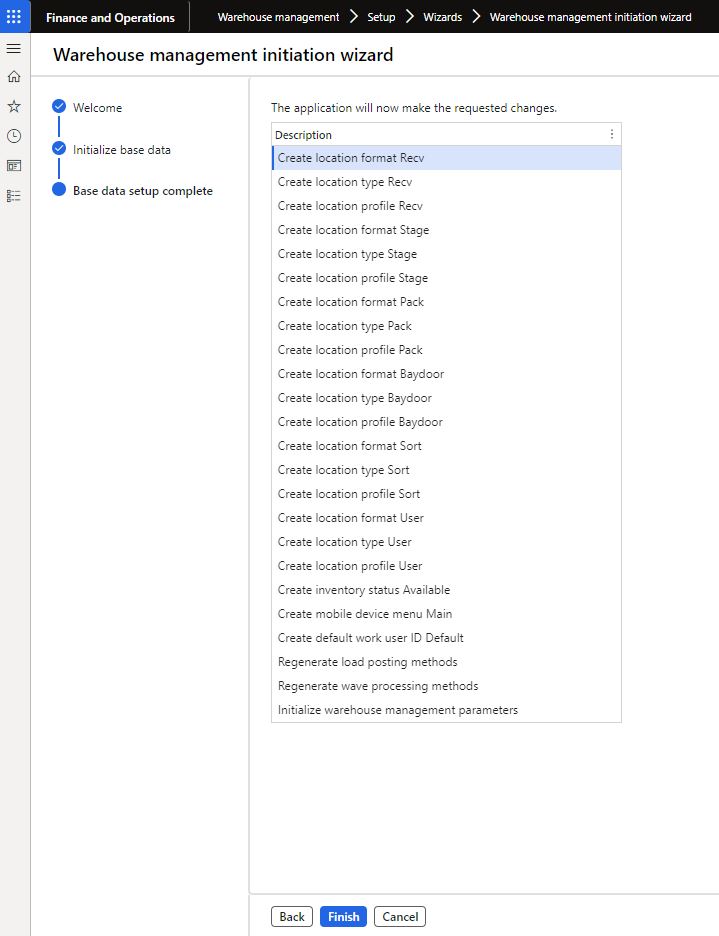
A clear advantage of using the wizards is that they can reduce your configuration effort. They group the most important parameters in one or multiple pages, so you don’t have to jump between different forms in the systems and create the records manually. Note, that you still need to set up parameters, for example, for location profiles. However, there is a predefined implementation task for such configuration, so if you stick to the implementation task, you can’t miss it.
Implementing warehouse management with a wizard in Dynamics 365 FnO
Published on:
Learn moreRelated posts
Architecting Scalable Business Logic in Dynamics CRM Using Plugin Life Cycle
Dynamics CRM Plugin Life Cycle: Optimizing for Scalability means designing plugins in a way that keeps the system fast, stable, and easy to ma...
Avoiding Currency Mismatch Errors in Dynamics 365 CE
When working with Dynamics 365 Sales, it’s important to understand how currency behaves across related entities like Opportunity, Quote, Order...
Sales Collaboration: How Sales Teams Work in Dynamics 365 CE
A Sales Team in Microsoft Dynamics 365 Sales represents a group of users who collaborate to manage and close sales opportunities efficiently. ...
Environment Variables vs Configuration Tables vs Hardcoding in Dynamics 365 Customer Engagement (CE)
In Dynamics 365 Customer Engagement (CE), managing configuration values effectively is key to building scalable and maintainable solutions. En...
Ticket sales management with Dynamics CRM in the Sports Industry
Mohona Dutta By Mohona Dutta | Reading time 5 mins So, how do you prospect? Pulling names out of lists on your laptop? Repeatedly calling...
How to create an impactful fan experience in sports with Dynamics CRM?
Mohona Dutta By Mohona Dutta | Reading time 5 mins For a salesperson, every day is game day. Sports organizations are always looking to i...
Updating JavaScript code in Dynamics CRM Made Easy for Developers
Hema Shamala By Hema Shamala | Reading time 5 mins Why do we need JavaScript in D365 CRM? It allows us to implement custom logic by using...
How To Use Advanced Find in Dynamics CRM 365
Nikhil Rajendran By Nikhil Rajendran | Reading time 5 mins One of the most commonly used features in Dynamics 365 is Advanced Find. A d...
Security Model of Dynamics CRM
Business Unit – It is a way to group business activities.When an organization is created, a Root Business Unit is created by default. Thi...