Power Apps : Smart Email Address Validation
Power Apps : Smart Email Address Validation
Introduction
Traditionally, the existing Email column type has only basic email validation: a valid email address consists of an email prefix (left part of @ symbol) and an email domain (right part of @ symbol). So it is a very basic validation.
With smart Email address validation, the Email column comes with better validation that includes reasons for the column being invalid.
Smart Email address validation detects the following issues:
- Incorrect syntax: For example, an address that doesn't contain both a username and an email domain.
- Disposable domain: An address that contains a known disposable or temporary email domain.
- Test or spam email addresses: An address that contains known indicators of a test or spam address in the email header or metadata, IP address, HTML code of the email, and email content and formatting.
- Expired email addresses: This is an email account that has expired and can no longer receive or send email.
- Emails that bounce back: This is an address that can't receive a message for any reason other than being expired.
Note that this feature went into public preview in October 2022 and it is still in preview in June 2024. So it has been in preview for a long time.
Prerequisites
- The Data validation Power Platform environment setting must be enabled.
The feature must also be enabled in the model-driven app.
See below for activation in Power Platform environment and in model-driven app. - Smart Email address validation only performs validation on text columns with the Email format type.
For example, the Email or Email Address 2 columns for the account table. - Smart Email address validation is supported only by model-driven apps. It is not supported by Canvas apps.
Enable Smart Email Address Validation
You first have to enable setting Data validation in your Power Platform environment. By default this setting is disabled.
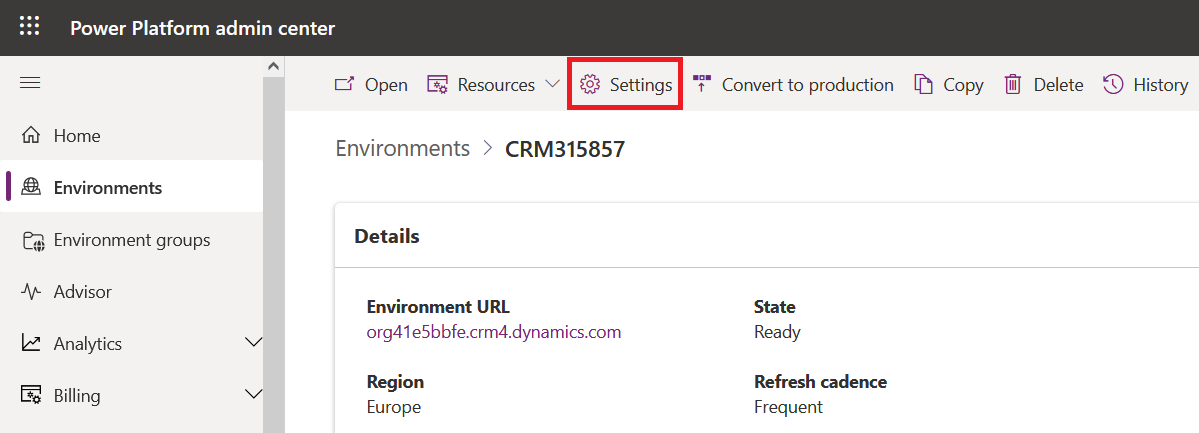
Connect to Power Platform Admin Center (https://admin.powerplatform.microsoft.com/environments) , select the environment for which you want to enable Data Validation and click on Settings in the command bar.
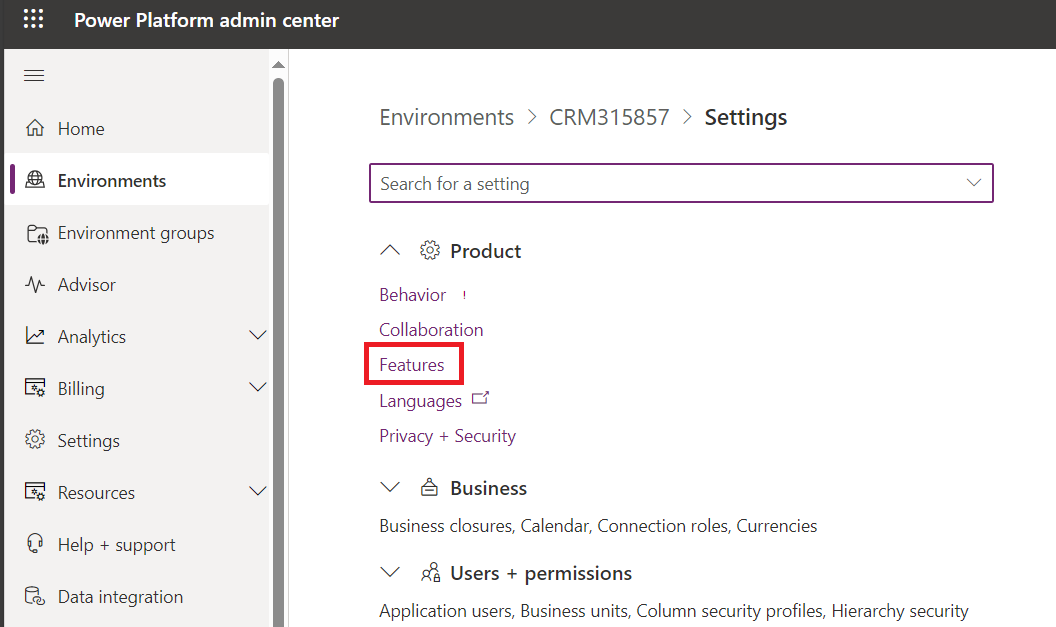
Then expand Product section and go to Features.
Then scroll down until you find Data Validation option. It is turned off by default.
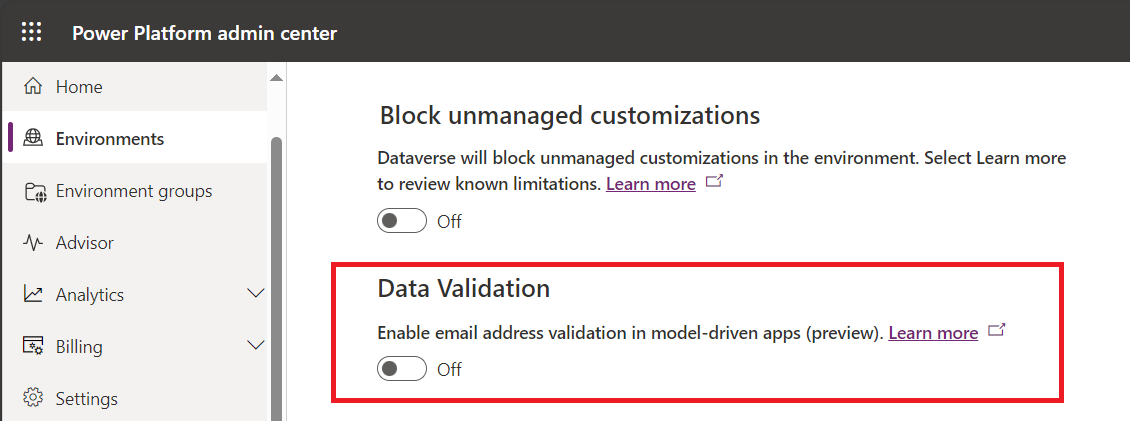
Turn it on and click on Save.

But it is not finished... You need to enable the feature in your model-driven app.
So connect to https://make.powerapps.com/ and open your app in the App Designer.
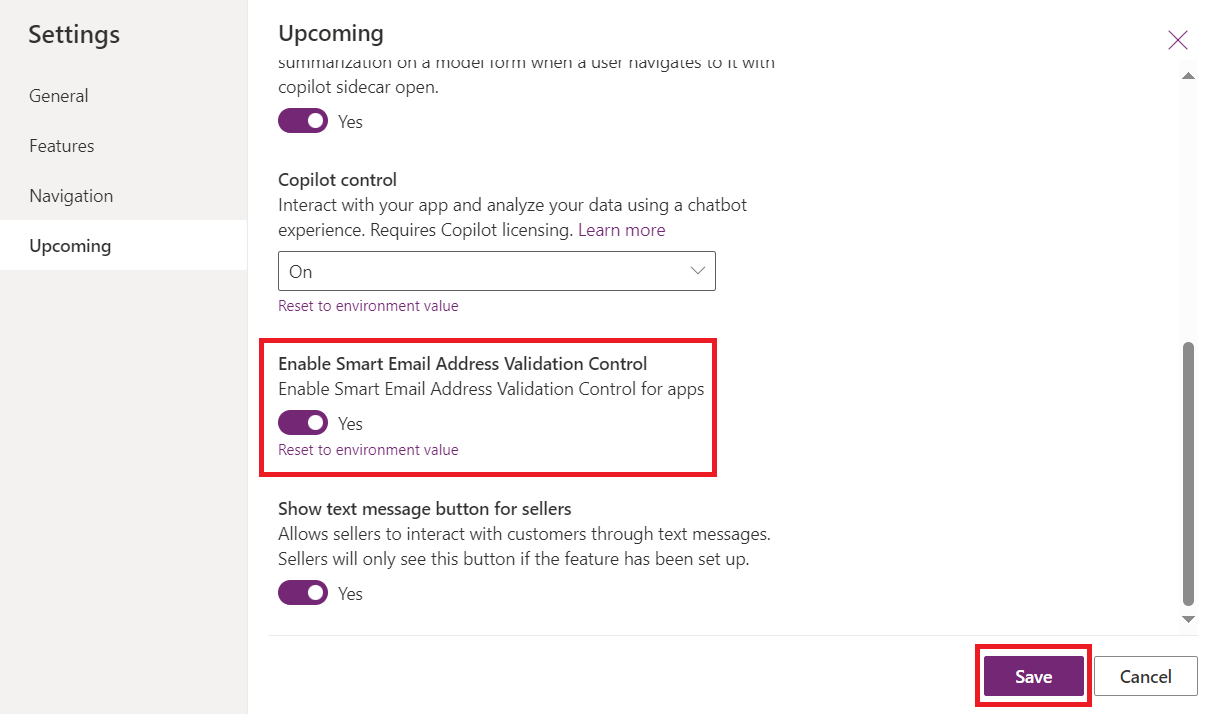
Click on Settings in the command bar and then go to Upcoming features in the Settings list on the left side.
Scroll down until you see Email Smart Email Address Validation Control. It is disabled by default.
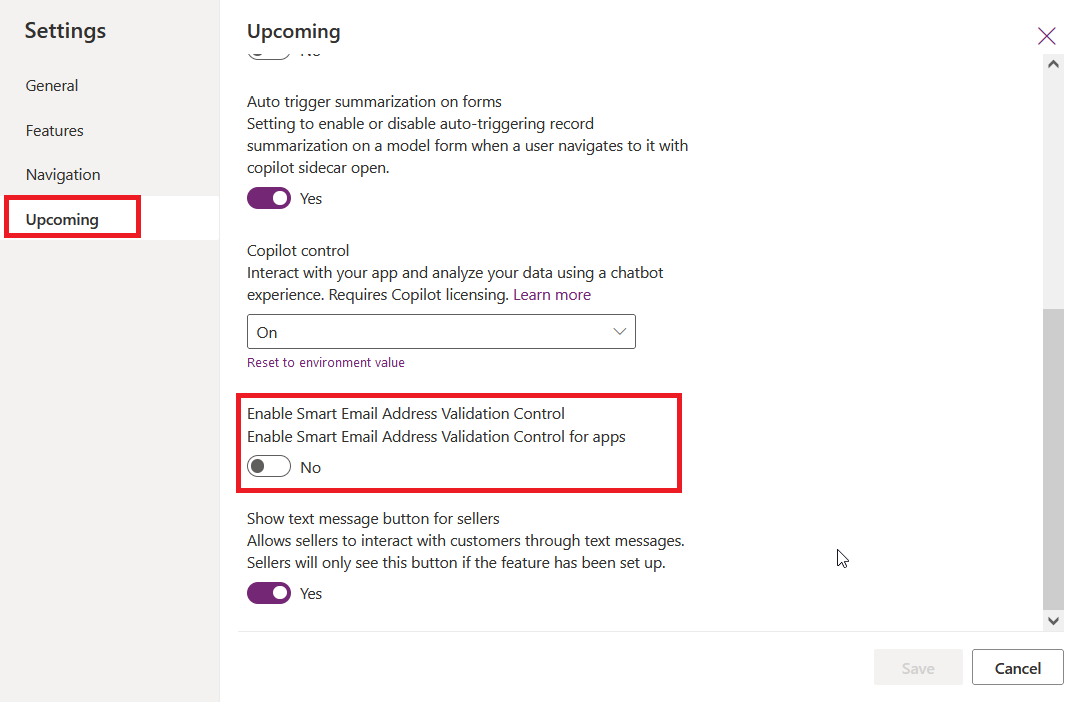
Turn the feature on and click on Save.
And finally do not forget to publish your app.
That's OK now, smart email address validation is enabled for your app.
If you want to enable this feature for multiple model-driven apps, you’ll need to follow previous steps for each app.
Email validation in practice
As an example I consider column 'Email' in table Account.
When you enter data in 'Email' column, it’s validating on the fly.
You don’t have to wait for the record to be saved. As soon as the email address column has data, the verification will run and show the result.
During the validation you will get the message 'Validating email address...'.
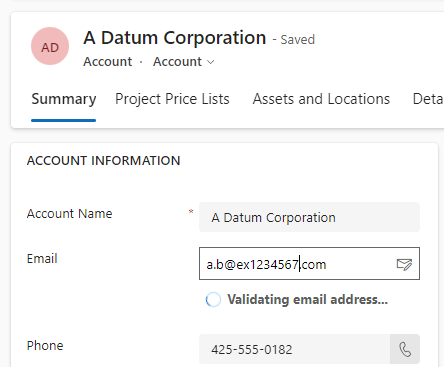
Below the result with the value '[email protected]'.
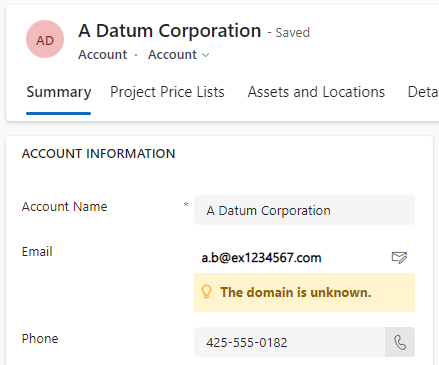
Another result with a different Email address.
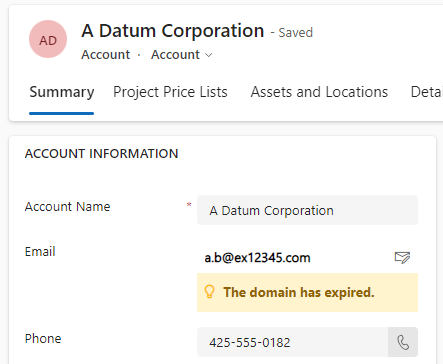
And the result with a disposable Email address.
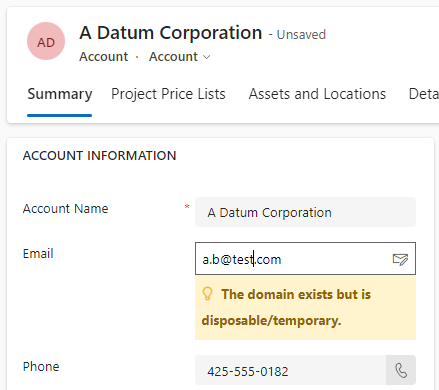
And the result with an error in the domain name.

Remarks
A few remarks:
- Smart email address validation works with quick create forms.
- If an email address is showing as an invalid address, user can still save the record with the invalid email address. So it is only a warning.
- If you open a record with an invalid email address there is no visual warning to indicate that the email address is invalid.
You will see whether or not there is an issue with an email address when you enter an email address, but not when you open a record.
Power Apps : Smart Email Address Validation
Published on:
Learn moreRelated posts
Ditch the Power Apps maker portal!
Are you a maker, a low-code developer, a builder? Do you want to be ten times more productive when you build Canvas apps, model-driven apps, P...
Power Apps Fundamentals + Microsoft Fabric Integration Series #3:Connecting Power Apps with Microsoft Fabric Lakehouse: End-to-End Implementation Guide
Modern enterprise applications must do more than capture transactional records; they must fuel continuous business intelligence. When operatio...
Microsoft Power Apps vs Traditional App Development in 2026: Which Approach Wins for Modern Businesses?
Introduction The software development landscape has changed dramatically over the last few years. Businesses that once relied exclusively on p...
The Future of Citizen Development: Power Apps and Copilot Studio in 2026
Introduction The way businesses build software is undergoing a major transformation. Not long ago, creating business applications required tea...
How to Build AI-Powered Business Applications Using Power Apps and Copilot
Introuction Artificial Intelligence is no longer just a buzzword—it has become an essential part of modern business applications. Organisation...
Power Apps vs Traditional App Development: Is Low-Code Winning in 2026?
Introduction For decades, businesses relied on traditional software development to build custom applications. Every feature required months of...
Top 10 New Features in Microsoft Power Apps You Can’t Ignore in 2026
The low-code revolution is evolving faster than ever, and Microsoft Power Apps continues to lead the way. With artificial intelligence becomin...