
Capturing Azure Storage Explorer REST API calls

Azure Storage Explorer is a powerful tool that simplifies working with Azure Storage services such as Blob, Queue, Table, and File storage. While it provides a user-friendly interface, there may be times when you need to inspect the requests it sends and the responses it receives from Azure. In such cases, Fiddler, a widely used web debugging proxy, can come to your rescue.
This step-by-step guide will walk you through the process of capturing a trace that you can use to evaluate such requests and responses using Fiddler.
Prerequisites:
- Install Azure Storage Explorer: Download and install the Azure Storage Explorer tool from the official Microsoft website.
- Install Fiddler: Download and install Fiddler Classic from the Telerik website.
Step 1: Launch Fiddler:
- After installing Fiddler, launch the application.
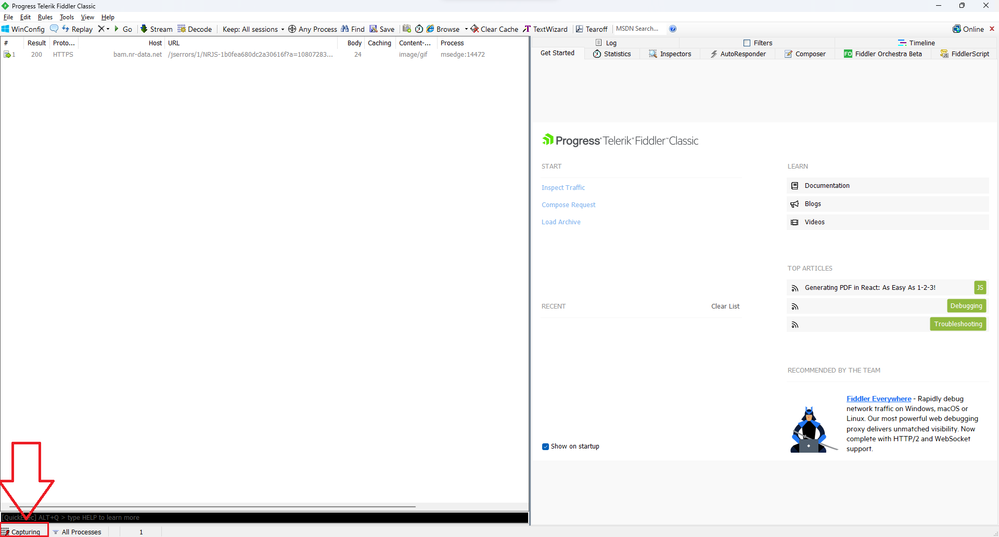
- As soon as you do that, you will see the following. Please note that at that point Fiddler will be already capturing HTTP/HTTPS requests, you can confirm this through the "Capturing" status in the taskbar at the bottom left corner:
- Since you won't need to do any capturing at this point, go ahead and click on the "Capturing" text, after doing that the text should disappear, confirming that the tool is not capturing traffic anymore:

Step 2: Configure Fiddler for HTTPS requests capture
To ensure Fiddler captures traffic from Azure Storage Explorer, follow these steps:
- Click on the "Tools" menu in Fiddler.
- Select "Options"
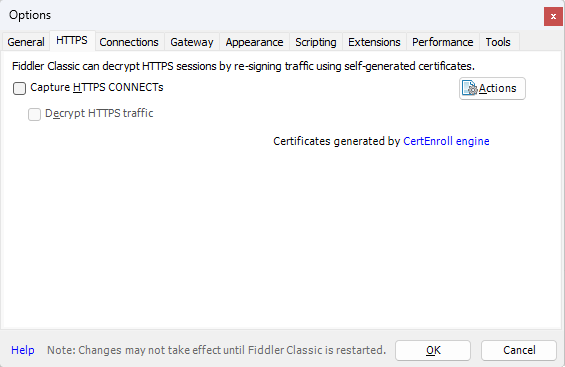
- In the Options window, go to the "HTTPS" tab
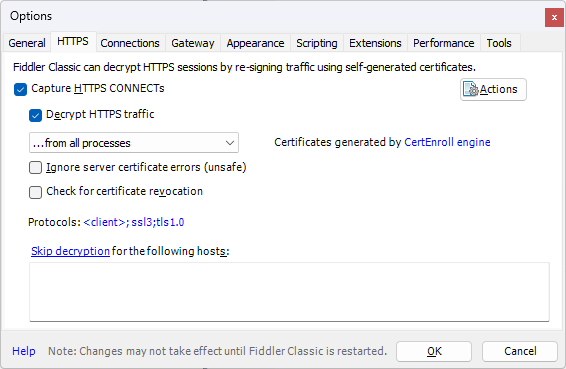
- Check the "Capture HTTPS CONNECTs" and "Decrypt HTTPS traffic" options
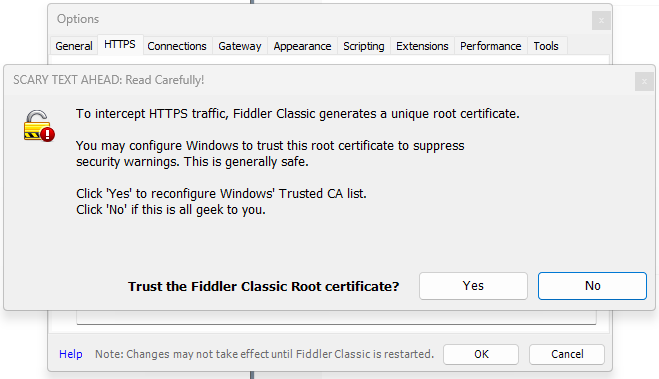
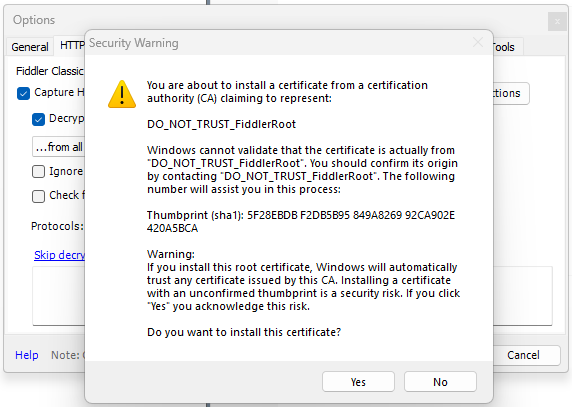
- Now, as soon as you check the "Decrypt HTTPS traffic" option, you will see the following warning, to be able to intercept the traffic from the Azure Storage Explorer tool, you will need to trust this root certificate, hence, you'll need to click on the "Yes" button:
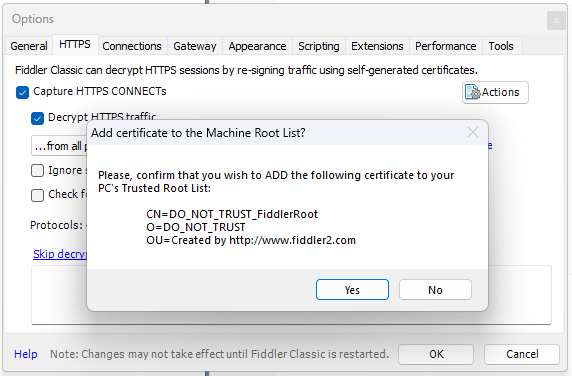
- After doing that, the OS will show you two additional warnings. You'll again need to click on the "Yes" button:
- After doing that, you should see the following confirmation:
- Click the "OK" button to close the confirmation message
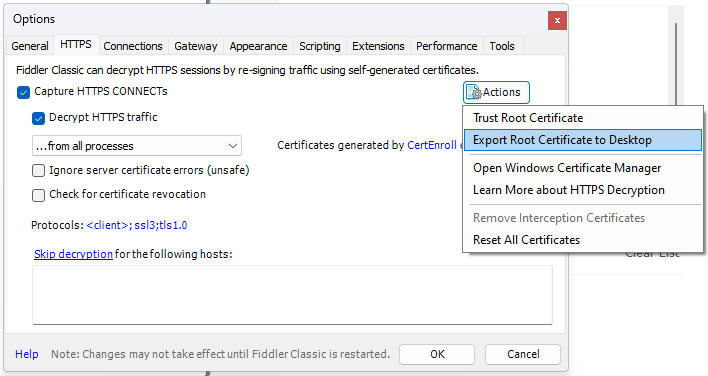
- Then click on the "Actions" button, and select the "Export Root Certificate to Desktop" option:
- Click the "OK" button to close the confirmation message
- Click the "OK" button twice to close the confirmation message and the "Options" window where you enabled the HTTPS traffic capture




Step 3: Import the Fiddler certificate to the Azure Storage Explorer tool
- Open the Azure Storage Explorer tool
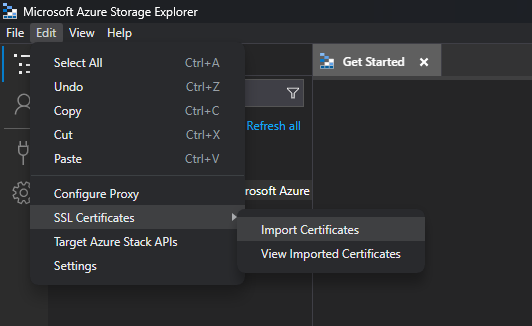
- Click on the "Edit" menu.
- Select the "SSL Certificates"->"Import Certificates" option
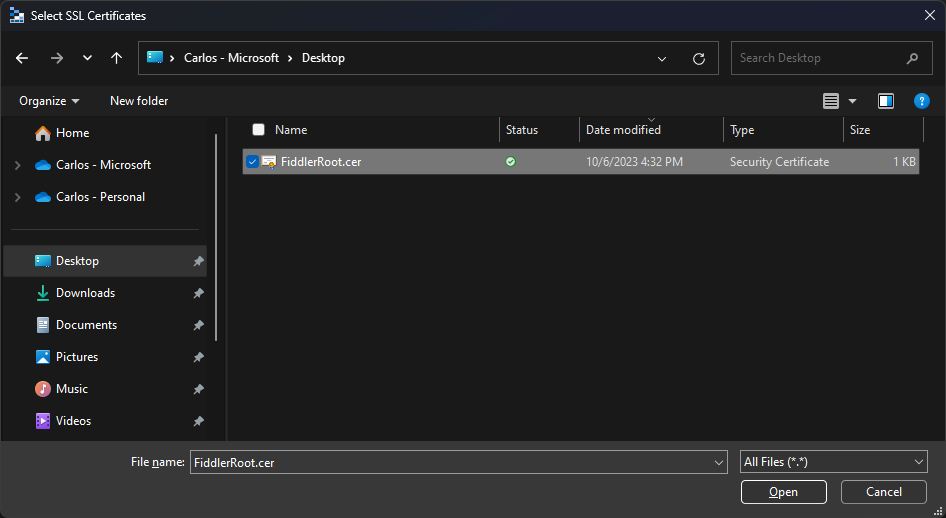
- Select the "FiddlerRoot.cer" file and click on the "Open" button
- At that point you should see the following confirmation message at the top: "Successfully imported 1 of 1 certificates. Storage Explorer must restart for the changes to take effect."
- Go ahead and click on the "Restart Now" button and wait for the tool to come back


Step 4: Configure the Proxy settings for the requests being sent through the Azure Storage Explorer tool to be routed to Fiddler
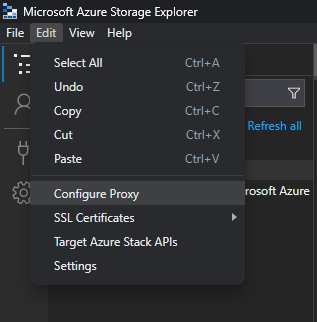
- Now that the Azure Storage Explorer tool is back, click on the "Edit" menu
- Select the "Configure proxy" option
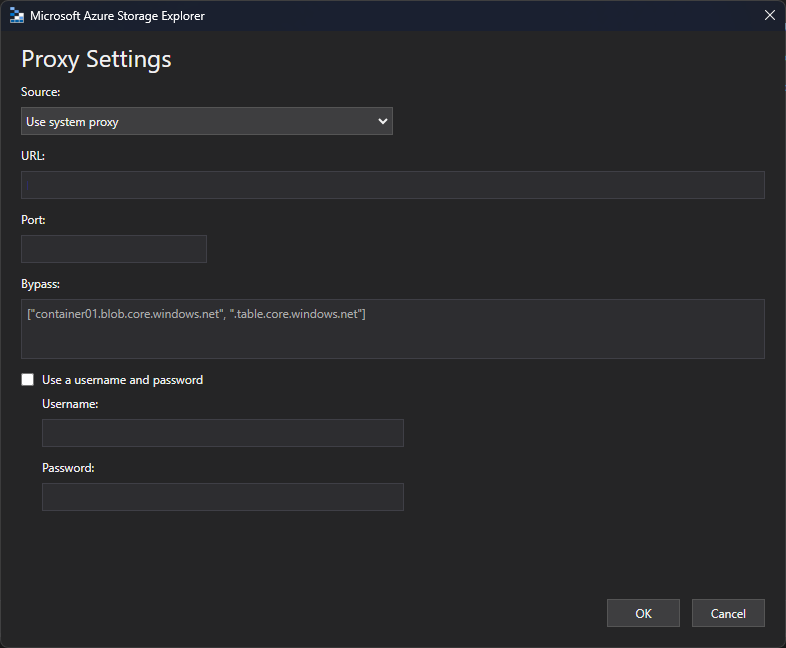
- Once there, make sure that the "Source" option selected is "Use system proxy":
- Click on the "OK" button
- At this point you should have everything you need for Fiddler to capture and decrypt the HTTPS traffic coming from the Azure Storage Explorer tool
Step 5: Start capturing traffic
Now, let's start capturing traffic from Azure Storage Explorer.
-
If you haven't yet, sign in and connect to your Azure Subscription or Storage Account
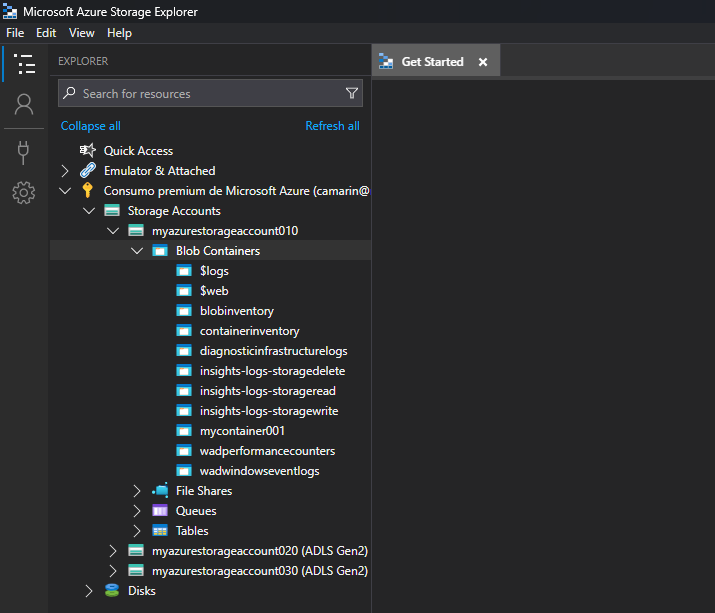
- Expand the containers within the Storage Account so that we can focus on that operation, in my case I can see the "$logs", "$web", "blobinventory", "containerinventory", and a few other containers:
- Since Fiddler was already set up to capture the traffic, go back to Fiddler
Step 6: Inspect Captured Traffic in Fiddler
- Switch back to Fiddler and start capturing traffic again by clicking on the place where you saw the "Capturing" text before, at the bottom left corner of the application:
- After re-enabling the traffic capture, you should see the text "Capturing":
- You'll then see how the app starts showing the list of captured requests in the left-hand panel. These correspond to any HTTP/HTTPS requests being sent from your working machine.
- At that point, go ahead and execute an operation from the Azure Storage Explorer tool and against your Storage Account
- Fiddler should show those requests as part of the list that was already showing after re-enabling the capture:
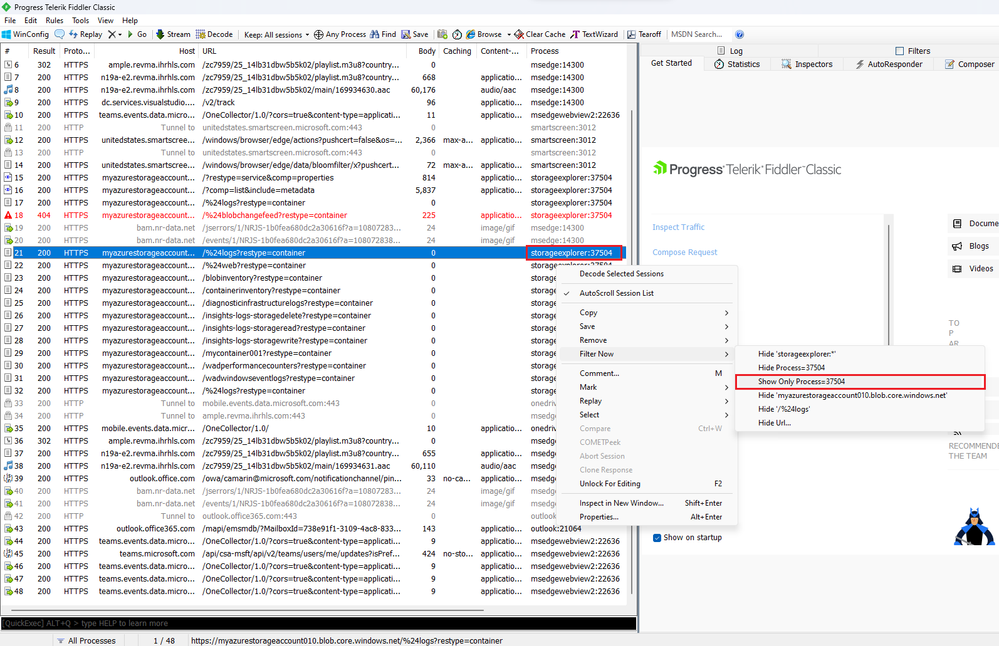
- Now, a little trick that I always use is to identify any request coming from the "storageexplorer" process, so that I can apply a filter to see only the requests coming from it.
- To apply the filter, you can just right click on the request you are interested in, and then select the "Filter Now"->"Show Only Process={PID}" option, 37504 in my case:
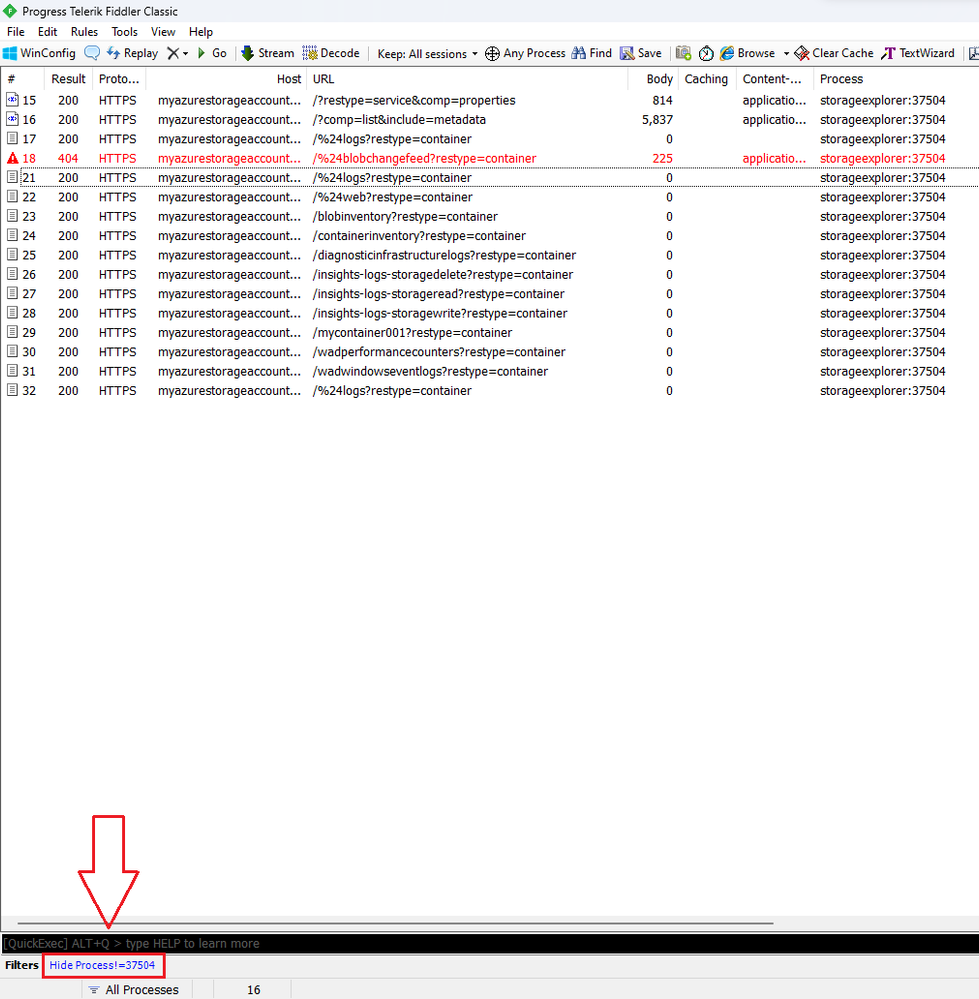
- After doing that, you will see only the requests coming from that process, which will make things a bit easier. Notice the filter being shown at the bottom left corner:
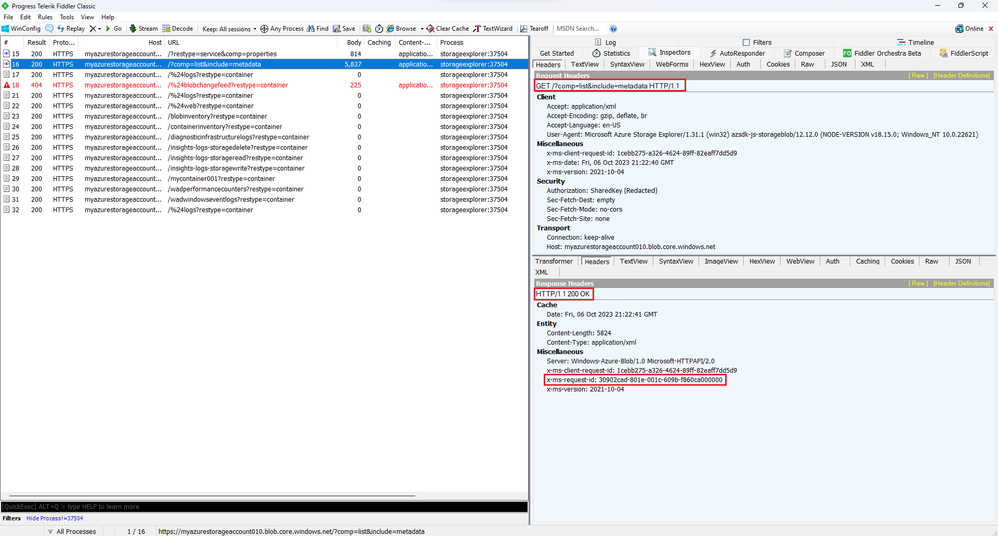
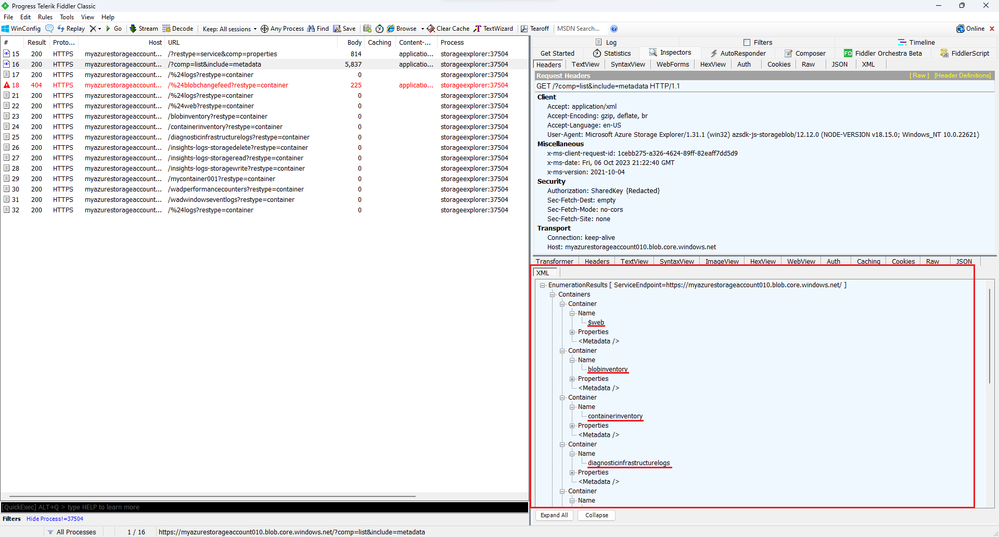
- At that point, you can just double click on any of the requests, which will make Fiddler show the request and response details. In my case, I selected the request to get a list of containers within my Storage Account. Here you can see that the Azure Storage Explorer tool sent a GET request, for which it got a HTTP 200 response, showing among other things the x-ms-request-id header value, which is typically very useful when contacting the Microsoft Support team for them to provide some technical support.
- Since the response that I got for this request was of type XML, I'm able to see the actual response body after clicking on the XML tab:
- And that's it, that's how you capture requests coming from the Azure Storage Explorer tool


Bonus tip #1!
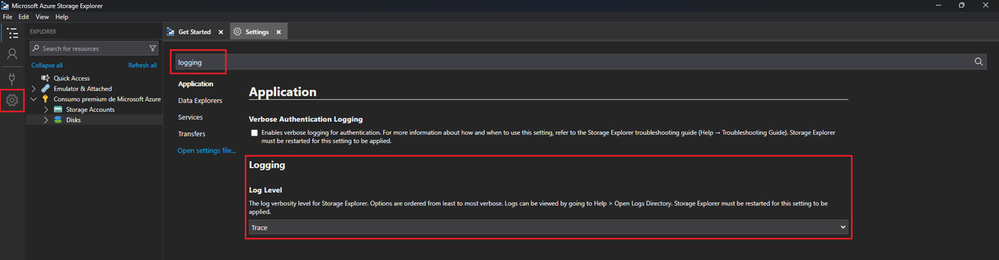
You can also enable verbose logging within the Azure Storage Explorer tool to see some of this information, the output will be in the log files and the entries may not be as friendly as what you can see through Fiddler, but it's still there nevertheless. To achieve this, all you need to do is to go to the settings and then look for the "Log Level" section, once there, make sure to set it to either "Debug" or "Trace":
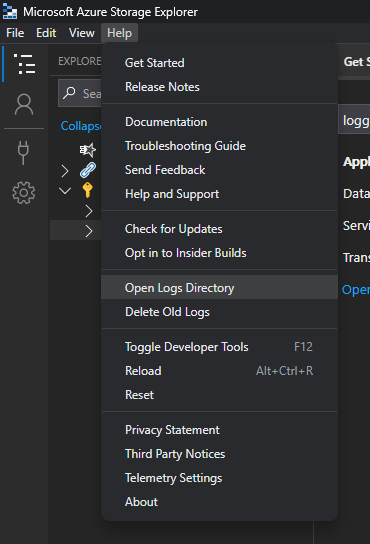
Once that's done and after executing an operation against a Storage Account, you can just click on the "Help" menu, and select the "Open Logs Directory" option:
In my case, this is what I see regarding the REST API call to get the information on my Storage Account:
Name of the file in my case: 2023-10-12_115134_storage-account-extension_30988.log

I hope this helps on capturing these traces in times when you need to do some troubleshooting related to the HTTPS requests that the Azure Storage Explorer tool sends to Azure.
References
=======
Azure Storage Explorer troubleshooting guide
https://learn.microsoft.com/en-us/troubleshoot/azure/azure-storage/storage-explorer-troubleshooting
Capture web requests with Fiddler
https://learn.microsoft.com/en-us/power-query/web-connection-fiddler
Delete a Certificate
Published on:
Learn moreRelated posts
Azure Storage - TLS 1.0 and 1.1 retirement
Overview TLS 1.0 and 1.1 retirement on Azure Storage was previously announced for Nov 1st, 2024, and it was postponed recently to 1 year later...
Efficient Management of Append and Page Blobs Using Azure Storage Actions
Overview In Azure Storage, Blob Lifecycle Management (BLM) allows you to automate the management of your data based on rules defined by...
[Azure AI Search] Internal Server Error when creating CMK encrypted objects
Scenario Customers follow the Microsoft doc to create CMK encrypted objects (data source, index etc.), but get the 500 Internal Serv...
Optimizing Azure Table Storage: Automated Data Cleanup using a PowerShell script with Azure Automate
Scenario This blog’s aim is to manage Table Storage data efficiently. Imagine you have a large Azure Table Storage that accumulates logs from ...
Optimizing Azure Table Storage: Automated Data Clean-up using a PowerShell script with Azure Automat
Scenario This blog’s aim is to manage Table Storage data efficiently. Imagine you have a large Azure Table Storage that accumulates logs from ...
Restoring Soft-Deleted Blobs with multithreading in Azure Storage Using C#
Blob soft delete is an essential feature that safeguards your data against accidental deletions or overwrites. By retaining deleted data for a...
Performing simple Azure Table Storage REST API operations using curl command.
The blog provides guidance to perform simple Table Storage REST API operations such as Create table, Delete Table, Insert entity, Delete entit...
Bulk delete all the old jobs from the batch account
Deleting a Job also deletes all Tasks that are part of that Job, and all Job statistics. This also overrides the retention period for Task dat...
Utilizing Azure Storage and Runbooks for scheduled automated backups of Azure SQL Databases
In this article, we are going to provide detailed steps to create a scheduled Azure SQL Database backup to storage account using automation. T...
[Azure Service Bus] JMS messages getting dead-lettered
The article discusses a problem where numerous messages end up in the dead letter queue (DLQ) when the JMS service bus consumer connects to th...