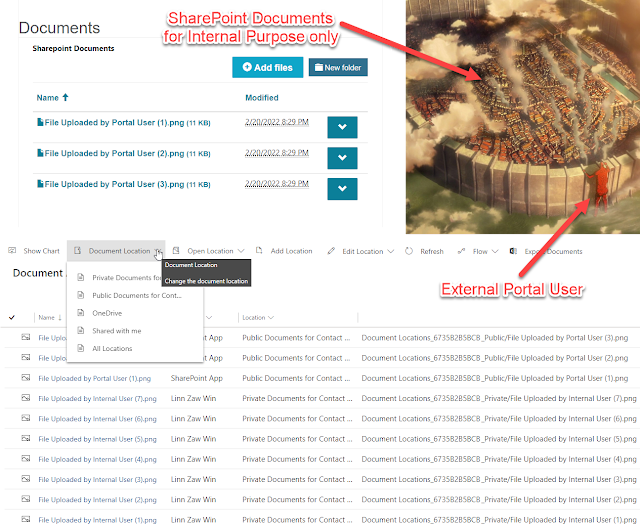
Managing Public SharePoint Documents for Power Apps Portal and Internal Documents Using Cloud Flow (Part 8 of 8)
")


Summary
Published on:
Learn more
Related posts
SharePoint Permissions in Power Automate
Which account really runs each action, and why a flow that works for you returns 403 for everyone else.
How to Backup a Microsoft Power Pages (Power Apps Portals) Website
Microsoft Power Pages (formerly known as Power Apps Portals) is a low-code platform for building secure, external-facing websites that integra...
Power Apps – Entity scoping in global search
We are announcing entity scoping in global search in Power Apps. This feature will reach public preview on August 7, 2026. How does this affec...
Power Apps – Multi Select in Grid column filtering
We are announcing Multi Select in Grid column filtering in Power Apps. This feature will reach public preview on August 7, 2026. How does this...
Benefits of Microsoft Power Apps for Modern Businesses: Why Businesses Are Embracing Low-Code Development
Every business wants to work smarter, respond faster, and reduce manual effort. Yet many organizations still rely on spreadsheets, paper forms...
Power Automate: Office 365 Outlook - Export email Action
Exports an Outlook email as a binary EML file by Message ID. Attachments are included inside the file.
Power Automate AI Agents: The Future of Workflow Automation (2026 Guide)
Introduction Workflow automation has evolved significantly over the past decade. Traditional automation focused on executing predefined rules ...