
Organize the components in your diagrams with layers in Visio for the web

Layers enable users to organize multiple elements of a diagram and control which ones are seen, hidden, locked, or unlocked with just a few clicks. The Visio desktop app has long supported layers, and now Visio for the web does, too. Users with a Visio Plan 1 or Visio Plan 2 license can now use layers to group a related set of shapes in a drawing and change properties of all the layer members at once.
Example user scenario: Network diagrams
Tomás, a network security architect for a global financial firm, is one of a dozen members of the firm’s enterprise architecture team in charge of meticulously designing network architectures that are efficient, reliable, and secure. Tomás frequently meets with other planners in the organization—such as database architects and firewall architects—to translate business needs into functional systems. To provide top-down planning and help eliminate inefficiencies, they design their highly complex network architecture diagrams in Visio for the web.
The complexity and various levels of detail included in each diagram often make it difficult to communicate system updates. But with the introduction of layers in Visio for the web, managing complex diagrams becomes more simple. Tomás and his team can now organize, categorize, and set properties for a related set of shapes in their diagrams. This enables them to show only information relevant to particular user groups; for example, they can show databases and their related systems to database admins, or the relevant communication ports to firewall admins. Furthermore, the new shape count provides useful at-a-glance information, such as the number of shapes in a specific layer (for this example scenario, we’ll call it the “Firewalls” layer) of the diagram.
Tomás and his team can use the Toggle Visibility property to show or hide annotations or shapes in a layer, or the Lock property to prevent accidental selection or movement of shapes. They can also use the Select Shapes property to quickly select and apply formatting changes to all the shapes in a layer at once.
Try it now!
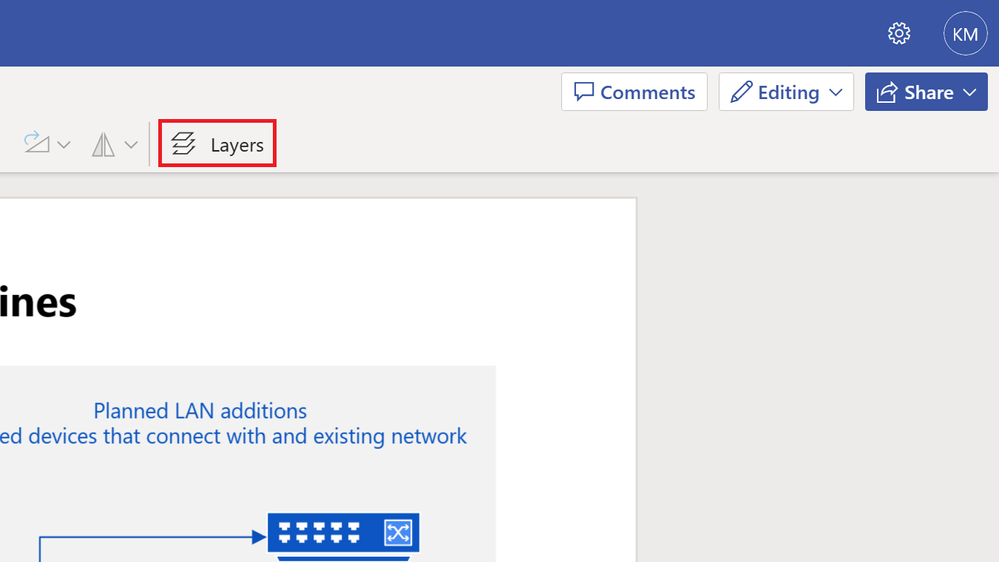
Getting started is simple. Select the new Layers menu button on the Home tab in the ribbon to open the Layers task pane.
A cropped image of a network diagram in Visio for the web highlighting the new Layers menu button on the Home tab.
Upon selection, the new Layers pane will open to the right of the canvas.
An image of a network diagram in Visio for the web showing the new Layers pane open to the right of the canvas.
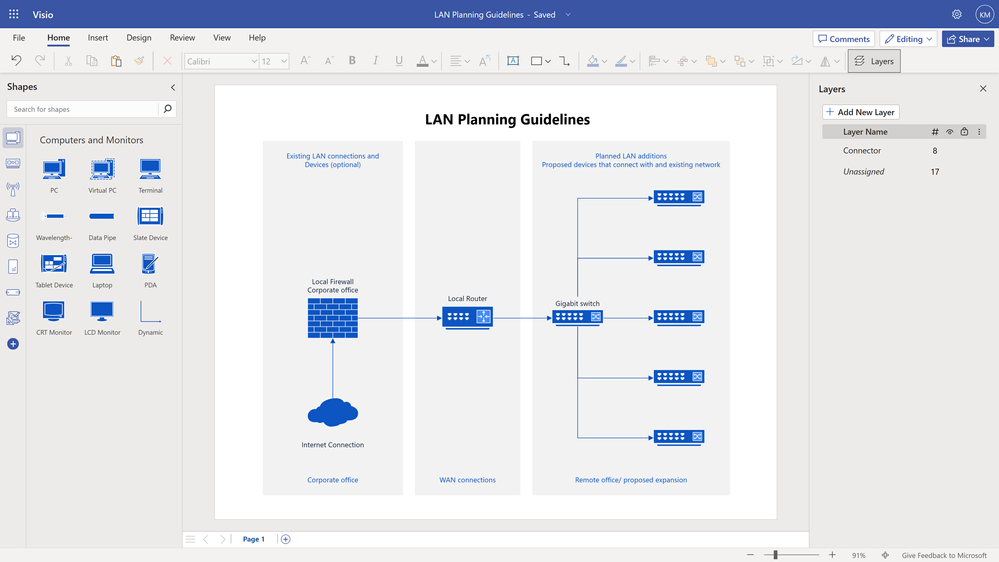
Here, you will see a list of any existing layers in the diagram, as well as the number of elements assigned to each layer. It’s important to note that, when starting from one of Visio’s dozens of starter diagrams, any flowchart shapes in your diagram are assigned to the “Flowchart” layer, any Azure shapes are assigned to the “Azure” layer, any connectors are assigned to the “Connector” layer, and all other shapes are “Unassigned” by default.
Create a new layer
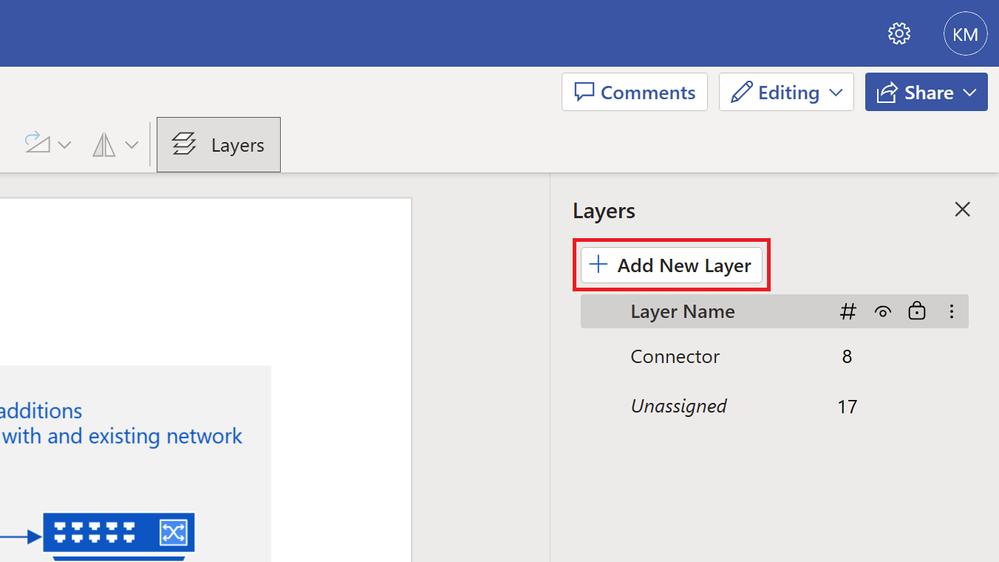
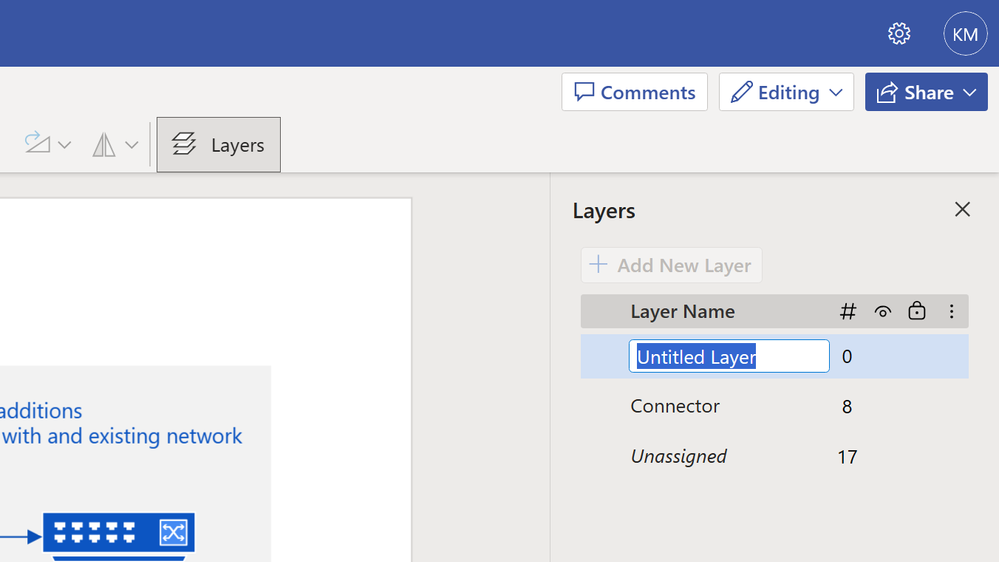
To create a new layer, simply select the + Add New Layer button at the top of the Layers pane, then type anywhere in the Untitled Layer field. Repeat this process to add additional layers.
A cropped image of a network diagram in Visio for the web highlighting the + Add New Layer button at the top of the Layers pane.
A cropped image of a network diagram in Visio for the web highlighting the Untitled Layer field.
Assign shapes to a layer
Once you’ve added your layers in the Layers pane, assigning shapes to a layer is simple. It’s important to note that shapes can only be assigned to a single layer at a time in Visio for the web.
First, select a shape on the canvas and then, in the Layers pane, select the radio button to the left of the layer name. In the example below, we assign the selected rectangular shape to the “Background” layer.
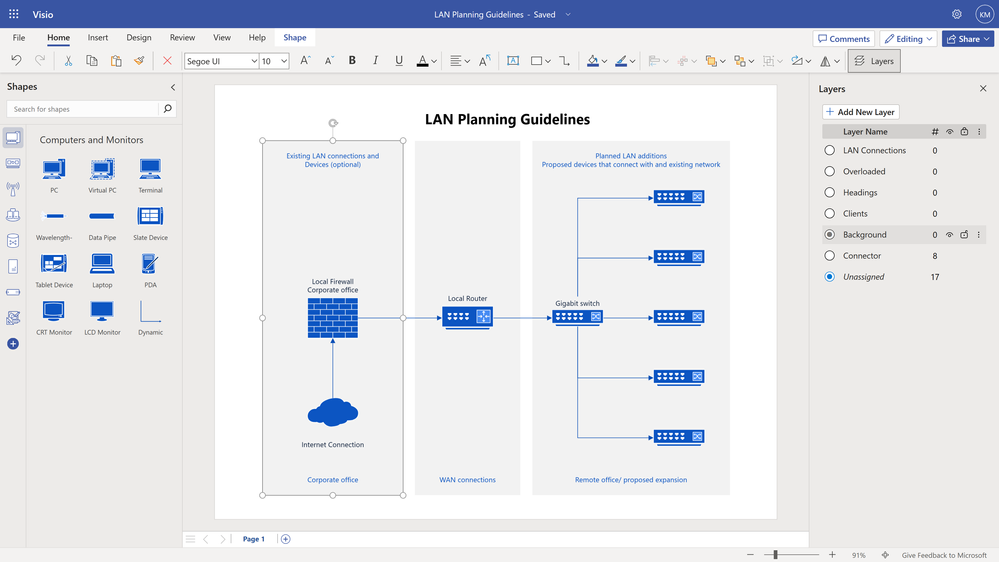
An image of a network diagram in Visio for the web demonstrating how to assign a shape to a layer.
Assign multiple shapes to a layer
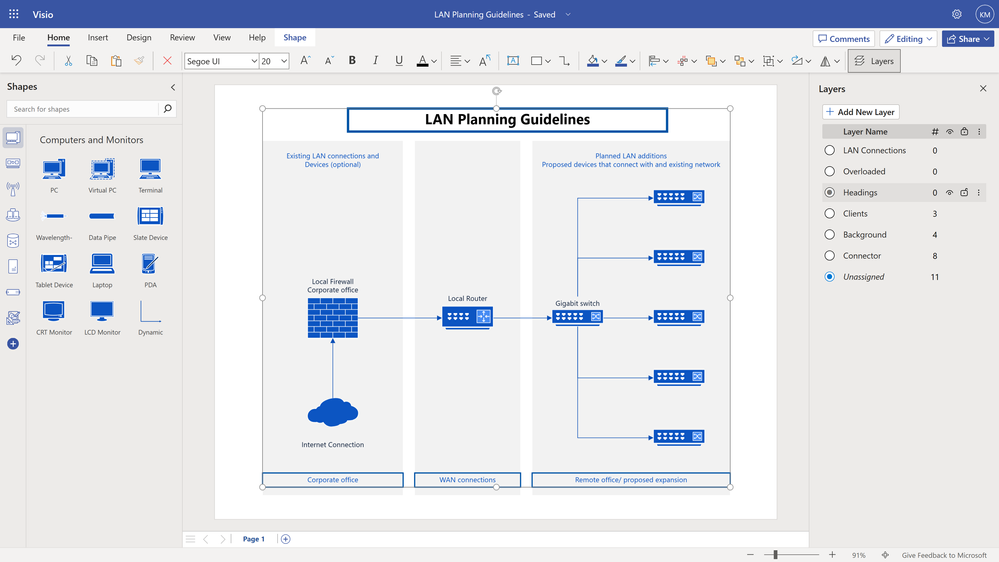
You can also change the assignment of multiple shapes at a time—or, in the example below, text boxes—to assign them to a layer. Here, we select the four text boxes and then, in the Layers pane, we select the radio button to the left of the layer name to assign them to the “Headings” layer.
An image of a network diagram in Visio for the web highlighting how to assign multiple shapes, or text boxes, to a layer.
Use the right-click menu to quickly create and assign shapes to layers
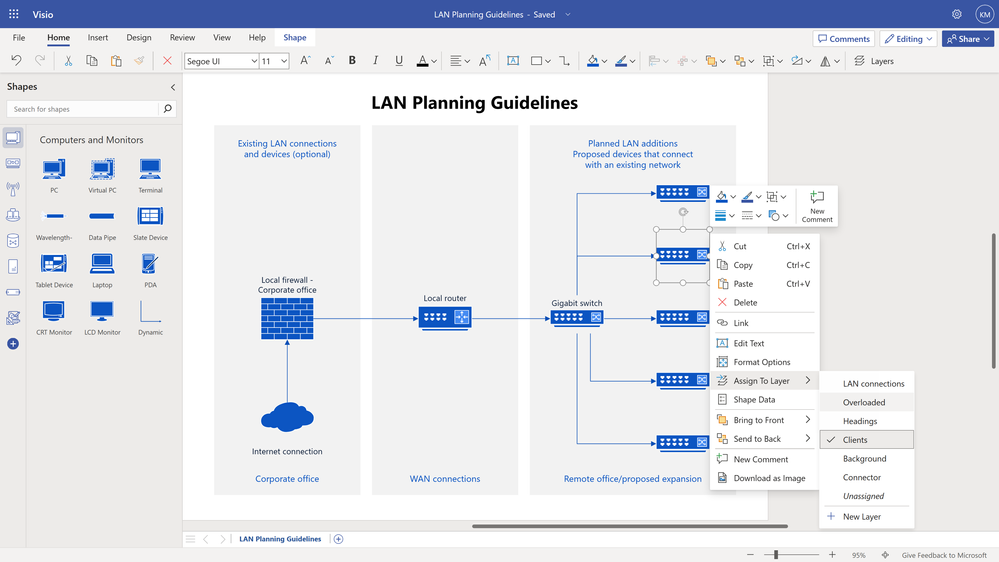
While the new Layers pane provides all the options you will need to create new layers and assign shapes to layers, we’ve also added a new option—Assign To Layer—in the right-click menu. This option is particularly useful if you’re working on a diagram and the Layers pane is not open, but you need to quickly reassign a shape to a different layer.
Simply right click the shape that needs to be reassigned, select Assign To Layer from the menu option, and then select the preferred layer name from the drop-down. If you want to assign the selected shapes to a new layer, you can also easily create a new layer and assign the shapes to that layer by selecting + New Layer in the drop-down.
It’s important to note that assigning a shape to a new layer removes any existing assignments from that shape. In the example below, we reassign the selected shape from the “Clients” layer to the “Overloaded” layer to help indicate which components need attention.
An image of a network diagram in Visio for the web demonstrating how to reassign a shape to a different layer using the Assign To Layer option in the right-click menu.
Apply properties to shapes in a layer
Once the shapes are assigned to a layer, you can then use the grouping to perform bulk operations. You can quickly hide and unhide or lock and unlock all shapes within that layer by hovering over the layer name, and then selecting the Toggle Visibility (eye) or Lock/Unlock (closed/open padlock) icons to the right of the name.
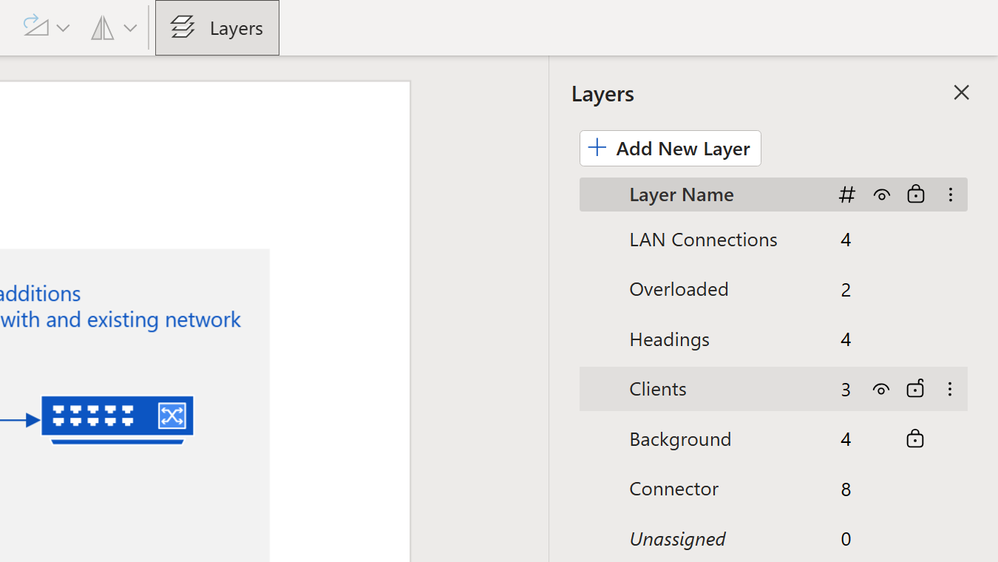
A cropped image of a network diagram in Visio for the web demonstrating where to find the Toggle Visibility and Lock/Unlock options in the Layers pane.
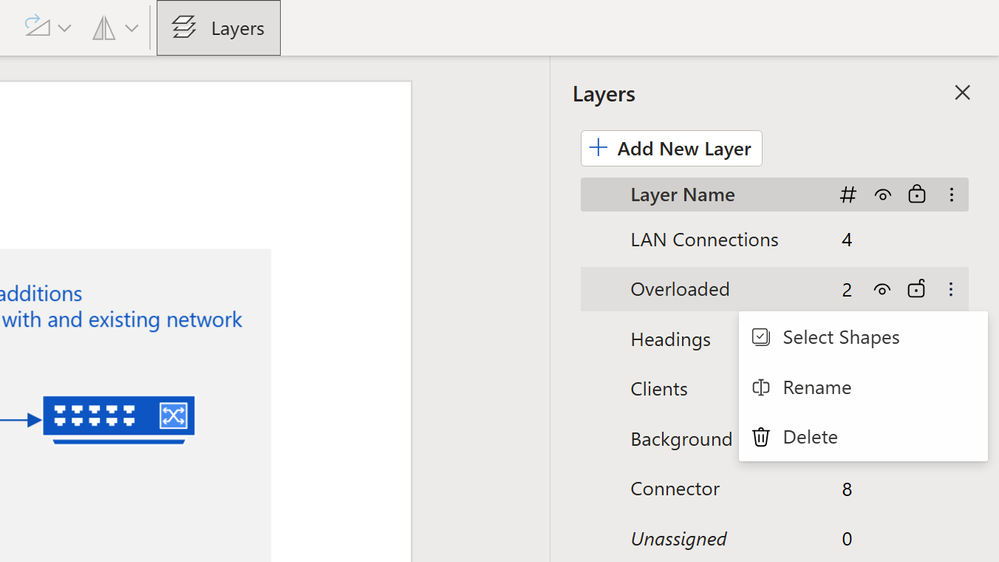
You can also select the More Options button (three vertical dots) to the far right of a layer name to access additional options, such as renaming or deleting a layer.
A cropped image of a network diagram in Visio for the web demonstrating how to access more options for layers in the Layers pane.
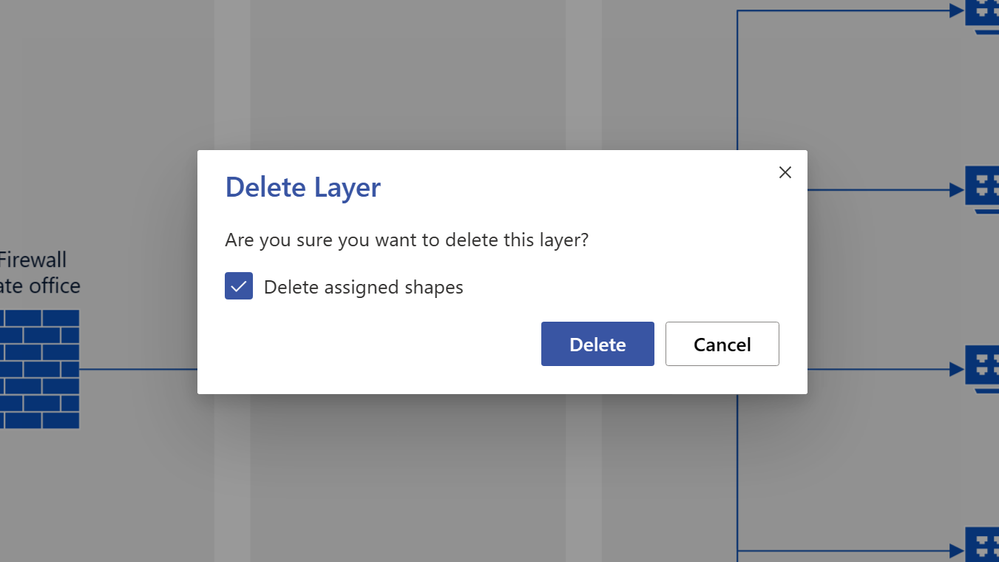
When selecting Delete, you will receive a prompt confirming whether you want to delete not only the layer, but also all shapes assigned to that layer. Unchecking the box will allow you to keep the assigned shapes and reassign them to the “Unassigned” layer.
An image of a message prompt in Visio for the web asks a user, “Are you sure you want to delete this layer?”
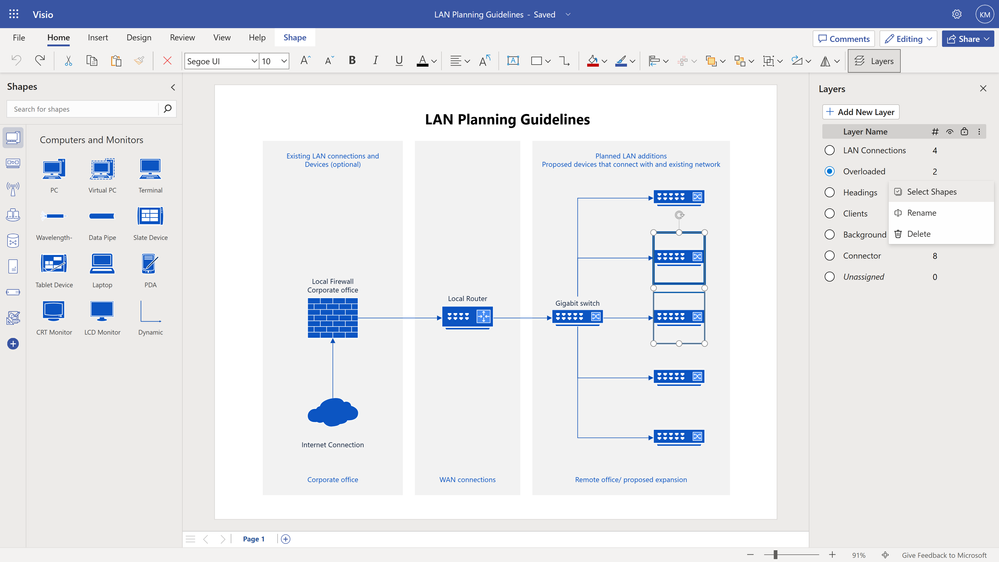
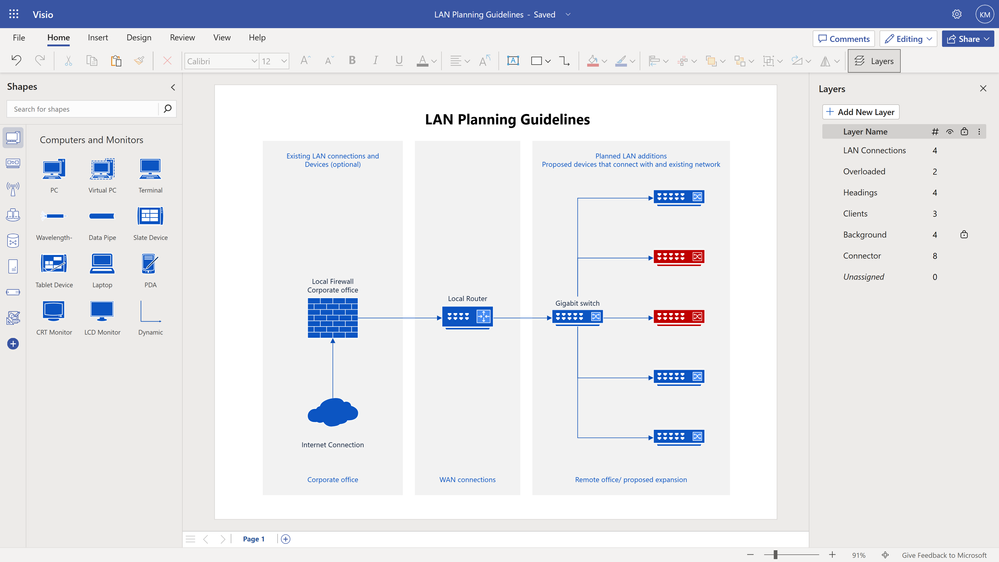
Furthermore, the Select Shapes option enables users to quickly apply formatting changes to all the shapes included in a layer. In the example below, we use the Select Shapes option to select and change the color of the two overloaded clients, which we reassigned previously, to red—to call them out visually in the drawing.
An image of a network diagram in Visio for the web demonstrating how to reformat all shapes included in a layer using the Select Shapes option.
An image of a network diagram in Visio for the web.
Learn more about how to add a layer and use layers to set properties for multiple shapes in Visio for the web.
We are listening!
We look forward to hearing your feedback and learning more about how you utilize layers in Visio for the web. Please share some of your use cases in the comments below or let us know how we can help to improve the experience. You can also send feedback via the Visio Feedback Portal or directly in the Visio app in Teams using “Give Feedback to Microsoft” in the bottom right corner.
Did you know? The Microsoft 365 Roadmap is where you can get the latest updates on productivity apps and intelligent cloud services. Check out what features are in development and coming soon for Visio on the Microsoft 365 Roadmap.
Published on:
Learn moreWe can help you with Organize the components in your diagrams with layers in Visio for the web
If you want help implementing, troubleshooting, or improving this product, contact us and we’ll point you in the right direction.
Related posts
Announcing the General Availability of the Microsoft 365 Document Collaboration Partner Program
Empowering Seamless Collaboration for Modern Workforces We are thrilled to announce the general availability of the Microsoft 365 Docume...
Favorite Copilot Prompts
(Amber Plumb interviewing Michael Morales and Allison Sweet) The power of M365 Copilot is transforming the way our support team operates...
Favorite Microsoft 365 Copilot Prompts
(Amber Plumb interviewing Michael Morales and Allison Sweet) The power of M365 Copilot is transforming the way our support team operates...
Boost digital event engagement with Voting and Archiving in Teams Q&A
Managing and delivering effective town halls is key to enabling two-way dialogue with leaders in today’s hybrid world. Microsoft Teams Q&A...
Prepare now for key end of support moments in 2025
One year from today, on October 14, 2025, support will end for all Office 2016 and 2019 suites, standalone apps, and servers. This includes:&n...
Everything you should know about Visio 2016 and Visio 2019 end of support
On October 14, 2025, Visio 2016 and Visio 2019 will reach end of support. After this date, Visio 2016 and Visio 2019 will no longer receive se...
Limit frontline worker access to Teams when off shift
We’re excited to announce that the frontline working time feature is now generally available! This feature allows admins to block or warn acce...
We are removing Feed on Microsoft 365 (Office)
As part of our ongoing efforts to streamline and enhance user experiences, we will be retiring the Feed feature (shown in figure 1 below) on t...
Leveraging Partner Apps to Deliver on the Promise of AI-Led Productivity
The advent of generative AI is driving a rethink of what outcomes we deserve from our productivity software – from gains in efficiency to more...
What’s new in FLW shared devices
Discover the Latest Enhancements in Shared Device Mode (SDM) We are excited to announce a series of new features in Shared Device Mode ...